Pages

Wednesday, December 30, 2020

Happy New Year!

 Well... it isn't quite the new year yet, but I thought the post title was still appropriate.  I  have a post up on the AJVD blog and here is a little peek:

I hope you will head over to the AJVD blog to check out my card.  Have a very happy new year and thanks for stopping by.


Tuesday, December 29, 2020

More Spellbinders Deals!

 Hello!  Popping in to let you know that there are still great deals to be had over at Spellbinders.   Just click on the banner below to be taken to the sale.  Lots and lots of great deals!

Thank you, in advance, to anyone who decides to use my affiliate link to make a purchase at Spellbinders.  I really appreciate it!  

Thanks for stopping by and have a great day!

Wednesday, December 23, 2020

Merry Christmas eve... eve!

 Hello and happy Christmas eve... eve!  I have one more Christmas card to share over on the AJVD blog today and here is a little peek of the card:


I hope you will head over to the AJVD blog to check it out!  Thanks for stopping by today and have a very Merry Christmas! 


Saturday, December 19, 2020

a couple cards...

 Hey there!  Hope you are well and are ready for Christmas.   As usual I'm really not ready for Christmas, but that's okay.  Have a couple of cards to share.  First up is a card for Freshly Made Sketches and the Reverse Confetti stock your stash challenge.  The challenge this month is thank you cards.  I was still feeling in a aqua/red mood so I used those colors along with the Reverse Confetti Thank You stamp and die set, as well as the Sketched Florals stamp and die set.  I created a wreath of sorts on the main panel of the FMS sketch from two of the images from the Sketched Floral stamp set.   I stamped the large Thank You from the Thank You stamp set in aqua ink and then die cut it with the matching die.  The shadow layer was die cut from red cardstock.  I cut additional thank yous from white cardstock to layer behind the stamped one and then adhered them to the shadow layer.  I nestled the thank you into the main panel and adhered that to the card front.  


The second card is for the current Inspired By challenge.  I went with the idea of the clock and some of the colors from the balloons with a little silver thrown in there.   The clock was created using a die from PaperTrey Ink.   There were other products that went along with this particular die, but I only bought the clock face.  I die cut it from some really pretty silver marblized paper from Spellbinders.  The paper is pretty thin so I die cut a second clock face from white cardstock and adhered it to give the clock more stability.   The numbers were die cut from some light purple patterned paper that is also from Spellbinders (both papers came in a card kit from them called Sparkling Holiday).  When you die cut the clock face many of the pieces come out like the little circles.  I saved some of the pieces to place back inside the clock face.  I adhered the clock to a panel of white cardstock and then pieced back in the circles popping them up with foam dots.  I then added the numbers to the circles.   The sentiment is from the Happy New Year stamp set from A Jillian Vance Design.  I had only one opportunity to get it stamped and thankfully it worked!  I finished off the card with little bits of silver striped and silver glitter washi tape and some silver fashion embellishments from Spellbinders.   Must say thank you to the team at Inspired by for picking my snowman thank you card as the honorable mention for the Melted Snowman challenge!


Thanks for stopping by!  Here's to hoping that 2021 is alot better than 2020!  Have a wonderful day!

Friday, December 18, 2020

Spellbinders Super Surprise Bundle and more!

Hello everyone!  I'm just popping in to let you know that Spellbinders has a couple of great offers going on right now.   Click on the banner below to purchase your very own Super Surprise Bundle!  This bundle contains stamps, dies, embellishments and an embossing folder.  The total amount of the bundle is over $160, but you can purchase a bundle for $45!  That is an amazing deal, right?


I also want to remind you that right now you can get a free Jane Davenport color pencil set and free shipping on a purchase of $100 or more.  This offer is good through Sunday.  You can purchase a Super Surprise Bundle, as well as a few more items and qualify for the free gift and shipping.  That is quite a deal!  


Thanks for stopping by and have a great day!

Wednesday, December 16, 2020

Happy Wednesday!

 Happy Wednesday everyone!  Wow... it is already the middle of December and Christmas is just a little over a week away!  Anyone feeling the pressure?!  I am, lol!  Still working on presents for at least one of my boys.  Anywho... it is Wednesday and that means I have a card up on the AJVD blog today.  Here is a little peek:


If it looks a little familiar it is because I created it using some die cuts left over from a slimline card I made a few weeks back.  I hope you will head over to the AJVD blog to check it out, though!  Thanks for stopping by and have a great day!

Friday, December 11, 2020

a deer and snowflakes...

 Hey there!  I got some crafty time today and I managed to make TWO cards!  Pretty proud of myself although I'm sure I have made at least two cards on the same day in the last few weeks, lol!   First up is a card for Color Throwdown and Freshly Made Sketches.    Amy Rohl, who is one of the designers over at CTD, created the most amazing cards using die cut poinsettias and die cut deer.   My card is something of a shameless case of her brilliant designs.   I die cut a tag from green cardstock and then two more from white cardstock and adhered them together.  The poinsettia was die cut from white cardstock using the AJVD poinsettia die and the deer from aqua cardstock using another AJVD die.   The AJVD deer die set includes a pair of glasses and other items to decorate your deer.  I die cut the glasses and a little dot from pink cardstock and adhered those to the deer.  The poinsettia was adhered to the tag and then I added the deer.  I looped pink baker's twine through the hole in the tag and tied a knot at the end.  Everything was adhered to a rectangle die cut from white cardstock.  The sentiment is from the AJVD Light of Christmas stamp set.  I stamped it using VersaFine CLAIR Morning Mist and die cut it with a banner die.  As a finishing touch I added Glossy Accents to the glasses for a little shine and realism. 


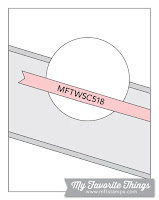
The second card is for the MFT sketch challenge.  I tried my hand at creating a tree from snowflakes!  I have an older set of MFT snowflake dies and I cut all of them from white and light gray cardstock.  I then layered one white and one gray of different snowflakes together.   Once they were dry I arranged the snowflakes on a panel of aqua cardstock.  When I had roughly the shape of a tree I adhered the snowflakes with liquid adhesive.  I added aqua colored jewels from Pretty Pink Posh to the centers of all the snowflakes.  The sentiment is from a now retired MFT sentiment set.  I stamped it on vellum with watermark ink and heat embossed in white.  Trimmed it down to a thin strip, wrapped it around the panel and adhered it in the back.  The panel was adhered to a light gray cardstock base.  Adding this to the Simon Says Stamp Wednesday challenge of let it snow.


Thanks for stopping by and have a great day!

Wednesday, December 9, 2020

Happy Wednesday!

 Hello and happy Wednesday everyone!  I have a post up on the AJVD blog today and here is a little peek of my card:


I hope you will head over to the AJVD blog to see the full card.  Thanks for stopping by and have a great day!

Monday, December 7, 2020

Christmas Cheer!

 Hello!  I'm back with an other post.  This one is for the current MFT sketch challenge, the Paper Players challenge and Simon Says Stamp Wednesday challenge.   I have never been into stamps of animals.  My preference for images is florals.  But... I absolutely adore the sweet little images of foxes, bunnies, birds and other animals designed by Stacey Yacula.   So last week I received an MFT/Stacey Yacula stamp and die set called Christmas Cheer.  I just love the little bunny in the stamp set.  So using the theme from Paper Players, the sketch from the MFT sketch challenge and dies (for the SSS Wednesday challenge) I created my little card.   I stamped the bunny, the Christmas tree and the treeline on watercolor paper from Tim Holtz and then colored the images with watercolor pencils.   Once everything was mostly dry I die cut them with their matching dies.  To create the more angled slope of the treeline I trimmed off the little trees and then angled the little hills so they were a little steeper and then die cut with a rectangle die.  The same die was used to diecut some very pale blue cardstock.  I stamped the sentiment at angle directly on the snowy slope.  I adhered the treeline to the rectangle and then added the smaller trees, the Christmas tree and finally the little bunny.   


Thanks for stopping by and have a lovely day!

Saturday, December 5, 2020

thanks snow much...

 Hello!  Popping in with a quick post to share a card that I made with one of the new dies from Simon Says Stamp's DIEcember release that went live on December 1st.  I'm super thankful to Simon Says Stamp for sending me product to use for their releases!  This time they sent me a gorgeous die set calld Snowflake Frame.  It includes a large rectangular die with snowflakes around the edges and five small snowflake dies that can be used separately.  I have not used those little snowflakes on a card... yet!  This card will be heading off to the current Inspired By challenge as well as the Simon Says Stamp Wednesday challenge to use dies.  The Inspired By challenge always has really fun themes and every week I think I will play along and then the next thing you know it is Thursday, again, and I didn't play along!   I die cut the frame from aqua cardstock and then stamped the sentiment (from an SSS stamp set that is no longer available) with watermark ink and heat embossed in white.  The small thanks is from another Simon Says Stamp set and was stamped with VersaFine CLAIR Nocturne ink on a thin strip and then trimmed down.  I stamped the snowman (he is from the same set as the sentiment) on white cardstock with Memento Tuxedo Black ink and then colored him with Copic markers.  I cut him out and popped him up on the frame with foam dots.  The frame was then adhered to a white cardstock base.  My snowman isn't melting, but he is a snowman and I do have snowflakes!  


 Thanks for stopping by and have a lovely day!

Thursday, December 3, 2020

thankful for all...

 Hello!  Got some time to make a card today and of course I had to make a card using my two favorite challenges:  Color Throwdown and Freshly Made Sketches!  I have been seeing lots of beautiful cards make with poinsettia images and dies and that inspired me to get out one of my favorite poinsettia stamp sets to use for my card.  That stamp set is Festive Poinsettia from Altenew.  I love the realistic looking poinsettia in this stamp set.  I stamped the image on Canson watercolor paper with Vintage Photo distress ink.  I then carefully wet different bracts of the poinsettia with water and watercolored with the dark red color from my Kuretake Gansai Tambi watercolor set.  I made sure to color one bract and then color another that wasn't close to it.  This way I could make sure that the colors didn't bleed too much.  The Vintage Photo mixed with the dark red to give it a more burgundy color, as well.   Once one bract was mostly dry I would add an additional layer of color. The remaining bracts were just wet with water and then I pulled out the Vintage Photo to give the rest of the bracts a kraft/cream color.   The stems and the actual flowers of the image were colored in the same way.  Most people think that the red, white, pink or cream colored bracts are the flower, but they aren't.  The flowers in the poinsettia are actually really tiny and look like what might be the center of a flower.    Once the image was mostly dry I die cut it with the matching die.  I then die cut some red cardstock with a rectangle die and tore off the bottom.   I die cut a piece of the Canson watercolor paper with a large rectangle die and then stamped the sentiment from Festive Poinsettia with the Vintage Photo ink.  I splattered the large rectangle and the poinsettia with black watercolor and let them dry.  When they were fully dry I adhered the red cardstock piece and the poinsettia to the large rectangle and then adhered everything to a kraft cardstock base.   Also adding this to the Simon Says Stamp Wednesday challenge of fun with dies.


Thanks for stopping by and have a wonderful day!


Wednesday, December 2, 2020

Happy December!

 Hello and happy December!  Where did the year go?  Popping in to let you know that I have a fun project up on the AJVD blog today.  Here is a little peek of my project:


I  hope you will  head over to the blog to see my project and to let me know what you think.  Have a wonderful day!