"We do not remember days, we remember moments." Cesare Pavese

Showing posts with label Spellbinders Dies. Show all posts

Saturday, May 6, 2023

you are always on my mind...

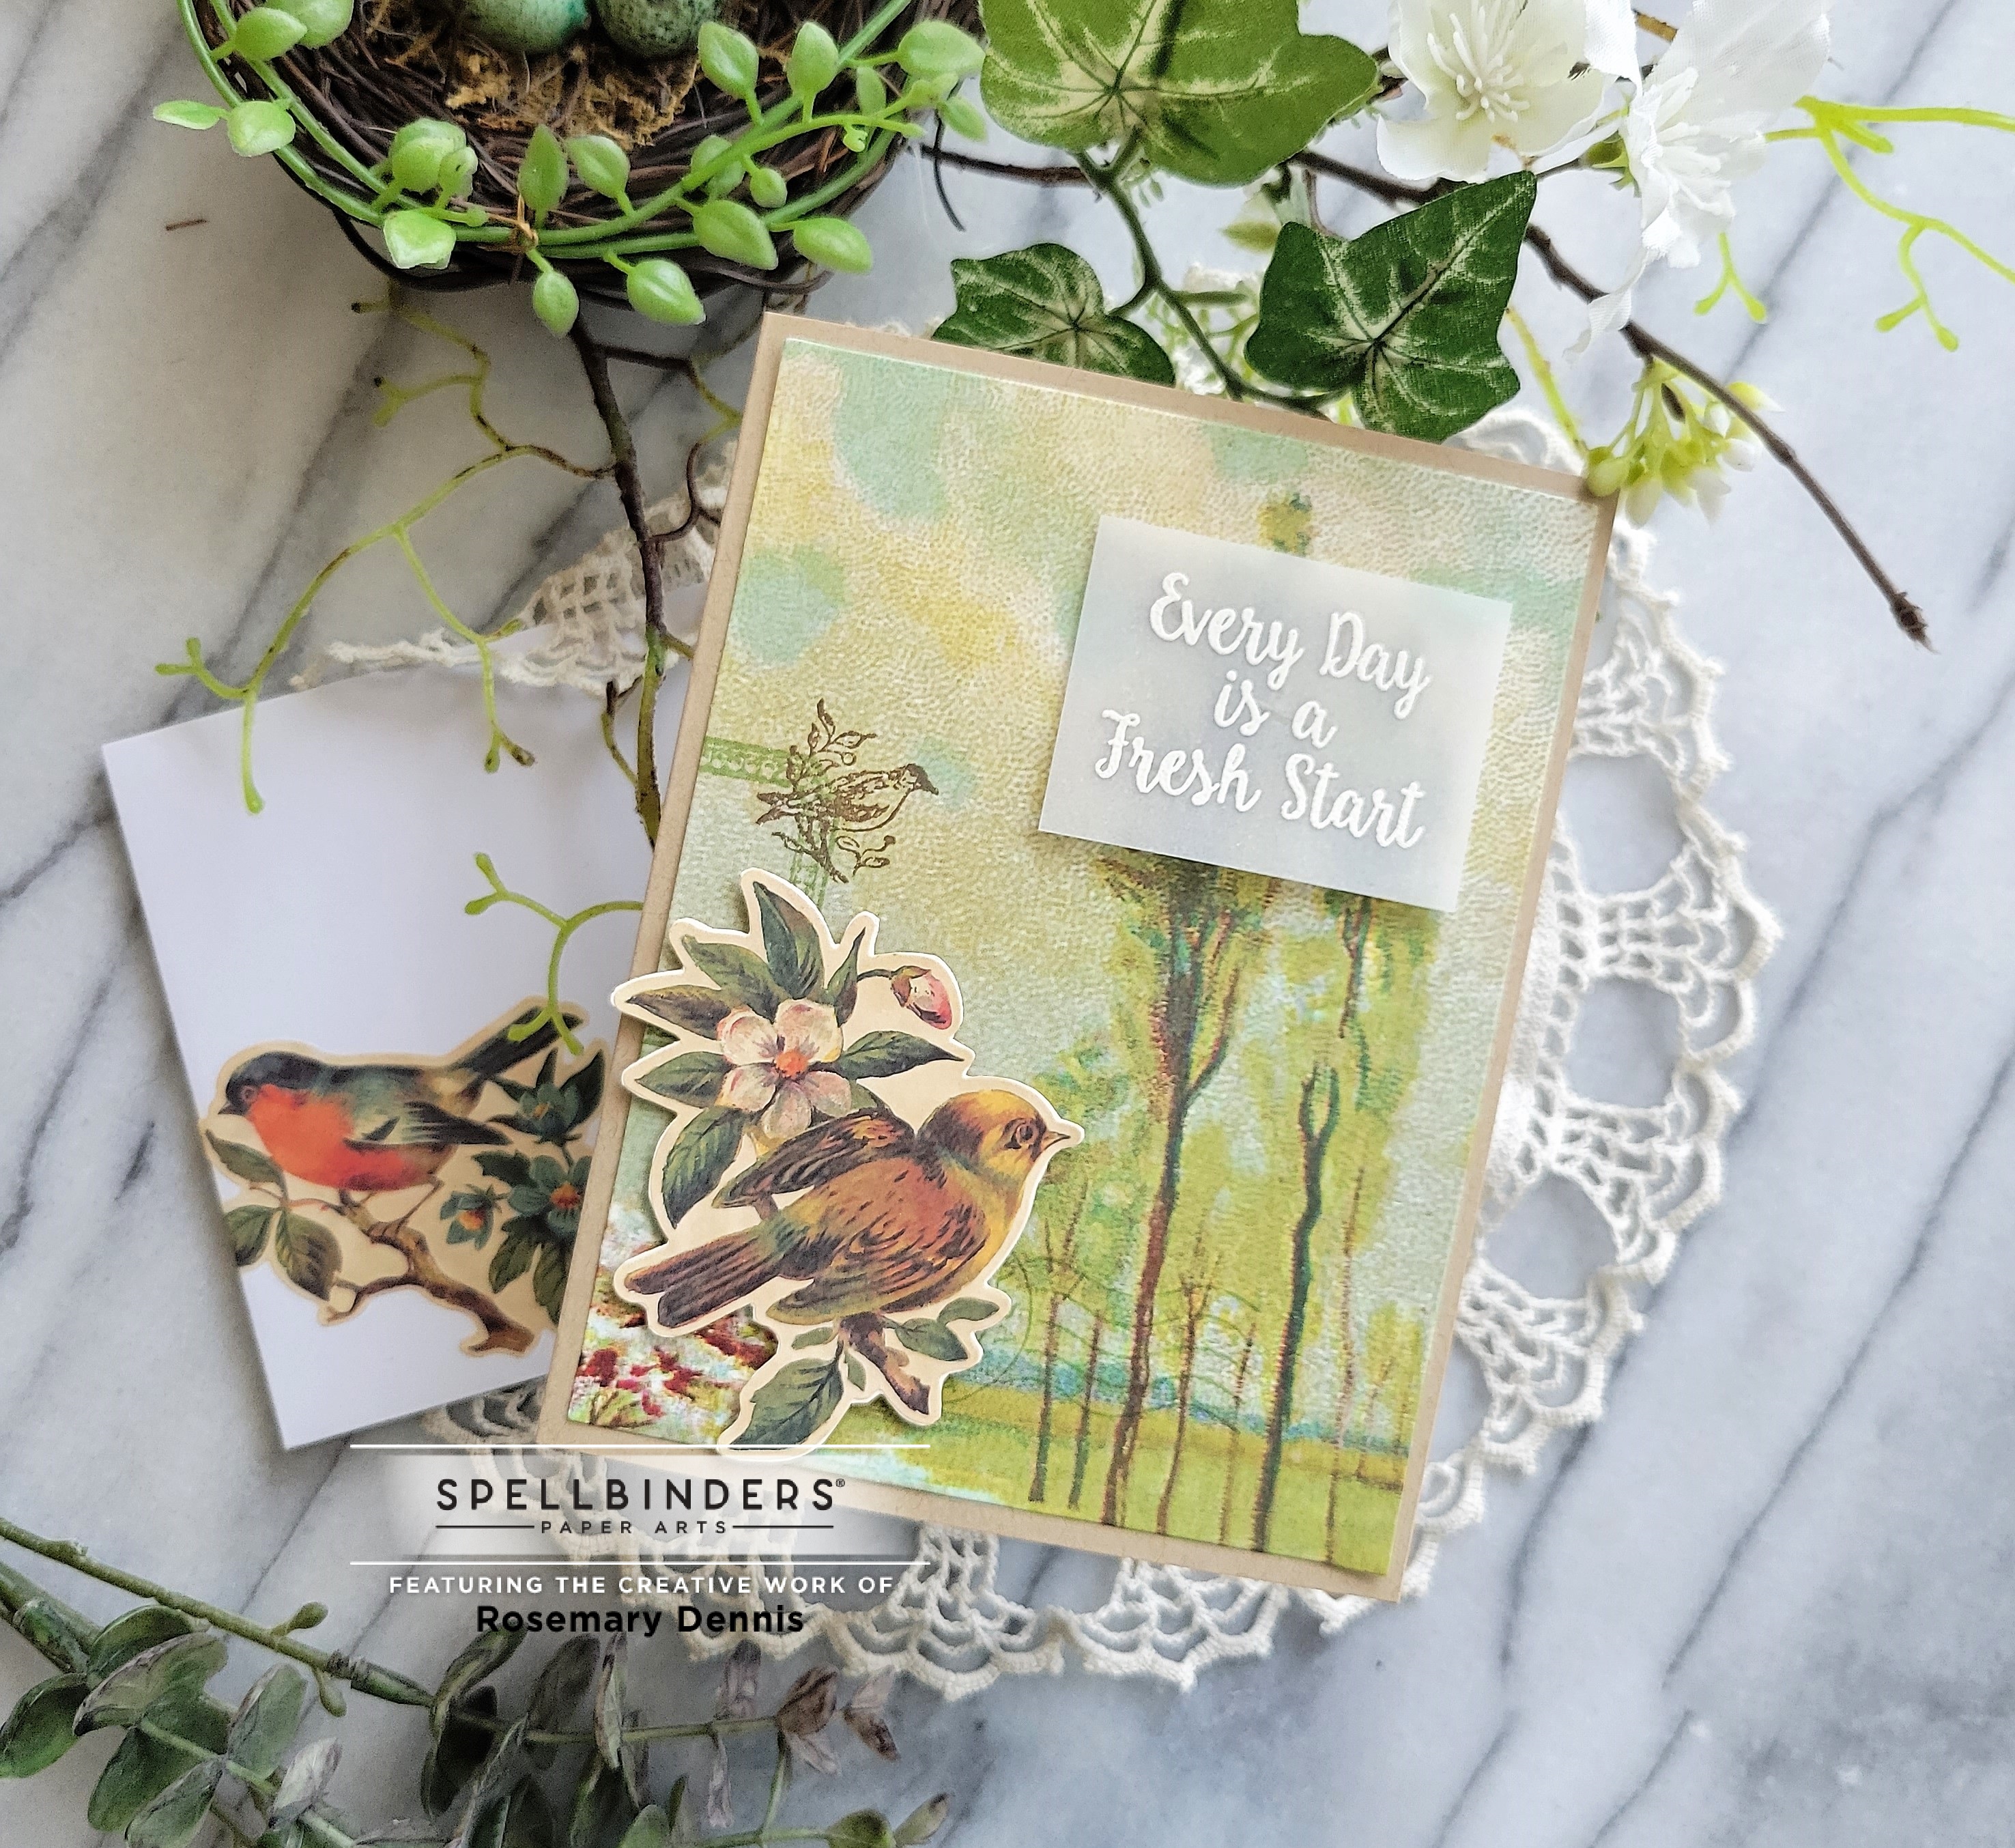
 Hello!  Popping in with a quick share of a card that I made for Color Throwdown and Sunday Stamps.  I used some pretty papers from the P13 Four Seasons: Spring pad that feature all the colors from the CTD combo.  And just wondering, but who is now singing "You Were Always On My Mind" by Willie Nelson, lol?!  Anyway... here is my card.


Scrapbook.com always has some kind of freebie that you can get with purchase.  About a month ago they were offering this cute little set of flowers from Spellbinders.  I couldn't resist and ever since they arrived at my house I have wanted to make something with them.  There are actually four layers to the flower, but I decided to only use two, the top layer and the bottom layer.  I die cut them from pink patterned paper and the leaves from a sage green patterned paper from the P13 pad.   I just love that pretty creamy yellow and white polka dot paper!  The floral strip is the reverse side of the polka dot paper and features all the CTD colors.   More patterned paper was die cut with a circle die for a place to arrange my flowers. I used the same pink paper for the sentiment strip that I stamped the sentiment on using brown ink to bring in more brown.  I finished the flowers with yellow Nuvo drops in the center of each flower.  Since my card is full of pastel colors I'm going to add it to the May Flower challenge of pastels! 


Thanks for stopping by and have a lovely day!

Thursday, November 17, 2022

Spellbinders Guest Blog Post

 Hi everyone!  I'm popping in to let you know that I have a guest designer post up on the Spellbinders blog today.  Here is a little peek of one of my projects. 


I hope you will head over to the Spellbinders blog to check out all my projects.  Thanks for stopping by and have a lovely day!

Tuesday, October 18, 2022

halloween cards

 Hello!  I'm popping in with two Halloween cards that I made.  I ended up with two cards because as I started making one card, I didn't like how it was turning out so some of the items I created for that card were transformed into another card.  Other items that were going to also be on the original idea ended up on the second card!  The end results.  I had a great time and I think I'm getting a bit of my mojo back.   Here is the first card.


The gnome and the pumpkins were originally going to be part of the original idea I had for a card.  After I colored the images with Copic markers and then die cut them I tried to make them work with some Halloween patterned paper that I wanted to use.   I ultimately realized that my gnome and pumpkins were too whimsical for the patterned paper, so I had to rethink things.   I decided to go with the sketch from Sunday Stamps and use some patterned paper from P13's The Four Seasons:  Autumn 6x6 pad.    The banner was die cut from the patterned paper and then I layered that on my kraft base panel.   The sentiment from a very old Reverse Confetti Halloween stamp set was stamped in VersaFine CLAIR Nocturne.   I then layered on my gnome and all the pumpkins.  I finished off by adding the strip of embossed green cardstock and the purple/white bakers' twine.    The card isn't too spooky, so I think I will be sending it to my great nephew and great niece. 


Let's have a look at the second card.  It has a spookier vibe!


As I struggled to make things work with my initial idea and I determined that the gnome and pumpkins weren't the answer I die cut the pumpkins you see on the card from some leftover panels that I had watercolored for a project I made a few months ago.  I thought they might work with the idea I had, but nope!  So that first idea was finally put to rest and I moved on.   I remembered I had all these fun Spellbinders dies that create a front door for different seasons.   The Halloween dies would be perfect with the pumpkins and so my card was born.  I used very old Halloween patterned paper for the background, the door and the stoop.  The stoop was backed with some of that watercolored paper I mentioned to make the sentiment really stand out.  I even used that paper to for the small window next to the door and for the windows in the door.  I like how it turned out.   I adhered everything and thought I was done until I spied the purple 31 that I had die cut for the gnome card.  I tried to make the numbers work on that card but decided the card didn't need that additional.   However, when I added them to the door panels on the second card, I knew they had found their home!  Even though there isn't anything else purple on the card I think the addition of the numbers works.   I think this card will be heading to my great niece who lives in California. 

Thanks for stopping by and have a lovely day.


Saturday, October 1, 2022

Spellbinders October Clubs

 Happy October everyone!   Hard to believe it is October because here in Western Washington it feels more like summer!    And with it being the 1st of October that means all the new Spellbinders clubs are in the Spellbinders store.   Even though fall is in full swing the Spellbinders October clubs are all about Christmas and everything is just gorgeous!  (An affiliate linked list of products will be at the end of this post.  Using my links allows me to earn a small commission at no cost to you.  Thank you for your support.  I truly appreciate it!)   Let's take a look at my cards.


First up is a card I made using the October Glimmer club called Poinsettia Spray and the October embossing folder called Scattered Christmas.   For this card I went with traditional Chrsitmas colors of red, green and gold.   I decided to just simply foil the image using Matte Gold foil on Spellbinders Pomegranate cardstock and then die cut it with the matching die.  The sentiment is part of the kit and was also foiled in Matte Gold on Pomegranate.  I die cut dark green cardstock with the largest die from the Fluted Rectangles die collection, placed it in the Scattered Christmas embossing folder and ran it through my Platinum 6.  The panel was adhered to a card base and then I added the image and the sentiment.  I'm going to add this one to the Simon Says Stamp World Cardmaking day gallery. 

This next card is very simple, too.  I stamped the small poinsettia image and a flower cluster (twice) from the Wonderful Christmas stamp and die set with Memento Bamboo Leaves ink and colored with Copics and then die cut them with the matching dies.  I arranged the cluster and adhered it the dark blue cardstock panel.  The sentiment from the stamp set was heat embossing using platinum embossing powder.   The panel was then added to a dark blue cardstock base.  I love the non-traditional color scheme of this card.   I'm going to add this one to the Simon Says Stamp Wednesday challenge of anything goes. 

My final card also has a non-traditional color scheme.  I wanted to go with a soft look for the large cluster from the stamp and die set.  I colored the poinsettia with light pink Copics and then added in some yellow.  The berries were colored in light red Copics, the pod/flowers in light yellow Copics and the greenery in light green Copics.  I trimmed down Pink Sand cardstock and embossed it with the Scattered Christmas embossing folder.  I decided to use the debossed side of the panel instead of the embossed side.  The panel was adhered to a cardstock base and then I layered a rectangle die cut from Dahlia cardstock using the Fluted Rectangle die set.  Before adhering the floral clusters to my card base I stamped the sentiment in black.   I  applied some distress collage medium to the clusters and then added Rock Candy glitter.  The pieces are so sparkly in person.  Once they were dry I added them to the card front.  

Affiliate linked supply list:

Spellbinders Platinum 6
Glimmer hot foil system
October Stamp and Die club
October Glimmer club
October Embossing folder club
Matte Gold foil
Dahlia cardstock
Pomegranate cardstock
Pink Sand cardstock
Fluted Rectangle dies
Essential Rectangle dies
Rock Candy Glitter
Distress collage medium
VersaMark watermark ink
VersaFine CLAIR Nocturne ink

Thanks for stopping by and have a lovely day!


Thursday, September 29, 2022

Spellbinders September Release - Part 3

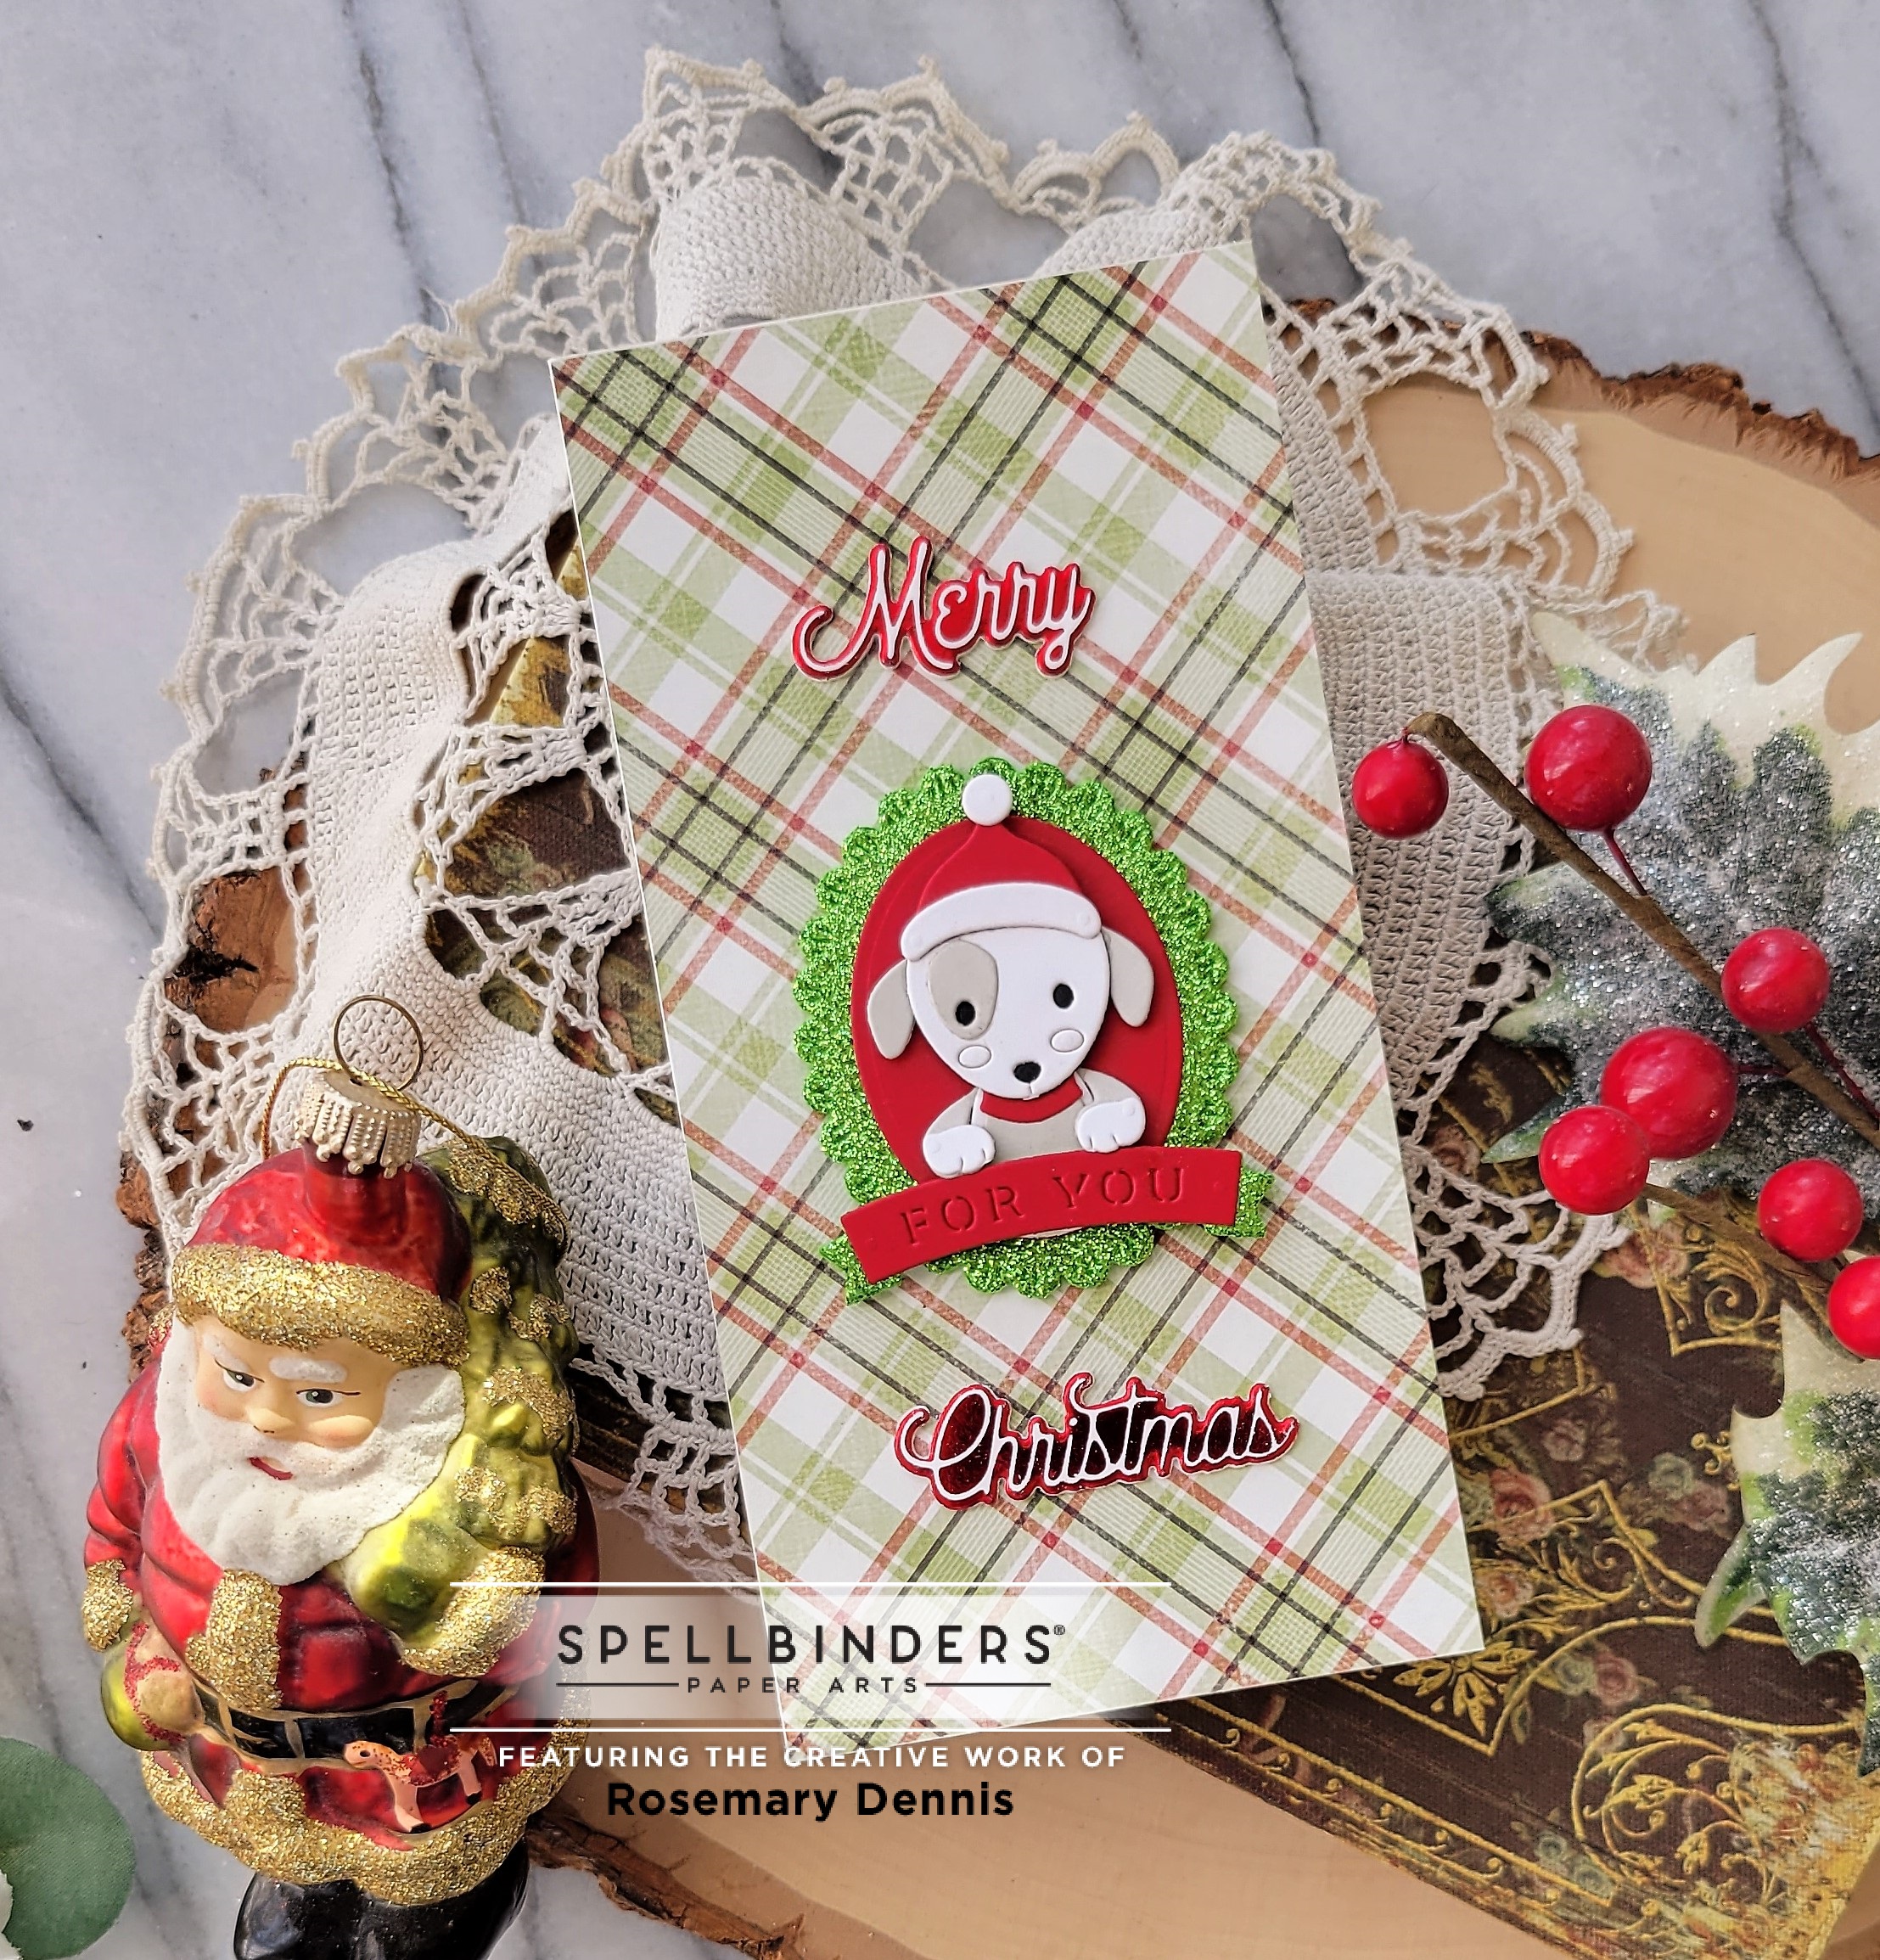
 Hello!  I popping back in with two cards that I made using another new product from the Spellbinders September release.  This cute set of dies is called Special Delivery Pet and is part of the Holiday Cheer Enclosed collection.   I just love the cute little cat and dog!  (Affiliate linked list of supplies are at the end of this post.  Using my links allows me to earn a small commission at no cost to you.  Thank you for your support.)


As you can see the cards are exactly the same except one has the little puppy on it and the other has the little kitty.  The plaid background paper is from the Simply Stories Simple Vintage Rustic Christmas 6x8 pad.   This cards will be going to my mom so she can give them to her great-grandchildren (she has four so I have two more to make!) so I made them mini slimline so she can slip a check inside easily.  I used green pop up glitter foam to die cut the oval scallop and the inner oval from red.  The puppy and kitty were die cut from white and light gray cardstock and then just alternated the pieces.  Each one was adhered to the oval.  The die that cuts the body is designed to fit perfectly into the bottom of the inner oval.  Love that little detail.  I added the little santa hat to the puppy and antlers to the kitty.  I die cut the banner from more green glitter foam and then the sentiment from red.  I finished off each card by adding the Merry Christmas sentiment that I foiled in red.  I have a solid foil plate so after I initally foiled the sentiments I used the remaining negative foil to create the sentiments that I used.  I like how they pop on the plaid background.   I'm going to add these cards to the Simon Says Stamp Wednesday challenge of anything goes.

Here are photos of each card by itself.   First the kitty.


And the puppy.


Affiliate linked list of supplies:

Platinum 6
Glimmer hot foil system
Red Foil
Special Delivery Pet
Holiday Cheer Enclosed collection
Merry Glimmer sentiments set
Peacock Feathers glitter foam pack
Bearly Art Glue

Thanks for stopping by and have a lovely day!

Friday, September 16, 2022

Spellbinder Release - Part 1

 Hello!  Hope your September is going well.  It has finally cooled down a bit here in my corner of the Pacific Northwest and I am thankful for that.  I'm even hoping for a little bit of rain, but that isn't in the forecast.   As my blog post title indicates I'm sharing some projects created with products from the September Spellbinders release.   These cards were made with products from a new Spellbinders designer, Zsoka Marko.  Zsoka is a whiz with Spellbinders dies and creates the most amazing projects with them.  So I was surprise excited to see that she had a line coming out with Spellbinders.  The collection is called Winter Tales and you can find the complete collection here.  (A list of affiliate linked products will be at the end of this blog post.  Using my links allows me to earn a small commission at no cost to you.  Thank you for your support.)


I used the beautiful Nordic Ornaments for the first card.  The set comes with two different dies, as well as lots of little dies to add fun details.  I used the larger ornament die for my card.   The color palette is from Color Throwdown.   After cutting all the pieces from the various colors of cardstock I put my ornament together.  I finished off the flowers with come Nuvo drops in Morning Dew.  The sentiment is from a previously release Spellbinders stamp set.  The sentiment was stamped in watermark ink and heat embossed with cream embossing powder.   The background was embossed with a new embossing folder called Holly Flourish from a collection by Becca Feeken.  You will be seeing more of this gem of an embossing folder!  I adhered the ornament and sentiment to the background.  Attached that to a kraft cardstock basee and then finished the card with the baker's twine bow.


For my second card I went for a more fall themed design.  This card was created with the Enchanted Garden die set.  This set is packed full of sweet flower images that you can layer to your hearts content, along with several different stems and leafy branches.  All the cardstock I used is from Spellbinders and will be listed below.  I die cut all the pieces from each color and then layered them.  The sentiment is from the Spellbinders September clear stamp and die club.  That was stamped on Alabaster cardstock in VersaFine CLAIR Acorn ink and then the flowers adhered as you see.  

Affiliate linked supply list:

Winter Tales Collection
Nordic Ornaments dies
Enchanted Garden dies
Holly Flourish embossing folder
September Stamp and Die club
Alabaster cardstock
Rainforest cardstock
Persimmon cardstock
Terra Cotta cardstock
Saffron cardstock
Spellbinders Platinum 6
Bearly Art Glue

Thanks for stopping by and have a lovely day.


Wednesday, September 14, 2022

Guest Blog Post on Spellbinders Blog

 Hi everyone!  I just wanted to pop in to let you know that I have a guest post up on the Spellbinders blog today.  I'm sharing a little peek of what I made for this blog post.  Please make sure you head over to the Spellbinders blog to see all of the projects that I made with the new Christmas Flea Market Finds collection from Cathe Holden.  You can find the collection here.  It is absolutely amazing!


Thanks for stopping by and have a lovely day!

Affiliate links:

Christmas Flea Market Finds Collection


Thursday, September 1, 2022

Spellbinders September Clubs

 Happy first day of September everyone!  I can't believe it is already September.   Where does the time go?   Being that it is the first that means all the new Spellbinders clubs are available.  I must say that this month's Glimmer, embossing folder and stamp/die clubs are some of my favorites.  (A list of affiliate linked products is at the end of this post.  Using my links allows me to earn a small commission at no cost to you.  Thank you for your support.)  Let have a look at what I made. 


The stamp and die club for this month is so cute!  Appropriately the set is called Fall Gnomes.  Just look at that gnome... and the pumpkins!  There is even a little gnome in the set.  So cute!  I used patterned paper from P13 The Four Seasons Autumn for the small rectangular background.  I pulled colors from that paper to color my pumpkins, gourd, sunflower and the gnome.  The larger rectangle is from the same paper pad and was embossed with the September embossing folder Scattered Fall.  I just love this new folder!   I Copic colored all the images, die cut and then added them to the background.  Going to add this to the Simon Says Stamp Wednesday challenge.


This card uses the embossing folder Scattered Fall, again, as well as the sentiment and smaller foiled images and die cuts from the Glimmer kit.  The foil you receive with your kit this month is copper and it is so pretty in real life.  I embossed Spellbinders Terra Cotta cardstock with the embossing folder and die cut it with the largest rectangle die from the Fluted Rectangles set.  The sentiment was foiled on Spellbinders Barely Peach cardstock with the copper foil and die cut with a smaller rectangle die.   I foiled the flowers and leaves then added a bit of color with some distress oxide inks in Crackling Campfire, Spiced Marmalade and Fossilized Amber.  The little berry sprig was die cut from the Barely Peach and the berries from Terra Cotta.  I popped up the sentiment panel and then added the little floral clusters. 


My final card focuses on the large leaf image from the Glimmer kit called Thankful for You.  I foiled the image twice to create the diamond shape.  The leaves were inked with the Crackling Campfire, Fossilized Amber and Spice Marmalade distress oxide inks.  I foiled the sentiment on Barely Peach cardstock with the copper foil.  I included a strip of the Terra Cotta cardstock that I embossed with the embossing folder, but this time I flipped it over to the debossed side.  I also added a strip of copper colored glitter cardstock for some sparkle.   I did a little reverse foiling with the small flower and leaf to finish off the card.  In the photo below I tried to capture what the copper foil looks like in real life.   


Affiliate linked supply list:

Thanks for stopping by and have a lovely day!

Friday, August 19, 2022

Spellbinders August Release... Part 2

 Hello!  I hope everyone had a great week.  I'm back to share more cards made with products from Spellbinders' August release.    (Affiliate linked products are listed at the end of this post.  Using my links allows me to earn a small commission at no cost to you.  Thank you for your support.)   All three cards are Christmas/holiday cards.  Lets take a look:


For this card and my second card I used the new Dazzling Diamond hot foil plate.  I foiled the image using red foil and then die cut it with a rectangle die.  The little Christmas wreaths were cut using a die from the new Gnome Tree die set from dark green cardstock and then I added red sequins.  The sentiment is from the new Christmas Memories Enclosed stamp set.  I stamped the sentiment in dark green ink and then die cut it with a label die.   I covered the front of my card base with a dark green patterned paper and then added my panel.   Will add this to the Simon Says Stamp Wednesday challenge of Christmas. 


For this card I used dark green cardstock and matte gold foil.  I just love the matte gold foil on the dark green cardstock.  I used some die cuts from the Santa Lane Floral die cuts pack and another sentiment from Christmas Memories Enclosed.  I finished off this card with a little red twine bow. 


My final card uses the full Gnome Tree die along with the new Argyle Socks embossing folder.  Both are from the new Gnome for Christmas collection.  I used some pastel patterned paper from LaLaLand Crafts to die cut the hats, shoes. mittens and cloths of the gnomes.  The beards were cut from white cardstock and the noses from a pale peach cardstock.   I did die cut the entire piece from thin scrap cardstock that I applied washi tape to the back to keep all the pieces together and then layered all of the top pieces on top.   I will tell you that my first attempt at creating a gnome tree was a huge fail.   I learned from that fail and a video that I watched in order to achieve a better result the second time.  After I had all the pieces in place I die cut the solid tree die that comes in the set from white cardstock and added my gnome tree.  The tree was added to Glacier cardstock that I die cut with a rectangle die and embossed with the Argyle Socks embossing folder.  I finished off the card with the star at the top and the little garlands.  I added silver fashion pearls to the star and garlands.  The sentiment is from Christmas Memories Enclosed and was embossed in silver.   

Affiliate linked list of supplies:

Monday, August 8, 2022

Letters to Santa

 Hello!  Spellbinder's August release is just around the corner, but I have one more project to share using products from the July release.   This project features the new Parcel & Post collection.    The main Parcel & Post die set includes all the dies to create a mailbox along with dies to create floral elements.  I did not use the floral element dies for today's project.  Instead I used the Parcel & Post Christmas Decorations along with a sentiment from the Christmas Mailbox Greetings Glimmer hot foil plates set to create a wintry Christmas scene.  (A list of affiliate linked products is at the end of this post.  Using my links allows me to earn a small commission at no cost to you.   Thank you for your support should you decide to use my links.)  Let's take a look at my project.


Just like with the little decor piece I made using the Winter Welcome Sled die set I had an idea to create a wintry Christmas scene with the Parcel & Post die collection.  Once I had assembled all the materials needed I got to work.   The frame was painted with dark green craft paint.  Once dry I added a some brown paint using a dry brush.  Some of the paint was also wiped off with a cloth.  I then added Gilded Foundry wax to parts of the frame and heat set it.  The back panel was covered with papers from the same collection I used to create my small decor piece.  Once the papers were secured and dry I added some Icicle crackle paste to the panel and let it dry.   I also added little dashes of the Gilded Foundry was to the panel and heat set them.  The mailbox was die cut from red cardstock as well as a thin chipboard.  I die cut three or four (I can't remember) mailboxes from the thin chipboard and then glued them together.   The side panel on the mailbox was die cut and adhered, along with door (I guess that is what you call it) that opens to put the mail inside the box.  Everything was then inked with Walnut Stain distress ink.  


The trees are from a Glimmer hot foil plate and die set that was released in July of 2021.   The dies allow you to cut out the top layer with all the openings and a solid bottom layer.  I applied Multi Medium Matte to the bottom layers and added Rock Candy glitter.  Once dry the top layer was adhered.  I die cut the candy canes and peppermint candies from red and white cardstock the glittered them up with more Rock Candy glitter.   Once dry everything was adhered together and the candy canes were attached to the mailbox along with the bow.  I also created five "letters to Santa".  Two of the trees were trimmed on one side so they would be flush with the frame that I glued in place.  Once the frame was secure I began adding all my elements.  I placed the "letters to Santa" at the top of the mailbox opening to make it look like the mailbox was stuffed and those were coming out.  I finished up with the sentiment that I hot foiled in matte gold and the little holly cluster in the one corner.  Then came the fun part... adding all the "snow" using Snowfall grit paste.  I love the Snowfall grit paste and I'm almost out.  I really hope Tim Holtz decides to bring it back this year so I can get some more!

Affiliate linked supply list:

Spellbinders Platinum 6

Spellbinders Glimmer hot foil system

Parcel & Post bundle

Parcel & Post Mailbox dies

Parcel & Post Christmas Decor dies

Parcel & Post Christmas Mailbox Greetings hot foil plates

Matte Gold foil

Shining Christmas Tree Glimmer/Die set

Ideaology Framed Panel

Bearly Art Glue

Distress Collage Medium

Multi Medium Matte

Rock Candy Glitter

Gilded Foundry Wax

Walnut Stain distress ink

I hope you enjoyed my little wintry scene.  Thanks for stopping by and have a lovely day!

Wednesday, July 27, 2022

belive in the magic...

 Hello!  I'm back with another project using new items from the Spellbinders July release.  This one is my favorite so far!  I used the new Winter Welcome Sled die and some fun products from Tim Holtz to create my little scene.  (A list of affiliate linked supplies is listed at the end of this blog post.  Using my links allows me to earn a small commission at no cost to you.  Thank you for your support.)  


I had the idea of this rolling around in my head for the last several weeks.  I finally put down another thing I was doing and got my little wintry scene completed.  I started by covering two Tim Holtz vignette boxes that I had with paper from the Tim Holtz Christmas Worn Wallpaper scraps.  I used Distress Collage medium to adhere the papers.  I did use some Christmas washi tape on the corners of the large box, but you can't see it in the photos.  Once the boxes were dry I adhered the large box on top of the small one using hot glue.   Then I got to work creating the sled, skates and my floral pieces.  Once everything was die cut I used Vintage Photo distress ink to give them an aged look.  Then I adhered all those little pieces together.  I added some Tim Holtz Snowfall grit paste to the top right corner and then pressed my sled into the paste.  I added a bit of hot glue to the sled runner on the bottom right to hold it in place.  Once the hot glue was dry I added more grit paste around the sled and to the left bottom corner.   I then added the skates to the top left corner along with the poinsettia and pine branches.  The poinsettia, pine branches and bow were all covered with Multi Matte Medium and dunked in Rock Candy glitter.    I then added more grit paste to the bottom left corner and then pressed in some glass pearls (also from Tim Holtz).  A bit more grit paste was added to the top of the sled and since the paste up in that corner was still wet I pressed two more pearls into that although you can't really see them.   Here is a close up of my little scene:


I finished things off by adding a bit of twine tied in a bow to the skates, as well as adding the twine to the sled to look like the rope to pull the sled behind you.  The sentiment is one that I hot foiled in July of last year using the Mini Christmas Sentiments set and green foil.  I added some Vintage Photo to the sentiment, adhered it to the base and then added a little grit paste around it.   I just love how my little scene turned out!  I'm going to add this to the Simon Says Stamp Wednesday challenge of anything goes. 

Affliate linked list of supplies:


Thanks for stopping by and have a lovely day.

Friday, July 22, 2022

Spellbinders July Release Part 2

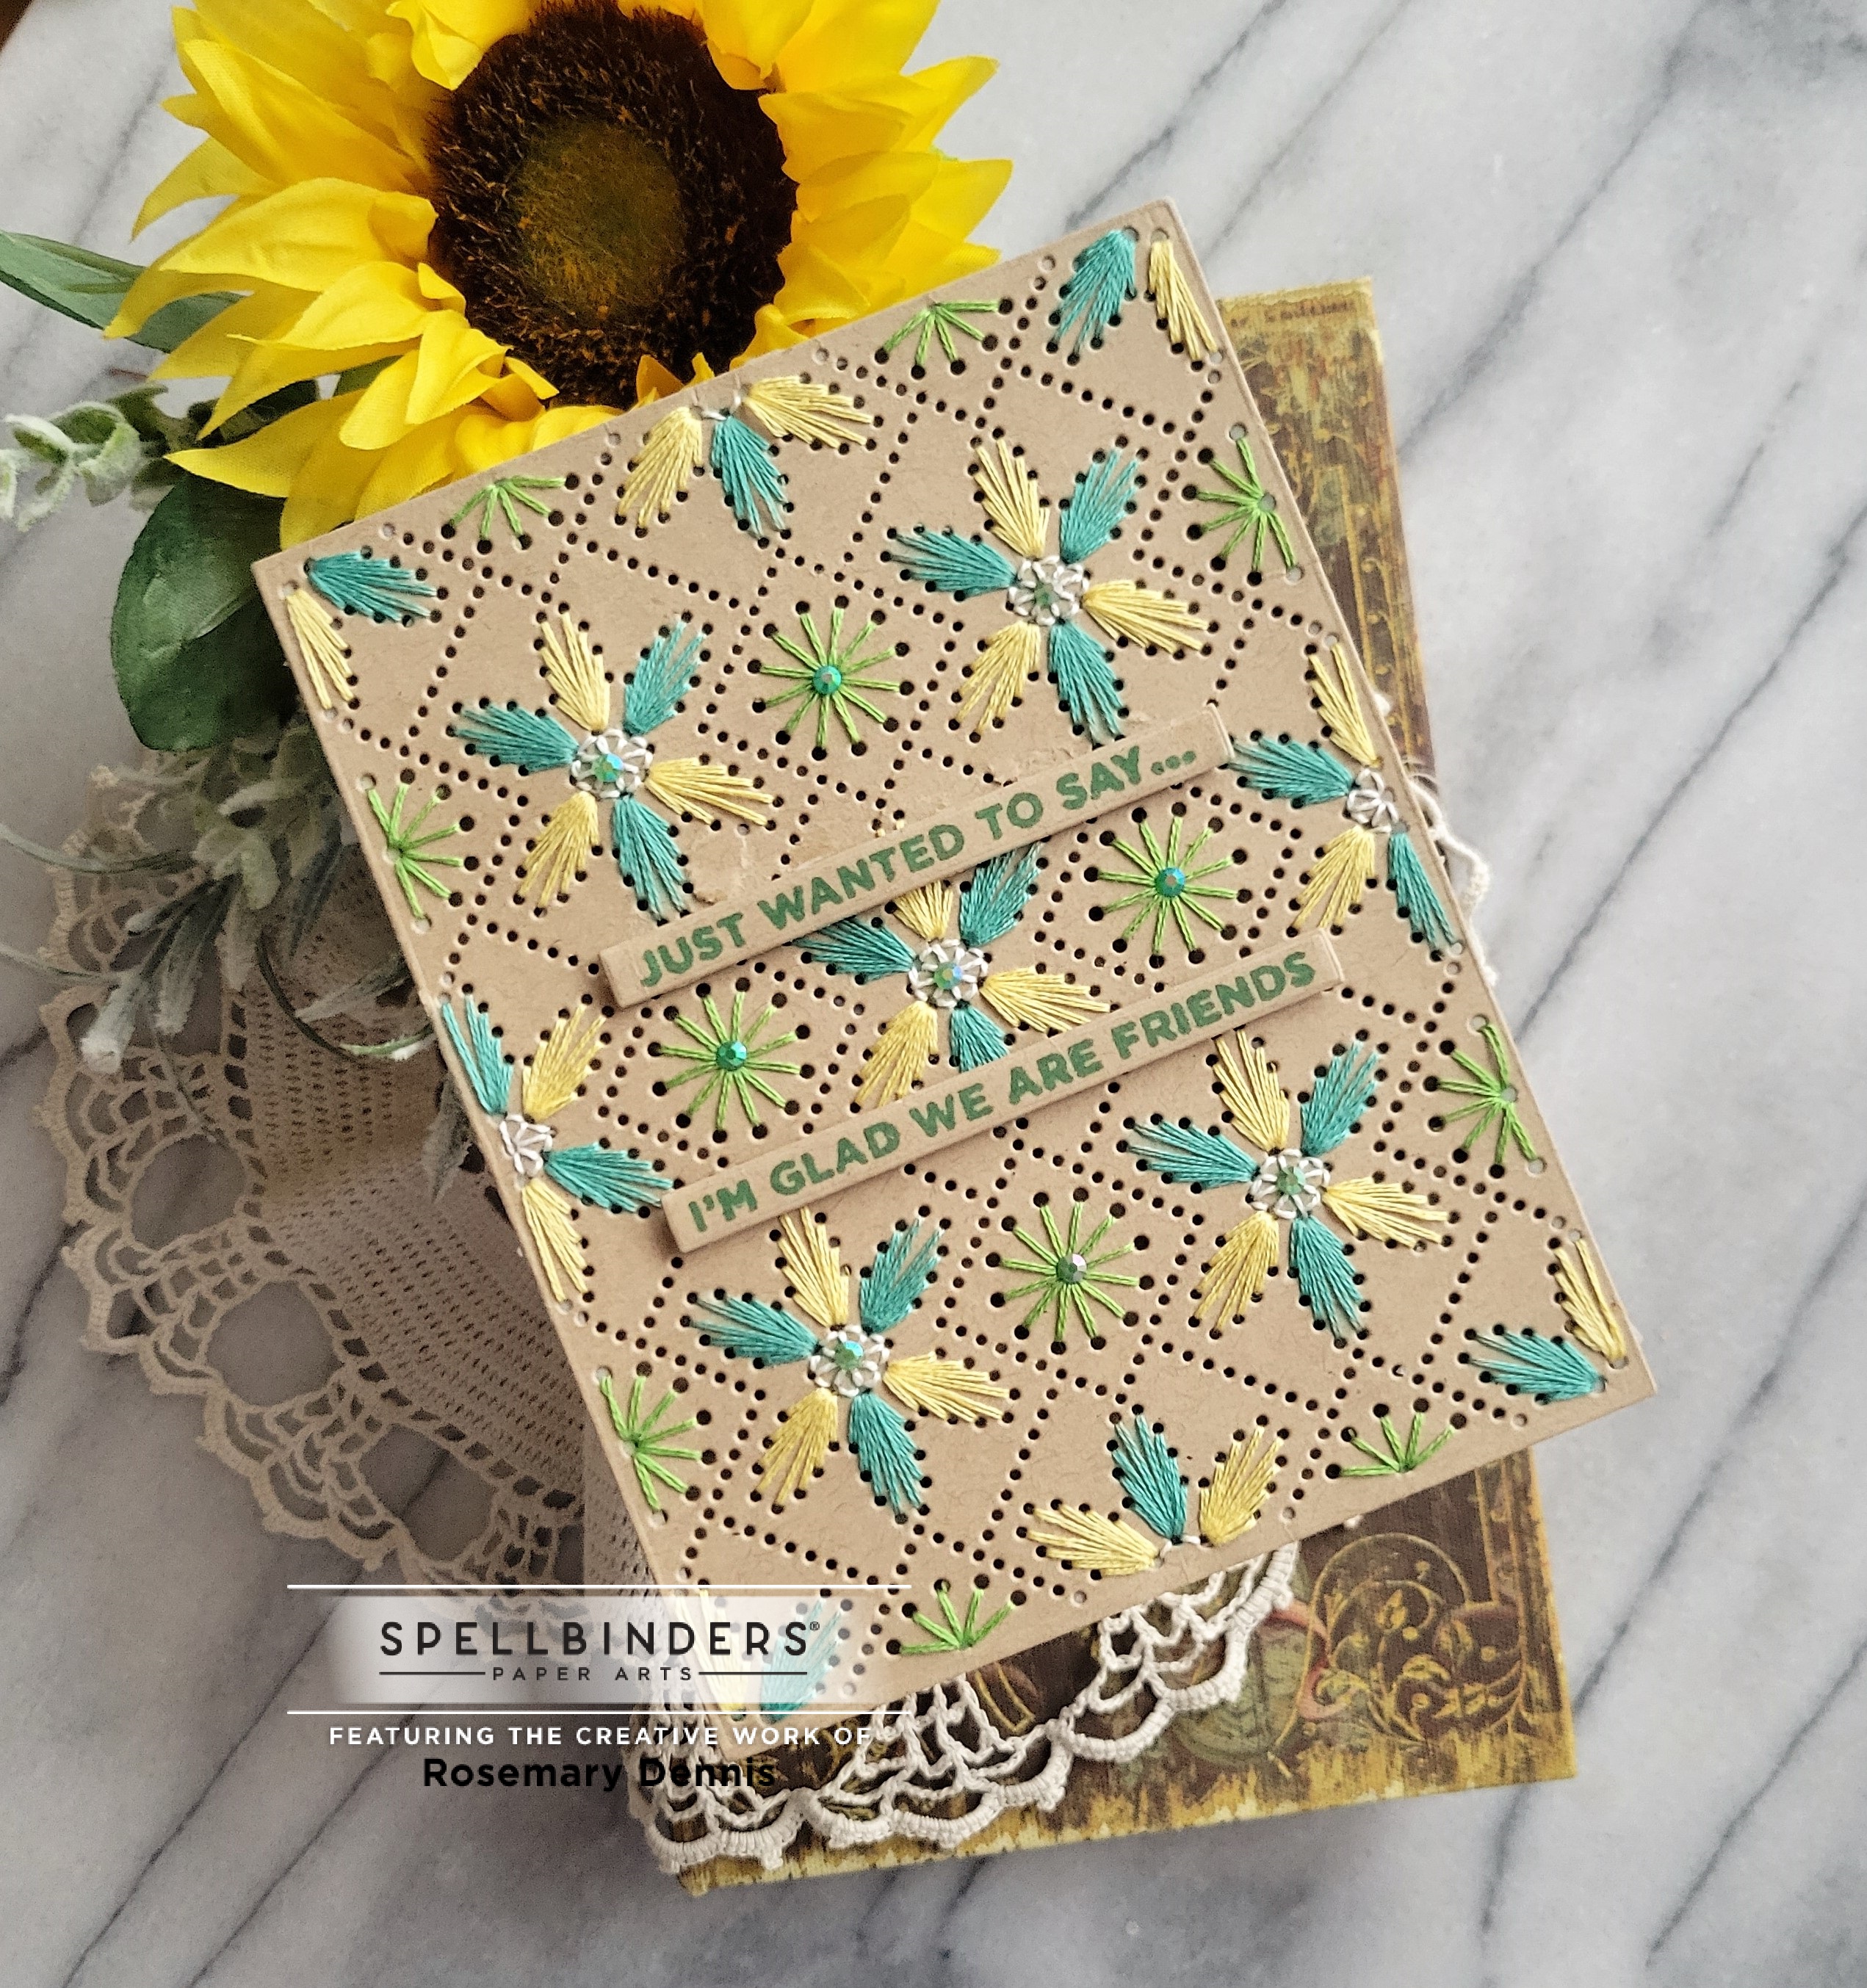
 Hello!  I'm back with two more cards I created with new products from the Spellbinders July release.  It is definitely Christmas in July right now!   Today's cards feature products from the Christmas Stitchmas collection.  My first card features the new Stitched Petal Diamond die and the colors from Color Throwdown.  (An affiliate linked list of supplies will be at the end of this post.  Using my links allows me to earn a small commission at no cost to you.  Thank you for your support.)


I am not going to lie, but this card front took a long time to stitch.  I could have made things easier if I had stitched in all one color, but I wanted to used the Color Throwdown palette because I love yellow, aqua and green with kraft.   So decided that the large flowers would feature some petals in yellow and some in aqua.  Once I finally got the stitching done it was easy to put the card together.  And as you may have noticed, this isn't a Christmas card.  I guess I could have gone Christmas with the colors, but decided to go with a friendship card.  I used sentiments from the Just Wanted to Say stamp set released last month and stamped then in VersaFine CLAIR green ink.  I finished off the card with tiny green gems.


This next card is definitely Christmas!  It features the new Stitched Joy die set and a new Glimmer plate called Plaid Tidings.  You will be seeing more of that Glimmer plate in a few days.   Before I started making card I cross-stitched.   Cross-stitching is kind of what got me into card making as I started cross-stitching Christmas cards for family and close friends.  I stopped cross-stitching when I started having problems with my right shoulder.  Recently I decided to give cross-stitching a try again and I have been spending more time doing that then card making!  Because I used to stitch I have alot of floss.  I found a bag of coordinating floss that I was going to used to make something with and decided to use those colors for the main stitched piece on the card.  The Plaid Tidings was foiled in red a on dark green cardstock.  I die cut the piece to be stitched from kraft and then got to work.  To tie in the dark green a bit more I die cut the letters from the same dark green cardstock as the foiled piece.  I thankful that the lighting was right so you can actually tell that it is red foiling.   The are extra little dies in the Stitched Joy die set so I die cut three of them to create my little stitched cluster on the 'o'.  I finished this card with red and gold Spellbinders gems.

Affiliated linked supply list:


Thanks for stopping by and have a wonderful day. 


Friday, July 15, 2022

Spellbinders July Release

 Hello!  The brand new Spellbinders release is available and it is filled to the brim with all kinds of wonderful Christmas themed products, as well as new cardstock colors, pop up glitter foam colors and much, much more.  You can see the entire release here.  I have two cards to share today.  (A list of affiliate linked supplies is at the end of this post.  Using my links allows me to earn a small commission at no cost to you.  Thank you for your support.)   Here are my cards:


My first card uses the new Winter Welcome Sled die set.  This die set is so much fun!  Along with the sled there are dies to create a pair of ice skates, as well as the dies I used to create my poinsettia and pine branches.  I used silver glitter cardstock for the base of the sled and then die cut rest of the sled from white cardstock.  After putting the sled together I created the poinsettia and pine branch cluster that I adhered to the sled.  I added the sled to a light gray cardstock panel that I embossed with a Spellbinders embossing folder called Forevergreen.  That folder was released last year.  The sentiment is from the Mini Christmas Sentiments Glimmer set and was foiled in black.  That set was also released last year.  I finished off the card with tiny crystals on the sled and a few more scattered around the sled.  I'm going to add this to the Simon Says Stamp Wednesday challenge of make your own background. 


This next card used the new Balsam & Berries stamp set, as well as the Mix & Match Holiday Greetings die set.  I heat embossed the large frame image from the set on Rainforest cardstock using red embossing powder and then die cut it with a rectangle die.  The sentiment was die cut multiple times from the red cardstock, stacked and then adhered to the card.   I'm a little "up in the air" about this card.  I like red and bright green together, but I think I have a little too much of it, lol.  Let me know what you think.

Affiliate linked supply list:

Thanks for stopping by and have a lovely day!

Thursday, June 23, 2022

Spellbinders June Release Part 3 - Flea Market Finds Collection

 Hello!  Hope your week is going well.  We are finally having some summer like weather here in my corner of the Pacific Northwest!  Hoping it will stick around for a while.  I'm popping in today to share several projects that I made with a brand new collection called Flea Market Finds that was created by Cathe Holden for Spellbinders.  If you love vintage, you will absolutely love this collection!  There are stamps, patterned papers, stickers, die cut pieces and a beautiful stencil set.  (Affiliate linked supplies listed at the end of this blog post.  Using my links allows me to earn a small commission at no cost to you.  Thank you for your support.)    Let's take a look at my first project.


This card uses the lovely Layered Vintage Floral stencil set, distress oxide inks and the handle with care label from the Handle with Care stamp set.   I just love floral image the stencils creates.  It reminds me of tea towels you can find at antique stores.  After I finished stenciling the image I added a little bit of extra by stenciling the center of the flowers and the yellow berries with Nuvo Glacier Paste in Pineapple Delight.  Once that was dry I added some additional distressing around the image with Antique Linen distress oxide ink and then roughed up the edges.  The label was stamped using Antique Linen distress ink, trimmed out and the edges roughed up.  I adhered the panel to a card base I made from Spellbinders Alabaster cardstock.   I also made a matching envelope. 


This next card was made with papers from the Blue Green Palette Sampler 6x8 paper pad, the Handle with Care stamp set and stickers from the Etiquettes sticker book.  I die cut the patterned paper and then stamped the images using a medium green ink and a brown ink.  The sticker was adhered to thin cardstock to give it more stability and then trimmed out.  I popped that up over the stamped images.  The sentiment was stamped in watermark ink on vellum.  Cream embossing powder was applied, heat set and then I trimmed out the sentiment.  I popped it up using rolled up glue dot.   I used another sticker for the coordinating envelope.


My final project came about as I flipped through the Floral Palette Sample 6x8 paper pad.  There are so many beautiful floral patterns in this pad, but the one with the moth (or is it a butterfly?).  Since there are two sheets of each pattern I was able to use both to create my project.  I had the Ideaology mini frame just waiting for me to use it for this project.  I postioned the back panel on the paper so I could trim out the section with the moth.  I then adhered that piece to the panel with Distress Collage Medium.  I trimmed out the moth and the flowers from the second piece of the same paper.  I trimmed into the sections of the wings so that I could use foam tape to create a little lift in the wings.   The frame was painted with a combination of light yellow and light teal paints.  Once it was dry I knocked back the color a bit with Ground Espresso distress crayon.   Then I added Gilded Foundry wax to the corners and heat set it to bring out the gilding.  I also added a few little splatters to the main panel and heat set  those as well.  I added a bit of glitter to the moth and the flowers using glitter glue.   I adhered the flowers to the panel using Distress Collage Medium and foam tape.  I then adhered the frame to the panel also using Distress Collage Medium.  Once the frame was secure to the panel I added the moth, again with Distress Collage Medium and foam tape.   The larger wing sections were also adhered to the frame.   


Here is a closer look at the glitter on the month, as well as some of the gilding from the foundry wax.   To finish the piece I used long stickers from the Etiquettes sticker book around the edges.  You can see one of those stickers in this photo.  I had a lot of fun creating this piece.  I hope you like it.

Affiliate linked supply list:


Thanks for stopping by and have a lovely day!

Friday, June 17, 2022

Spellbinders June Release - Part 2

 Hello, there!  I'm popping in with three more cards using new products from the Spellbinders June release.  As I told you in my previous Spellbinders post this release is huge!   I still have more products to share with you!  (Affiliated linked products listed at the end of this blog post.  Using my links allows me to earn a small commission at no cost to you.  Thank you for your support.)   


This first card uses the new Leafy Sprig die set and a sentiment from the new Just Want to Say... stamp set.  I used the sketch from Freshly Made Sketches and the colors from Color Hues for my card so I will be posting the card there.   The die set allows you to die cut the leafy sprig, as well as separate leaves.  I cut both from Spellbinders Peridot and Cosmic Sky cardstock and then layered the green leaves on the blue sprig and vice versa.  I used a small rectangle from the Essentials Rectangles die set to cut my two small panels from white and then layered them on the main panel.  The leafy sprigs were layered on top, along with the sentiment that I stamped on white cardstock using VersaFine CLAIR Nocturne ink.  I finished things off with Nuvo drops in Morning Dew.


This card features the new My Sweet Friend dies from the Right Words collection by Becca Feeken.  I'm also using a new embossing folder from the release called Hand Drawn Scallop embossing folder.  I embossed Spellbinders Dahlia cardstock with the folder and then die cut it with an oval die from Becca's Fluted Oval die set.   The words were die cut from Spellbinders Pink Sand cardstock several times and then adhered together.  I die cut a white panel of cardstock and adhered the scalloped oval to this panel.  I added the die cut words and then sentiment from Just Want to Say that I heat embossed in white on Pink Sand cardstock.  I finished with little flowers from the My Sweet Friend die set that I cut from Wild Berry cardstock, layered together and adhered as you see with little leaves die cut from Peridot cardstock.  I also added a little drop of Morning Dew Nuvo drops to the centers of the flowers.  Going to add this to the Simon Says Stamp Wednesday challenge. 


My final card uses the sweet new die set called Sweet Birdie.  I also used the h and i alphabet dies from the May release.  I also used a sentiment from the Just Want to Say stamp set.  The colors for my card are from Color Throwdown so I will be posting this card there.   I die cut all the pieces from cardstock in the CTD colors and then layered everything on a white body.  The sentiment was stamped in aqua ink on Waterfall cardstock.  I die cut the shadow of the letter from Pink Sand and layered on the white letters.  I die cut a small rectangle and layered on all my elements.  I finished with little orange flower sequins.  More Morning Dew Nuvo drops were added to the sequins and the eye of the little bird.

Affiliated linked product list:


Thanks for stopping by and have a lovely day!


Tuesday, June 14, 2022

Happy 20th Birthday Spellbinders!

 Hello!  Can you believe it?!  Spellbinders has been creating and providing cutting edge papercrafting products for 20 years!   To celebrate Spellbinders has released the Birthday Celebrations collection.  This collection is jam packed full of fun birthday related products.  I will be sharing several different cards today using multiple products from the Birthday Celebrations release.  (Affiliate linked products listed at the end of this blog post.  Using my links allows me to earn a small commission.  Thank you for your support.)

This card uses the brand new So Many Candles Glimmer hot foil plate and the new Stylized Happy Birthday dies.  I foiled the candles using rainbow foil making sure to position the foil so that the yellow would fall where the flames of the candles are.  I just love how the foiling turned out.  I kept things simple by just die cutting the happy birthday from black glossy cardstock and scrap cardstock that I stacked together.  The shadow die was cut from vellum so you can still see the foiled candles.  I did add a few Spellbinders color mix essentials gems for a bit of sparkle. 


This next card uses the new Awesome Birthday stamp set.  I just love those fun candles!  Again, I kept things very simple.  I stamped the candles in VersaFine CLAIR Nocturne ink and colored with Prisma color pencils in shades of blue.  This was not my first attempt at coloring the candles.  I think I tried four additional times to color the candles and each time it ended in disaster.  Thankfully, on the 5th try things worked out!  I then added the sentiment also stamped in Nocturne ink.  For a bit of sparkly I stamped the scattered stars image from the set in VersaMark watermark ink, applied rainbow embossing powder (it is clear embossing powder with little sparkles in it) and then heat set.   The sparkle in real life is so pretty.


My final card uses the super fun Topsy Turvy Cake dies and a sentiment from the Birthday Unboxing Glimmer foil plates.  I used three different shades of teal cardstock (Spellbinders Waterfall, Teal Topaz and Lagoon) to cut the layers of my cake.  There are dies that you can insert into each cake layer to cut out different elements.  I used those dies to cut the elements from the same cardstocks, but then layered the elements on.  I love how it turned out.  I used previously released Glimmer of the month kit called Mini Nested Glimmer Dots and teal foil to foil the dotted rectangle on a panel of cardstock cut to fit my mini slimline card base.  I also foiled the sentiment from Birthday Unboxing in teal and then die cut it with the matching die.  I adhered my panel to the card base and then popped up the sentiment and cake.  The finishing touch are the little decorative pieces on the top of the cake that were die cut from some glitter cardstock that has a teal tint to it.  

Affiliated linked products used:


The Spellbinders June release is HUGE and I will be back with more cards that I create with new product including another card using a product from the Birthday Celebrations collection.  Thanks for stopping by and have a lovely day!


Tuesday, June 7, 2022

hi...

 Hi... it has been awhile!  I have been creating cards, but unfortunately they aren't anything I can share right now.  Stay tuned for next week!  My blogging friend, Lisa, is a member of the Just Us Girls design team and this week she is the hostess.    It is word week and she chose the word "paintbrush".   When I saw that I just had to pull out my Artful Tulip and Butterfly Burst paintbrush dies from Spellbinders and create something!  

I also used a floral die set from Becca Feeken called Petite Floral Potpourri for the flowers.  The patterned paper is from the Stampin Up! pack called Sunshine and Rainbows.  The sentiment is from Pinkfresh Studio and was hot foiled in back.  I finished the flowers with little white gems from Spellbinders. 

Thanks for stopping by and have a lovely day.