Hello! I'm popping in with two cards for a few challenges. And as you can tell from my blog title, one card features a wreath and the other features flowers. First up is the card featuring a wreath.
Thanks for stopping by and have a great day!
Hello! I'm popping in with two cards for a few challenges. And as you can tell from my blog title, one card features a wreath and the other features flowers. First up is the card featuring a wreath.
Thanks for stopping by and have a great day!
Happy Thursday everyone! The Simon Says Stamp Be Creative release is now available at the SSS website. You can see the entire release right here. Simon Says Stamp was so kind and sent me the lovely You Did stamp set from CZ Design. This set is perfect for any wedding themed card that you might need, but some of the images would work for birthday cards, as well. I created two wedding themed cards. Take a look. (Affiliate linked list of products is at the end of this post. Using my links allows me to earn a small commission at no cost to you. Thank you for using my links.)
Hello! Popping in with a card for the Altenew monthly challenge, as well as Freshly Made Sketches. I don't often get time to participate in Altenew's challenge so when I had the chance this week I took it. Here is my card:
Hey there... hope you are having a great day! I have been playing around with alcohol inks the last few days and here two cards that I created using the resulting backgrounds. First up is a card for the Altenew monthly challenge. Haven't played along with their monthly challenge in awhile, but I really liked the colors so I decided to create a card. Earlier in the week I received the Paint A Flower Coral Sunset and so I used that set for my card. I created the background using purple, blue and green alcohol inks. Once I had the mix and look I was going for I added little bits of silver foiling to the areas where the alcohol inks were a little thick and sticky. You can sort of see the silver in the card, but it looks really pretty in real life. I then stamped the image over my background with VersaFine Clair Nocturne ink, applied clear embossing powder and heat set. I die cut the piece down and adhered it to a cardstock base. The sentiment is from Altenew's Label Love stamp set... and oldie, but goodie! I brought in a little bit more silver with some silver sequins. Going to add this to the Simon Says Stamp Wednesday challenge to make a birthday card. My colors are a bit more intense, but I love how the background turned out!
The second card is for the Pinkfresh Studio monthly challenge. For this background I used a pink alcohol ink and Gilded Alloy. This month the challenge is to have gold on your project. There are other colors provided to use, but to keep things simple I decided to go solely with pink and the Gilded Alloy. I created the background and then spent time deciding what I was going to do with it! At first I was going to stamp on it, but then decided that I didn't want to do that because I didn't know what ink to use! So I decided to cut the piece with my PF Fancy Oval Frame die. The Yupo paper I used is heavy weight and did not cut well so I ended up not using the frame, but simply the interior oval. I learned that I do not like using the heavy weight Yupo as it is hard to die cut so I won't be buying that in the future. I die cut the frame again from textured gold cardstock, twice more from thin white cardstock and adhered them together with spray adhesive. The frame was adhered to an off white cardstock panel and then I popped up the alcohol ink oval with foam dimensionals. The floral image is from the Choose Hope stamp set and I embossed that in gold on vellum then die cut it with the matching die. I adhered that to the frame hiding the glue by applying it behind the embossing. I die cut additional leaves using one of the dies from the Curvy Leaves die set and adhered those at the top of the card. The sentiment is from the stamp set and boy did that give me problems! I stamped and embossed the Hoping fine and then trimmed it out. I adhered it with glue, but wasn't really thrilled with how it looked. I stamped the "your birthday is wonderful" sentiment on cardstock and was going to heat emboss it, as well. When I applied the embossing powder it was a mess! At first I thought the stamp was flawed, then I realized that there was some residual photopolymer attached to it. I pulled that off and started over. Didn't like the sentiment on cardstock so I went with vellum and liked that much better. Finished off the card with some light pink sequins from Pretty Pink Posh. Going to add this to the Simon Says Stamp Wednesday challenge, too, but will do so through Instagram.
Thanks for stopping by and have a lovely day!
Hey everyone! I'm popping in to share three cards that I made using the Mix & Match Circle stencil from the brand new Hello Beautiful Release. You can shop the release right here (affiliate link used). The first card is my favorite. I wanted to create a soft, dreamy background so I pulled out distress oxide inks in Spun Sugar, Bundled Sage and Speckled Egg. I taped down my piece of white cardstock, taped the stencil on top and began my inking with the Spun Sugar in one area. I moved to Bundled Sage and made sure to overlap some of the Bundled Sage on to the Spun Sugar circles. I finished with Speckled Egg and then did some additional blendings of the other colors. I die cut the panel with a Spellbinders Essentials die and adhered the panel to a white cardstock base. The sentiment is the Hello Crafty Friend die from Simon Says Stamp. I die cut the shadow from vellum, the words from white cardstock (3 times) and then adhered everything. I adhered the sentiment to the card base along with some Rainbow Fish embellishments from Trinity Stamps. (Sorry the photo is so washed out!)
For the second card I used silver embossing paste on a piece of light aqua cardstock. After the piece dried I die cut it with circle dies. I stamped the sentiment from the Simon Says Stamp Hexagon Greetings in Delicata Silver Shimmer in on the same aqua cardstock and die cut it with the Hexagon die. I arranged the circles and the hexagon greeting on a white cardstock panel and adhered that to a light gray cardstock base. I finished off the card with some matte silver sequins that my dear friend Greta sent me recently.
Hello! Stopping in with a quick post of a card that I made for Color Throwdown and Freshly Made Sketches. I wasn't even sure that this card was going to get made as I was really having troubles with the CTD combo. I tried watercoloring, but couldn't come up with a nice color that would pass for cream so I looked through my cardstock and found some cardstock that I think is from Stampin Up! Or it could be PTI's Rustic Cream... I really don't know! I used the Simon Says Stamp Ornate Ornaments stamp and die set, as well as a sentiment from an older SSS stamp set called Gifts of Love. Since the theme at the SSS Wednesday challenge and the SSS flickr challenge is Christmas I will also be posting the card there. Super simple... I stamped the three ornaments in Versamark watermark ink on colored cardstock and heat embossed with WOW embossing powder in gold. The ornaments were die cut with the matching die and adhered to a white die cut cardstock panel with liquid adhesive. I added little gold twine bows to each ornament and heat embossed the sentiment in gold, as well. While I wasn't certain about the color combo at first I do really like how the card turned out!
Hey everyone! Popping in with three cards I made using a new background stamp called All Leaves from the Simon Says Stamp Make Merry release! I love leaves and I love this background stamp! You can find the release here (this is not an affiliate link, just providing it for your convenience). The first two cards are very similar in style. For both cards I used different shades of inks in fall colors. The first cards uses Altenew inks in two shades of red and two shades of an orangy yellow. I started at the top of the stamp with the orangy yellow colors and worked my way down to the red shades for an ombre look. I trimmed down the panel and adhered it to my dark red card base. I used a stamp from the SSS Hexagon Greetings stamp set and did the same inking as I did for the background. I die cut it with the matching hexagon die and popped it up on the card front. I added some little leaves (from SSS) that I die cut from gold glitter paper. Will be adding this one to the SSS Wednesday challenge.
For the next card I added in two additional colors in shades of green (also from Altenew) and just randomly inked up the stamp with the colors. That way I got some mixing of the colors producing a little bit of brown along with the orange, yellow, red and green. This panel was trimmed down to a smaller size and then I die cut the word hello (a SSS die, not sure if it is still available) from the panel and then several times from white cardstock. I placed washi tape on the back to hold the word in place and then adhered the other diecuts on top ending with the one with the stamping. A sentiment from the SSS Thanks & Encouragement Word Mix stamp set was adhered along with some enamel dots. The panel was then adhered to a light gray cardstock base. I'm going to add this one to the Sunday Stamps challenge since it has alot of the colors from their challenge in it.
Thanks for stopping by and have a great day!
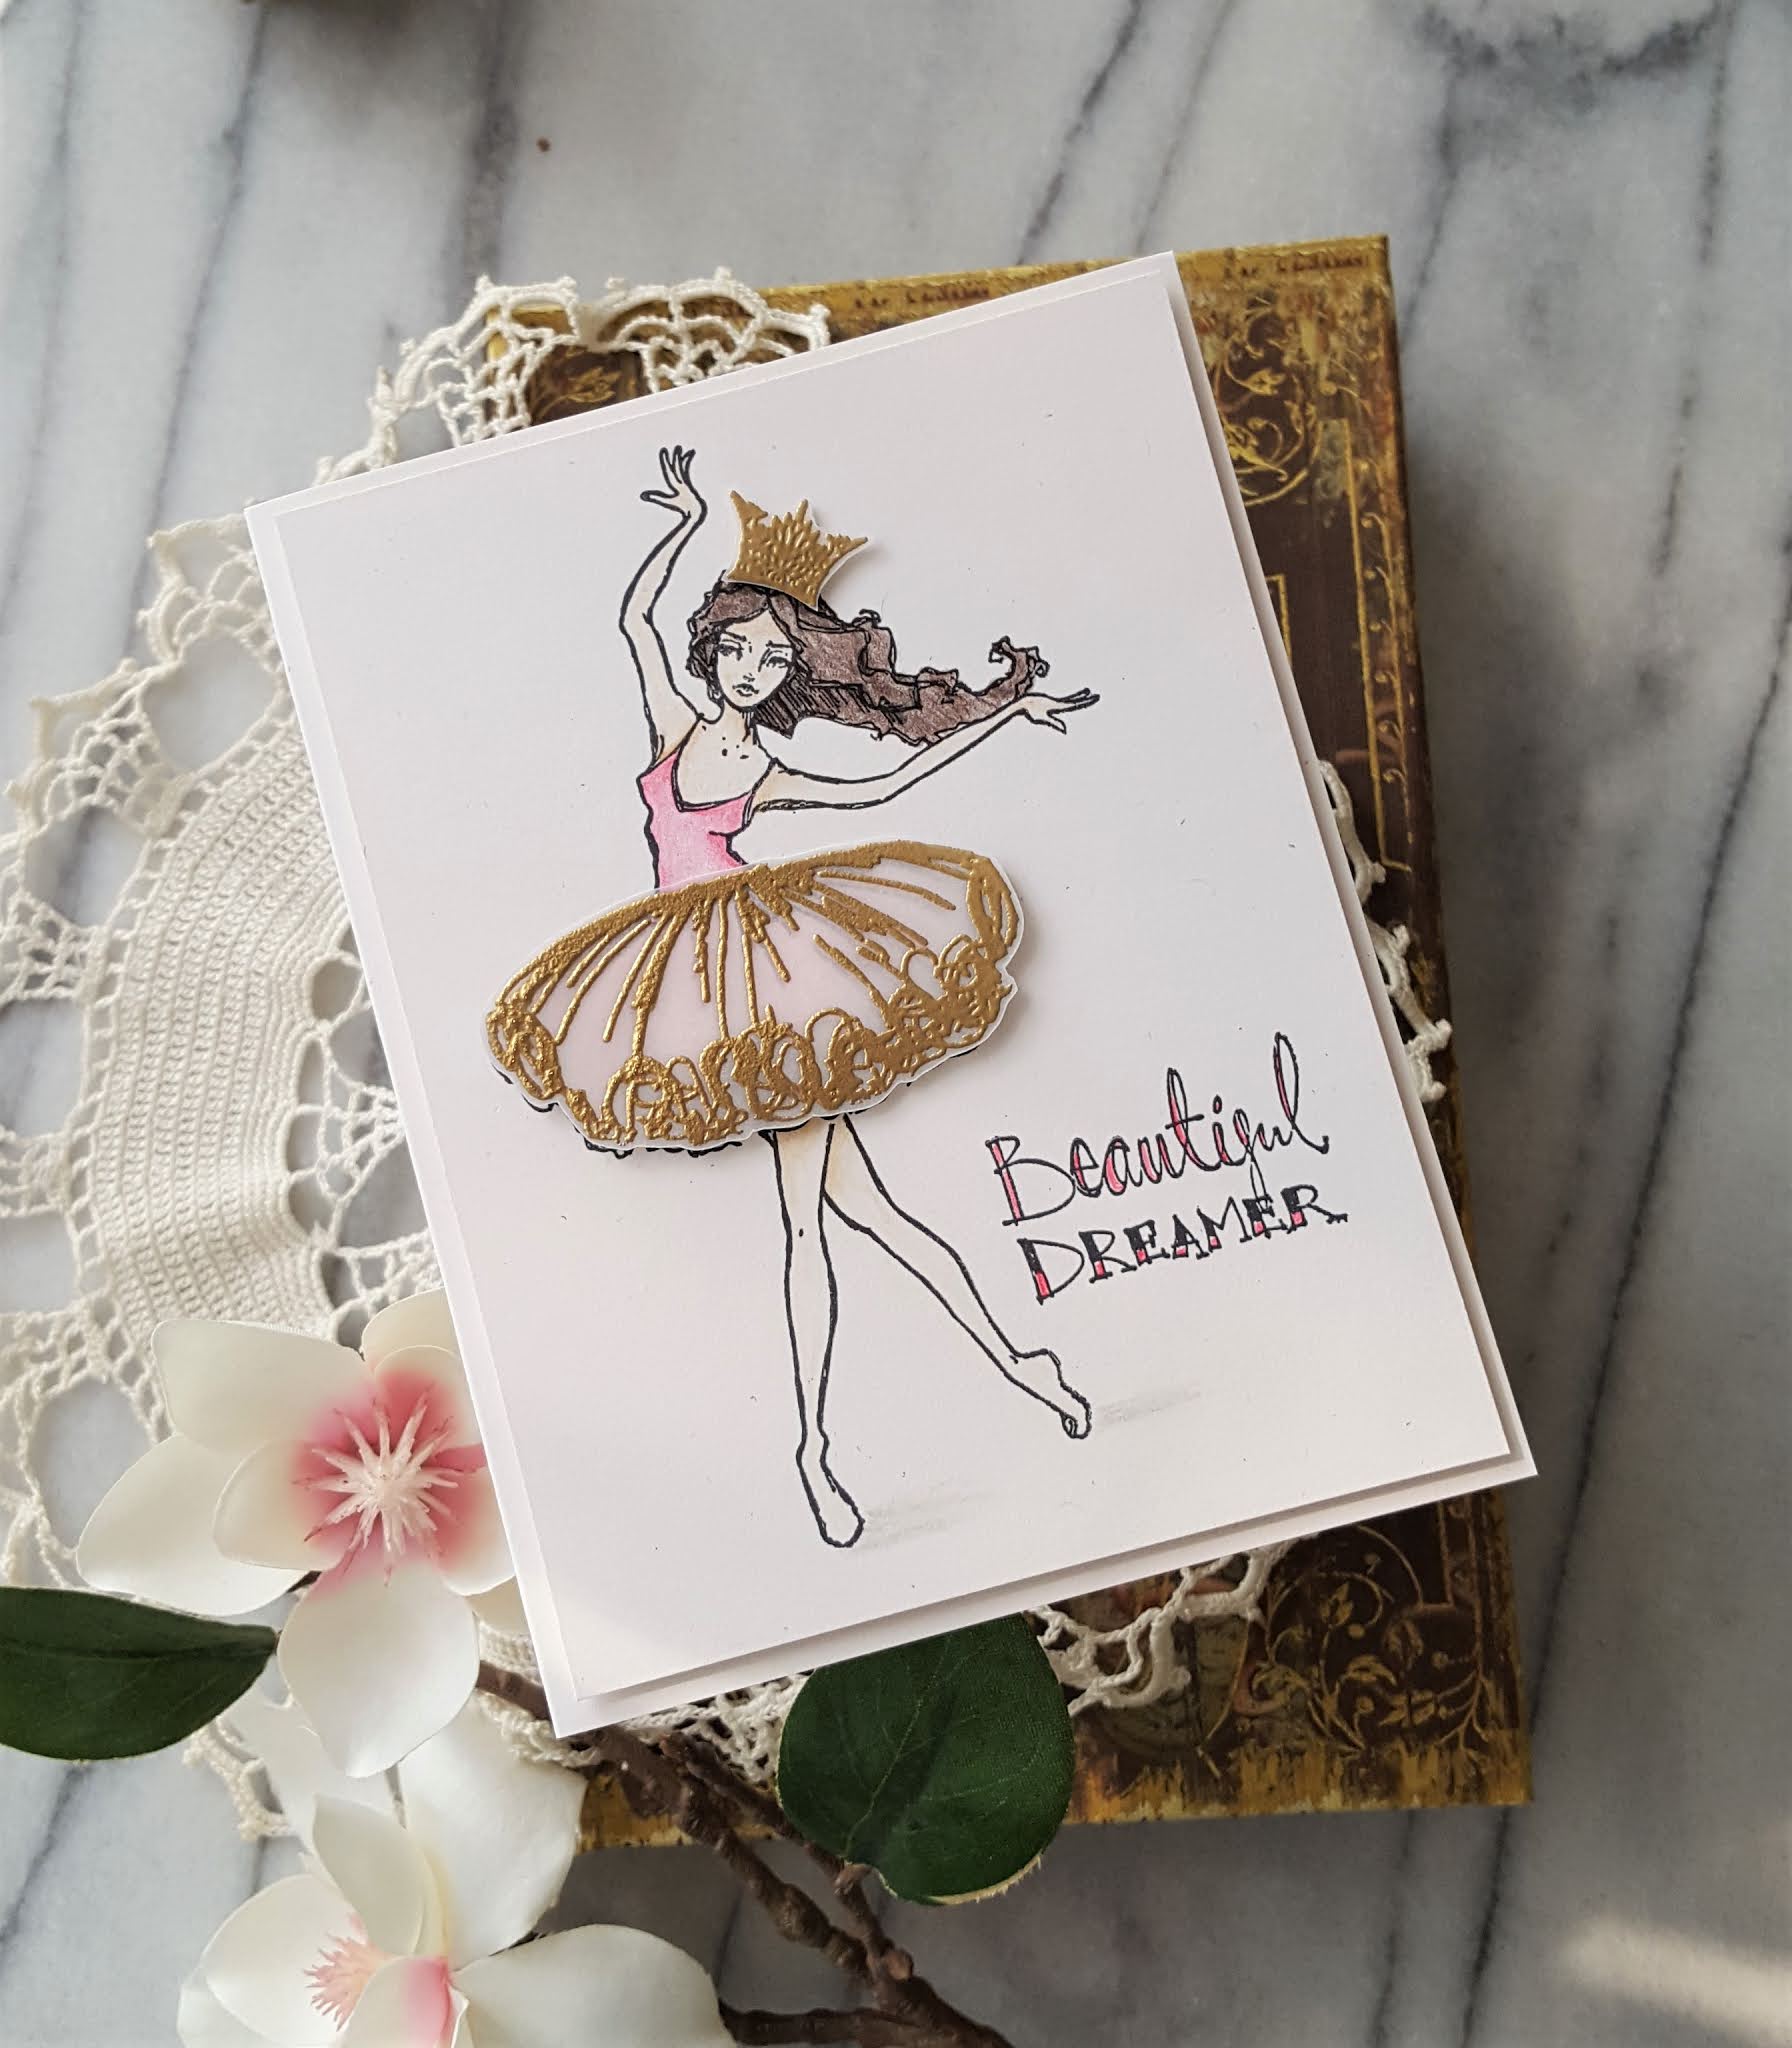
Hello! Hope you are having a wonderful day! The stormy weather that we have had the last few days seems to have cleared up and the upcoming week is supposed to be really nice! That is fall in the Pacific Northwest! I have two cards to share that I made using Spellbinders products. First up is a card that I made using the newly released Jane Davenport for Spellbinders stamp set called Beautiful Dreamer. I was immediately drawn to this stamp set because I took ballet for many years when I was younger and the image of the dancer reminds me of that time in my life! I started by determining exactly where my dancer would go and then stamping her tutu. I created a mask for the tutu, placed it on top of the stamped image and then stamped my dancer. Originally I was just going to do the stamping as indicated, but decided to stamp the tutu a second time on vellum using watermark ink and gold embossing powder. This was then trimmed out to be placed on the stamped image. Colored the image very simply with Faber-Castell polychromos pencils and then adhered the vellum tutu. I real life you see a hint of the pink tutu through the vellum overlay. I stamped the sentiment and colored it with one of the pinks I used to color the dancer. I was going to stop there, but she was looking a little plain so I stamped one of the crown images that came in the set on vellum with the same gold embossing powder, trimmed it out and popped it up. The set also includes a pair of toe shoes. Next time I ink up this little dancer I'm going to give her some pink toe shoes!
The second card was made using the September Spellbinders small die kit. The die set is so very pretty, but also very delicate. I used the color combo from Fab Friday so I will be posting my card over there. I die cut the frame from light blue cardstock and then all the little flowers from navy blue and yellow cardstocks. They were all layered on and then I adhered the frame to a white cardstock base. I will admit that my diamond is not completely squared up! Next time I use this die set I will make sure to line things up better!
Thanks for stopping by and have a lovely day! Some affiliate links used in this blog post. Please know that I really appreciate it if you use my affiliate links to shop!
Hello friends! I'm popping in today to share a project I made with a newly released stamp set from Jane Davenport for Spellbinders called Walk With Courage. This set has images of two women created in a stylized manner, as well as the sentiment and a few other smaller images. This card definitely made me think of those strong women I know who are walking with courage right now. I decided to do some simple watercoloring with the image and it turned into a bit of disaster so I started over and heat embossed the image using gold embossing powder. I pulled out some ephemera pieces from the Spellbinders July 2020 card kit called Vintage Mementos. The butterfly I used in the layout is a soft yellow so I went with that color for her dress, shoe and hair. I used distress ink in scattered straw for the coloring. Once the image was dry I trimmed it down and adhered it to a card base. I heat embossed the sentiment walk with courage in the same gold embossing powder on vellum and trimmed out the circle. I then spent some time arranging the sentiment strip and the butterfly to find an arrangement that I liked. It turns out that my arrangement is somewhat similar to the sketch at CAS(E) this Sketch so I will be posting her over there. I really like how this turned out. Now to determine who I will send this to in the future! I will be back later in the week with another card using a new Jane Davenport stamp set so stay tuned!
Hello and happy STAMPtember everyone! Can you believe that we have rolled around to another one?! I'm participating in a blog celebration (or party) put on by Simon Says Stamp to celebrate this yearly event. This isn't a blog hop per se, but a large gathering of lots of crafters sharing tons of inspiration. You can start at the beginning by heading to the Simon Says Stamp blog. And since this a party you have to have prizes and surprises, right?! Well check out the banner for your opportunity to get a free stamp set for a $100 order using the code! The are other codes and offers to be found so make sure you check out the whole blog party! I have two cards and a set of tags to share with you today that I made using the beautiful Prismatic Snowflakes. You can find the new release here. I also used the Holiday Snowflake Tag die set, as well as sentiments from the Frozen Fractals stamp set and Stained Glass Greetings stamp and die set.
First up is a set of tags that I made with the two largest snowflakes from the Prismatic Snowflakes set along with the Holiday Snowflake Tag die set. I stamped the snowflakes on white cardstock with VersaMark watermark ink and then heat embossed them using pewter embossing powder. The smaller snowflakes were then inked with Speckled Egg and Tumbled Glass distress oxide inks and the larger snowflakes with Tumbled Glass and Salty Ocean distress oxide inks. I trimmed out the snowflakes and layered them on tags that I die cut from white cardstock and Simon Says Stamp Sea Glass cardstock. I also die cut the snowflake from the tag set from Memory Box glitter cardstock that has a light blue tint to it. Those were layered on the tags and the snowflakes layered on tope. I finished off each tag with different embellishments. Large jewels from Pretty Pink Posh for one set of tags and small snowflake sequins and Pretty Pink Posh jewels for the other. Love how they turned out!
The next project is a card that was inspired by some of the beautiful cards that the super talented Yana Smakula creates! She is so good at creating dramatic backgrounds using stamps and then filling in the spaces with jewels or sequins. I'm not so great at creating background with stamps, but was able to pull this one off because there are so many snowflakes in the set making it easy to arrange the background. I simply placed the largest snowflake in the center then around additional snowflakes around the top and partway down the sides. I stamped the images with VersaMark watermark ink, then flipped my cardstock panel around, removed the large center snowflake, left the others in place and stamped. I applied gold embossing powder (from WOW Embossing) and heat set. Once that was done I used Chipped Sapphire and Black Soot distress inks to darken the edges of my dark blue panel leaving the center uninked. The panel was then trimmed down slightly with a rectangle die. I stamped the word peace from the Stained Glass Greeting set on vellum with watermark ink, applied gold embossing powder and heat set. This was then wrapped around the panel and secured in the back. I stamped the sentiment (also from Stained Glass Greetings) on the same dark blue cardstock with watermark ink and heat set with gold embossing powder. This was trimmed down and popped up on the vellum strip. Then I filled in most of the gaps using some pretty gold pearls that I had left over from making Christmas cards with my Glimmer and a Spellbinders card kit. I absolutely love how this card turned out!
The last card was something that I just decided to do well... at the last minute. Originally I was only going to do the card and tags, but was enjoying making things with the stamp set and just couldn't stop! I used a sentiment from the Frozen Fractals stamp set and one of the dies from the Christmas Foliage die set. I stamped the large snowflake on vellum with watermark ink and then heat embossed with a sparkly white embossing powder from WOW Embossing. The snowflake was then trimmed out and a large Pretty Pink Posh Jewel added to the center. I then die cut the leafy sprig from some of the same Memory Box glitter cardstock I used on the tags. I die cut a panel of Sea Glass cardstock and arranged my snowflake and the leafy sprigs on the front. I didn't adhere everything down at that point as I still needed to stamp the sentiment. I placed the sentiment where I wanted it, removed everything and then stamped it using VersaFine CLAIR Nocturne ink. Everything was then glued in place and the panel adhered to a white cardstock base. I finished off the design with additional jewels.
Hello everyone! You probably already know, but Simon Says Stamp has a new release called Let's Connect. You can find the new release here. Simon was so kind and sent me the really sweet Anna's Flowers stamp set. I created three cards using the set. First up is a card that I did some watercoloring on. One of the flowers in the set really lends itself to doing faux no line watercoloring (at least I think that is what is called!). I stamped the flower across a panel of watercolor cardstock at varying heights using Old Paper distress ink. I then applied clean water to the petals and colored them with Pick Raspberry and Abandoned Coral distress inks. The leaves and stems came from another old Simon Says Stamp set and were colored in the same manner. Once that portion of the coloring was done and dry I added in grass and a sky using Mowed Lawn and Salty Ocean distress ink. The sentiment was stamped with VersaMark watermark ink and then embossed with WOW embossing powder in Ebony. It was trimmed down to a strip, wrapped around the card and secured on the back. I adhered the panel to a white cardstock. I'm really pleased with how this turned out.
The second card is very simple. I stamped the large sunflower like image on off white cardstock using four different yellow inks from Altenew. It is a little hard to tell that I used four, but I did, lol! The panel was die cut down with a rectangle die. I arranged where I wanted the sentiment to be and then stamped it with VersaFine CLAIR Nocturne ink. I used some bright yellow twine to create a border on either side of the sentiment and then added a little bow using the same twine. The panel was then adhered to a kraft cardstock base. Clean and simple! I think this one is my favorite of the three.
The final card didn't turn out exactly how I thought it would, but it was fun to create! I started by randomly stamping three of the sunflower like images on white cardstock with various different yellow inks (the same inks used on the second card). I then prepped the cardstock with an antistatic powder and stamped over the images with watermark ink. I didn't get them exactly over each image, but I wasn't going for perfection. I then applied a dark yellow/orange ink over the top and the wiped off the excess ink. I split the panel and adhered then to a kraft cardstock base leaving a gap that I used to wrap some twine around and tied in a bow. The sentiment was stamped on a small tag using VersaFine CLAIR Nocturne ink and then inked with the same ink that I used for the background of the panel. That was then adhered to the card front.
Hello and happy Monday! I'm popping in with a couple of cards that I have shared on Instagram. One card is for the MFT sketch challenge and I was just going to use Instagram to enter the challenge, but decided to post it on my blog since I still have a little bit of time before the challenge closes. The second card was just something I colored up last week and turned into a card. With the card for the MFT sketch challenge I used one of the images from the MFT Magnolia Blossom stamp set. I stamped the image with Memento Tuxedo Black ink and then colored the flowers with two Copic markers (R81 and R83). The stems were colored with one (YG67) and the center of the main flower with just one color, as well (Y02). I had originally started coloring the image with different colors, but it was too bright. I really took my time with the coloring and I'm very pleased with how it turned out. I fussy cut the image once it was done and then finished up the rest of the card per the sketch. I have a medallion die from MFT that I used for the background. I don't know what it is called and I don't think it is available any more, but it is sure is pretty. This is my first time using it. I stamped the sentiment (from a retired MFT stamp set called Spring Blossoms) on vellum with watermark ink and heat embossed with Ebony embossing powder from WOW!
With the second image I used my ZIG markers. I love the Mondo line of stamps from Ellen Hutson and one of my favorites in the Mondo Gerbera Daisy. I used that one and stamped it on smooth bristol cardstock with VersaFine CLAIR Acorn ink. This is another one that I spent along time on the coloring. Once I was done with the ZIG coloring I added a little bit of depth with a brown Polychromos color pencil. The image was die cut with the matching die. To make the card I kept it simple and just added a little strip of yellow cardstock that I embossed and a simple sentiment that I stamped with the same Acorn ink. I think coloring with my ZIGs is my favorite way to color.
Hello! Got some crafty time in and made a card for the two challenges that I pretty much always combine: Color Throwdown and Freshly Made Sketches! The FMS sketch is a square one and generally I don't like to make square cards (not sure why), but I decided to go with the square on the finished card. I stamped the Essentials by Ellen Mondo Sakura on smooth bristol with VersaMark watermark ink and then embossed using WOW embossing powder in Metallic Gold Rich Pale and then colored with ZIG markers. I used Pink Flamingo and Orange to create my peachy color. And then finished with little touches green. I will admit that I had to start over because I added little touches of color to the stamens and then die cut the image. The little bit of color wasn't dry and it smeared on to the image. Another live and learn, lol! With the second image I didn't add the color to the stamens until after I had done the die cutting! I created a background piece by scribbling two shades of blue ZIGs (Blue Hazel and Persian Blue) on some bristol cardstock and then blended it out with water. After it had dried I die cut it with a Spellbinders classic square die. The piece was adhered to an off white cardstock base and then I added the flower image. Finished off the card by stamping the sentiment with VersaMark on vellum and heat embossing with the same embossing powder used for the image. Sometimes simple is the best. With my floral image I think this will also work for the current Inspired By challenge so I shall post it there, as well.
Well... hello there! Hope everyone had a lovely weekend! I attended my niece's bridal shower and had a nice time. She is will be getting married in early September and is fortunate that her venue is moving forward with her wedding. I did get time this morning/afternoon to make a card for several different challenges: Fab Friday (sketch), Sunday Stamps (colors) and Inspired By (inspiration). When I saw the inspiration photo at Inspired By I immediately thought of the pineapple themed stamp sets and settled on one from Simon Says Stamp (no longer available) called One Cool Pineapple. This set also includes a watermelon slice making it perfect for the inspiration. I stamped the pineapple and watermelon slice on watercolor paper with VersaFine CLAIR Nocturne ink. I filled in some of the gabs with a little flower from the set, as well. I then did simple watercoloring with distress inks. I used Mowed Lawn, Squeezed Lemonade, Fossilized Amber and Spiced Marmalade for the pineapples. The watermelon slices were colored with Mowed Lawn and Picked Raspberry. The little flowers were colored with Mermaid Lagoon. Once the piece was dry I die cut it with a rectangle die. I didn't want to cover up all the coloring that I had done so in order to keep with the Fab Friday sketch I die cut the smaller rectangle directly from the main rectangle. I then adhered the main rectangle flush on my card base and popped up the smaller rectangle with foam tape. The sentiment is from the SSS set called Hello Darling. I heat embossed it with black embossing powder from WOW Embossing on vellum and then die cut it with a fishtail flag die. That was adhered using rolled up glue dot so that the adhesive wasn't as noticeable. A simple take on the sketch, but I like how things turned out!