Hello, hello! I'm back to share my project for this week's JUGs challenge. This week is mood board week it is a pretty one! Let's have a look at what I made.
Thursday, April 16, 2026
Just Us Girls Guest Designer Week 3 - Moodboard
Thursday, June 26, 2025
Simon Says Stamp Friend Like You Release!
Hello, hello! I'm popping in to share two cards that I made with a background stamp from the Simon Says Stamp Friend Like You release. Simon was so kind and sent me the Dahlia Background stamp to create with. It is so beautiful! You can check out the enter release here. Let's look at what I made.
For the first card I went with a soft look using Copic markers. I stamped the image multiple times because I my big MISTI stamping tool is wonky and I can never get a good, stamped image the first time around with large images. Anyway, I finally did get it stamped and then colored the image very simply with a light pink and light green Copic. I used my colorless blender to blend the colors out a little bit. I die cut the image, adhered it to a white cardstock base and then added the sentiment that I stamped on vellum with VersaMark watermark ink. Platinum embossing powder was applied and heat set. The sentiment was then die cut with the matching die. Adhered that with rolled up glue dots.
For the second card I went for a bolder look.
Thursday, February 27, 2025
Simon Says Stamp Favorite Things Release!
(To see my Birch Press Design post click here. Thanks!)
Hey friends! I'm popping in to share two projects I made with the most adorable stamp set from the new Simon Says Stamp Favorite Things release. Simon was so kind and sent me the Bunny Blessings stamp set to work with! Let's have a look at what I created.
Thursday, January 11, 2024
Simon Says Stamp Sweetheart Release!
(See my Birch Press Design post here)
Hello everyone! I'm popping in today to share three cards that I made with the Hello Animals stamp set from the new Simon Says Stamp Sweetheart release that is available right now on the Simon Says Stamp website.
Saturday, September 2, 2023
It's STAMPTEMBER!
Hi everyone! September has arrived and that means that STAMPTEMBER has arrived, as well. If you haven't heart of Stamptember I will fill you in. Stamptember is Simon Says Stamp's celebration of all things crafting. The month is filled with special collaboration releases from many of your favorite stamp companies, special edition crafty kits and so much more. Today Simon Says Stamp is kicking things off with a blog party (not a blog hop)! You can see the list of all participants on the Simon Says Stamp blog. Each participant has a special code to share. Using my code will allow you to get the Fancy Love die set for free with purchase! See the graphic below for the code:
The code is good until September 3, 2023 at 11:59 pm ET.
Simon was so kind and sent me the super cute Happy Hauntings stamp set to create with. I'm not a huge fan of Halloween, but I now have one great nephew and three great nieces and the cute little dragon images are perfect to use to create Halloween cards for all the littles in your life! Take a look at what I created.
There are four images in the stamp set and lots of fun sentiments. I stamped all the images using VersaFine CLAIR Nocturne ink on watercolor paper and then watercolored them with my Jane Davenport watercolors. I was going to color two of the dragons purple, but loved the first two so much in the bright green that I did all four that way. How cute are these two little witch dragons? I just love the one with the balloon. I have never seen the Nightmare Before Christmas, but I'm very aware of the main character Jack Skellington and the balloon face reminds me of him!
I love pumpkins so I was happy to see two of the dragons carrying pumpkins. Once all the images were colored and dry I die cut them with a small rectangle die and then moved onto creating the backgrounds. I used the SSS Ticking background stamp from the July release and stamped it using Spiced Marmalade distress oxide ink. I distressed the edges of the rectangle using Peeled Paint distress oxide ink and a very light distressing of Black Soot distress oxide ink. I layered the backgrounds on lime green cardstock. For a little more interest I stamped the spider web in the corner of each piece and then added some silver stickles (which you can't really see in the photos). I love how they turned out!
Thanks for stopping by today and enjoy the Stamptember release blog party! Don't forget you can see the entire release right here.
Wednesday, August 23, 2023
Freshly Made Sketches 600 Sketch Celebration!
Happy Wednesday everyone! Today Freshly Made Sketches is celebrating their 600th sketch and they asked me and other past "Queen of Clean" winners to participate in the celebration! Take a look at the sketch and then the card I made.
Isn't that a great sketch? Of course it is because all the FMS sketches are great, lol! Here is how I interpreted the sketch:
For the circular element in the sketch I used the super pretty Thanks for Being There stamp and die set from Pinkfresh Studio. I stamped the image with VersaFine CLAIR Nocturne ink on watercolor paper and then colored it with my Jane Davenport watercolors. Once it was dry I die cut it with the matching die. I'm also going to add this card to the August Pinkfresh Studio challenge (sparkle & shine) so I added some sparkle to my card with leaves die cut from gold glitter cardstock using the Leafy Branch die. For the background and the strip element I used the Pinkfresh Studio Sparkling Diamonds cover plate die. I used the gold glitter cardstock for the strip element, as well. I finished off the card with the sentiment and lots of sparkling gems in the centers of the flowers. Adding this to the Simon Says Stamp Wednesday challenge, as well.
I hope you will play along with the FMS challenge this week. They have some fun things in store for you. Thanks for stopping by and have a wonderful day!
Friday, May 19, 2023
Simon Says Stamp Dear Friend Release!
Hello! Hope your week is going well. There is a new release available on the Simon Says Stamp website and it is amazing! Please check it out the Dear Friend release here. Simon was so kind and sent me the lovely Fancy Hello die to create with. I have two cards to share so let's have a look.
Thursday, April 6, 2023
Simon Says Stamp Beautiful Days Release
Hello! The new Simon Says Stamp Beautiful Days release is live on the website and I'm popping in to share three cards that I made with the new stamp set Garden Fresh. This new stamp set is so pretty! It is full of beautiful images and lovely sentiments! Let's have a look at what I made.
Friday, January 27, 2023
sylvan hello...
Hey there! Popping in with a card that will be heading to the Altenew January inspiration challenge, as well as the Simon Says Stamp Wednesday challenge. I haven't participated in an Altenew challenge in a very long time for various reasons. But I have decided that this year I will try to participate more so that I can use the Altenew products that I have. For this card I used a new to me 3D embossing folder from Altenew called Sylvan Baroque.
Monday, September 5, 2022
autumn wishes
Hello! Hope all is well with you. Popping in with my first autumn themed card. I will be posting this one to the Paper Players, as well as the Simon Says Stamp Wednesday challenge. I haven't played along with Paper Players in ages. Their current challenge was just the one to get me back.
Saturday, February 19, 2022
just wanted to say...
Hello! I'm popping in with a card that I made using one of the new die sets from Susan Tierney-Cockburn's new release at Spellbinders. The entire collection is called Garden Favorites and I'm using the Sunflower and Ladybugs die set. I didn't use the little ladybug die, but maybe I should have! You can find her new collection here. A diecutting was done using my Spellbinders Platinum 6 die cutter. All foiling was done with my Glimmer hot foil machine. I used Bearly Art glue to adhere the flower together and to attach it and the leaves to my card front. (Affiliate links used where possible. Using my links allows me to earn a small commission at no cost to you. Thank you for your support.)
If you have never seen any of Susan's collections, you really should check them out at Spellbinders. Her dies help you create very realistic looking flowers. I have to admit that I'm very intimidated by her dies and so I don't often choose to work with them. However, when I saw the sunflower dies I decided to give them a try. I used the layout from Freshly Made Sketches for my card design so I will be posting the card in their gallery. I started out by creating my sunflower. I know when most people think of sunflowers they think of yellow ones, but sunflowers also come in red. I continued in my theme of doing things differently by using watercolor cardstock and my Jane Davenport ArtEssentials Bright Watercolors. I die cut the flower twice and then colored both the front and the back of the flowers in first a light red and then a darker red. There is a flower center piece that I colored using the darkest red and the little seeds were colored in a brown. The leaves were done in a bright green with an emerald green layered on top. Once everything was dry I did a little bit of shaping and then assembled my flower. I used my Fluted Rectangle dies to die cut the smaller rectangle and my Essentials rectangle die for the larger one. That was hot foiled with red foil using a previous released Spellbinders monthly Glimmer kit (May, 2021). The sentiment is from the newly released Sentiments for Everyday Glimmer set and was also foiled in red. I layered all my elements on an off white cardstock base.
Thanks for stopping by and have a lovely day!
Tuesday, June 29, 2021
Spellbinder/Jane Davenport Blog Hop
Hello everyone! Today I am participating in a blog hop sharing products designed by Jane Davenport for Spellbinders. You should have arrived here from Jessica Vasher's blog. If you did not start at the beginning of the hop on the Spellbinders blog you can click here. Spellbinders will be giving away 3 $50 gift certificates. Commenting is open until Sunday, July 4th at 11:59 and the winners will be picked from the comments left on the Spellbinders blog. The three winners will be announced on the blog hop post on Wednesday, July 7th. (Compensated affiliate links used where possible. Using these links earns me a small commission at no cost to you. Your support is appreciated!)
I created two cards for the hop using stamp sets designed by Jane Davenport as well as her Magic Wand ArtEssentials color pencils and Watercolor Set Neutrals ArtEssentials.
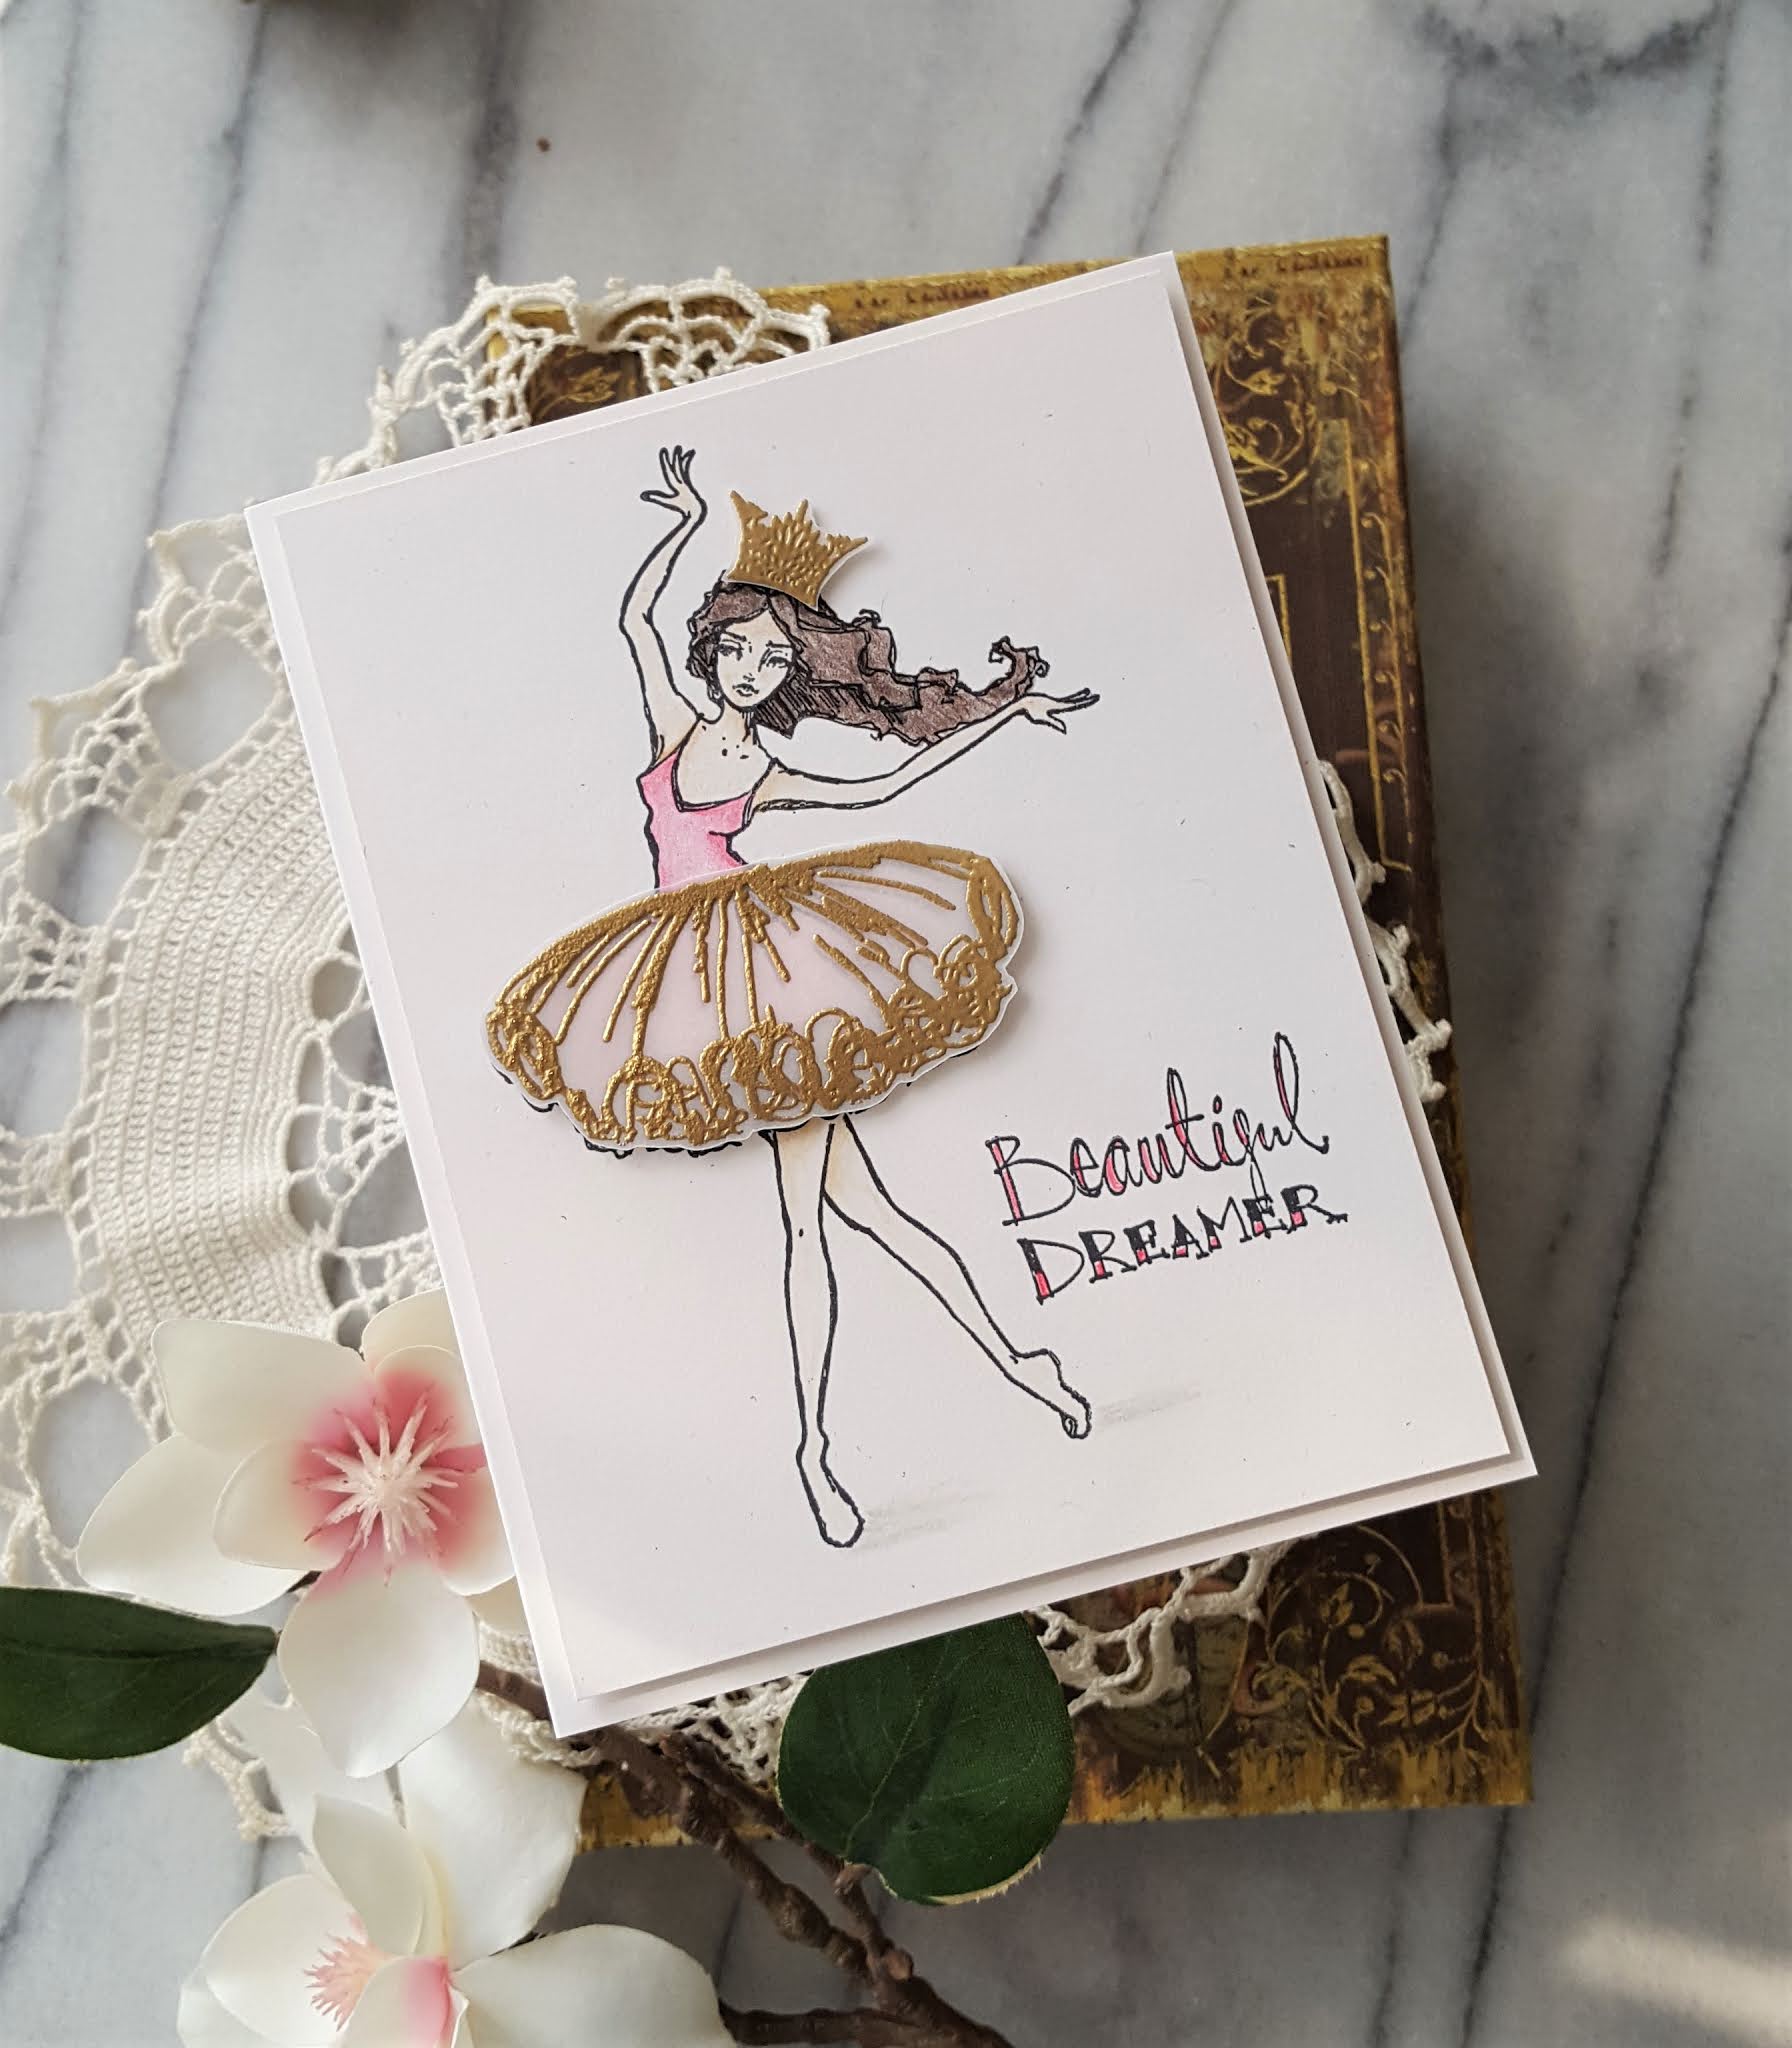
First up is a card I made with using the Magic Wand color pencils. I stamped the image from the Jane Davenport Beautiful Dreamer stamp set on Stonehenge white 100% cotton paper with VersaFine CLAIR Nocturne ink. I did have to do some masking as the tutu is a separate image. I stamped that first, masked it and then stamped the dancer. I'm not an authority on color pencils by any means, but oh my goodness I really enjoyed coloring with the Jane Davenport color pencils! After I was done coloring her I stamped the sentiment with VersaFine CLAIR Nocturne and then added the little crown in Delicata Golden Glitz. I die cut the image with the largest rectangle die from the Spellbinders Essential rectangles die set and adhered the panel to an off white cardstock base. I added a few little gold sequins for some sparkle.
For the second card I used the watercolor set. The colors are so vibrant and pretty and I really enjoyed painting with them. I think at some point I will be picking up the Brights set. Anyway I stamped the image from Walk with Courage on Fabriano Artistico white watercolor paper with VersaFine CLAIR Nocturne ink and then I foiled the circle down on side using my Glimmer hot foil system and the plate that was part of the May Spellbinders Glimmer kit (this kit is not available at this time). The sentiments are also from the same Glimmer kit and were foiled in black. You can't tell in the photo, but the circles were Glimmered in pewter foil. I then watercolored the image. I kept things very simple, but did do some shading on her face and arm. When everything was dry I die cut the image with the middle sized rectangle from the Essentials set and popped it up on a light gray cardstock base. I die cut the sentiments (with a die from the same Glimmer kit) and adhered them to the card front. I finished with some matte silver sequins.
You next stop on the hop is Heather Hoffman. Thank you for stopping by, I hope you are enjoying this blog hop and have a lovely day!
Sunday, September 27, 2020
Spellbinders cards...
Hello! Hope you are having a wonderful day! The stormy weather that we have had the last few days seems to have cleared up and the upcoming week is supposed to be really nice! That is fall in the Pacific Northwest! I have two cards to share that I made using Spellbinders products. First up is a card that I made using the newly released Jane Davenport for Spellbinders stamp set called Beautiful Dreamer. I was immediately drawn to this stamp set because I took ballet for many years when I was younger and the image of the dancer reminds me of that time in my life! I started by determining exactly where my dancer would go and then stamping her tutu. I created a mask for the tutu, placed it on top of the stamped image and then stamped my dancer. Originally I was just going to do the stamping as indicated, but decided to stamp the tutu a second time on vellum using watermark ink and gold embossing powder. This was then trimmed out to be placed on the stamped image. Colored the image very simply with Faber-Castell polychromos pencils and then adhered the vellum tutu. I real life you see a hint of the pink tutu through the vellum overlay. I stamped the sentiment and colored it with one of the pinks I used to color the dancer. I was going to stop there, but she was looking a little plain so I stamped one of the crown images that came in the set on vellum with the same gold embossing powder, trimmed it out and popped it up. The set also includes a pair of toe shoes. Next time I ink up this little dancer I'm going to give her some pink toe shoes!
The second card was made using the September Spellbinders small die kit. The die set is so very pretty, but also very delicate. I used the color combo from Fab Friday so I will be posting my card over there. I die cut the frame from light blue cardstock and then all the little flowers from navy blue and yellow cardstocks. They were all layered on and then I adhered the frame to a white cardstock base. I will admit that my diamond is not completely squared up! Next time I use this die set I will make sure to line things up better!
Thanks for stopping by and have a lovely day! Some affiliate links used in this blog post. Please know that I really appreciate it if you use my affiliate links to shop!
Monday, September 21, 2020
walk with courage...
Hello friends! I'm popping in today to share a project I made with a newly released stamp set from Jane Davenport for Spellbinders called Walk With Courage. This set has images of two women created in a stylized manner, as well as the sentiment and a few other smaller images. This card definitely made me think of those strong women I know who are walking with courage right now. I decided to do some simple watercoloring with the image and it turned into a bit of disaster so I started over and heat embossed the image using gold embossing powder. I pulled out some ephemera pieces from the Spellbinders July 2020 card kit called Vintage Mementos. The butterfly I used in the layout is a soft yellow so I went with that color for her dress, shoe and hair. I used distress ink in scattered straw for the coloring. Once the image was dry I trimmed it down and adhered it to a card base. I heat embossed the sentiment walk with courage in the same gold embossing powder on vellum and trimmed out the circle. I then spent some time arranging the sentiment strip and the butterfly to find an arrangement that I liked. It turns out that my arrangement is somewhat similar to the sketch at CAS(E) this Sketch so I will be posting her over there. I really like how this turned out. Now to determine who I will send this to in the future! I will be back later in the week with another card using a new Jane Davenport stamp set so stay tuned!
Tuesday, April 28, 2020
Creating with Jane Davenport Whimsical and Wild Stamps!
Hello! I hope your week is off to a good start! It is Tuesday (in case you have lost track of the days, lol!) and I'm popping in to share two cards that I made with stamps from the newly released Jane Davenport Whimsical and Wild collection. These stamps are based on her Whimsical and Wild Happy Hour Art Journal book. I am creating with the Panda Thank You and Brave Bear stamp sets. First up is a card using the Brave Bear stamp set. I stamped the main setimage on Canson watercolor paper with VersaFine CLAIR Nocturne ink. I let it dry and then colored the image with Tonic Studios AquaFlow pens. Once I was finished coloring the image and it was dry I deepened some of the shadows on the bear with a dark brown Polychromos color pencil. I die cut the image with the elongated octagonal die from the Becca Feeken Sentimental Finery die set. I then used the largest die from that set to cut some black cardstock and adhered it to a black cardstock base so that it is just an subtle look in the background. The main image was then popped up on foam tape. I finished by stamping the sentiment on black cardstock with VersaMark watermark ink, applying white embossing powder and heat setting. The sentiment was trimmed out and adhered to the card front. As the layout of my card is similar to the sketch from the Paper Players I will be posting it there.
The second card using the Panda Thank You was done in a similar manner except that I heat embossed the image with WOW! black embossing powder. I also used the AquaFlow pens to color the image. I haven't used the AquaFlow pens much and a couple had never been opened so coloring both images was a bit of a learning process for me. And I ended up using the orange color for the young girl's dress as part of that process. But I do like how it turned out. Once the piece was dry I decided to ink up the edges with watermark ink and apply embossing powder. I went with Platinum embossing powder for the edges. I decided to create a custom sized card so that my piece would have a border around it. My card size is 4 3/4 x 6. Because the piece was a little warped with all the watercoloring and heat embossing so I used foam tape to adhere it to my cardstock base. These stamp sets are a little outside my comfort zone as they lend themselves to mixed media, but I sure had a fun time working with them and going outside that comfort zone.Thanks for stopping by and have a wonderful day! Compensated affiliate links used where possible.


