"We do not remember days, we remember moments." Cesare Pavese

Friday, July 22, 2022

Spellbinders July Release Part 2

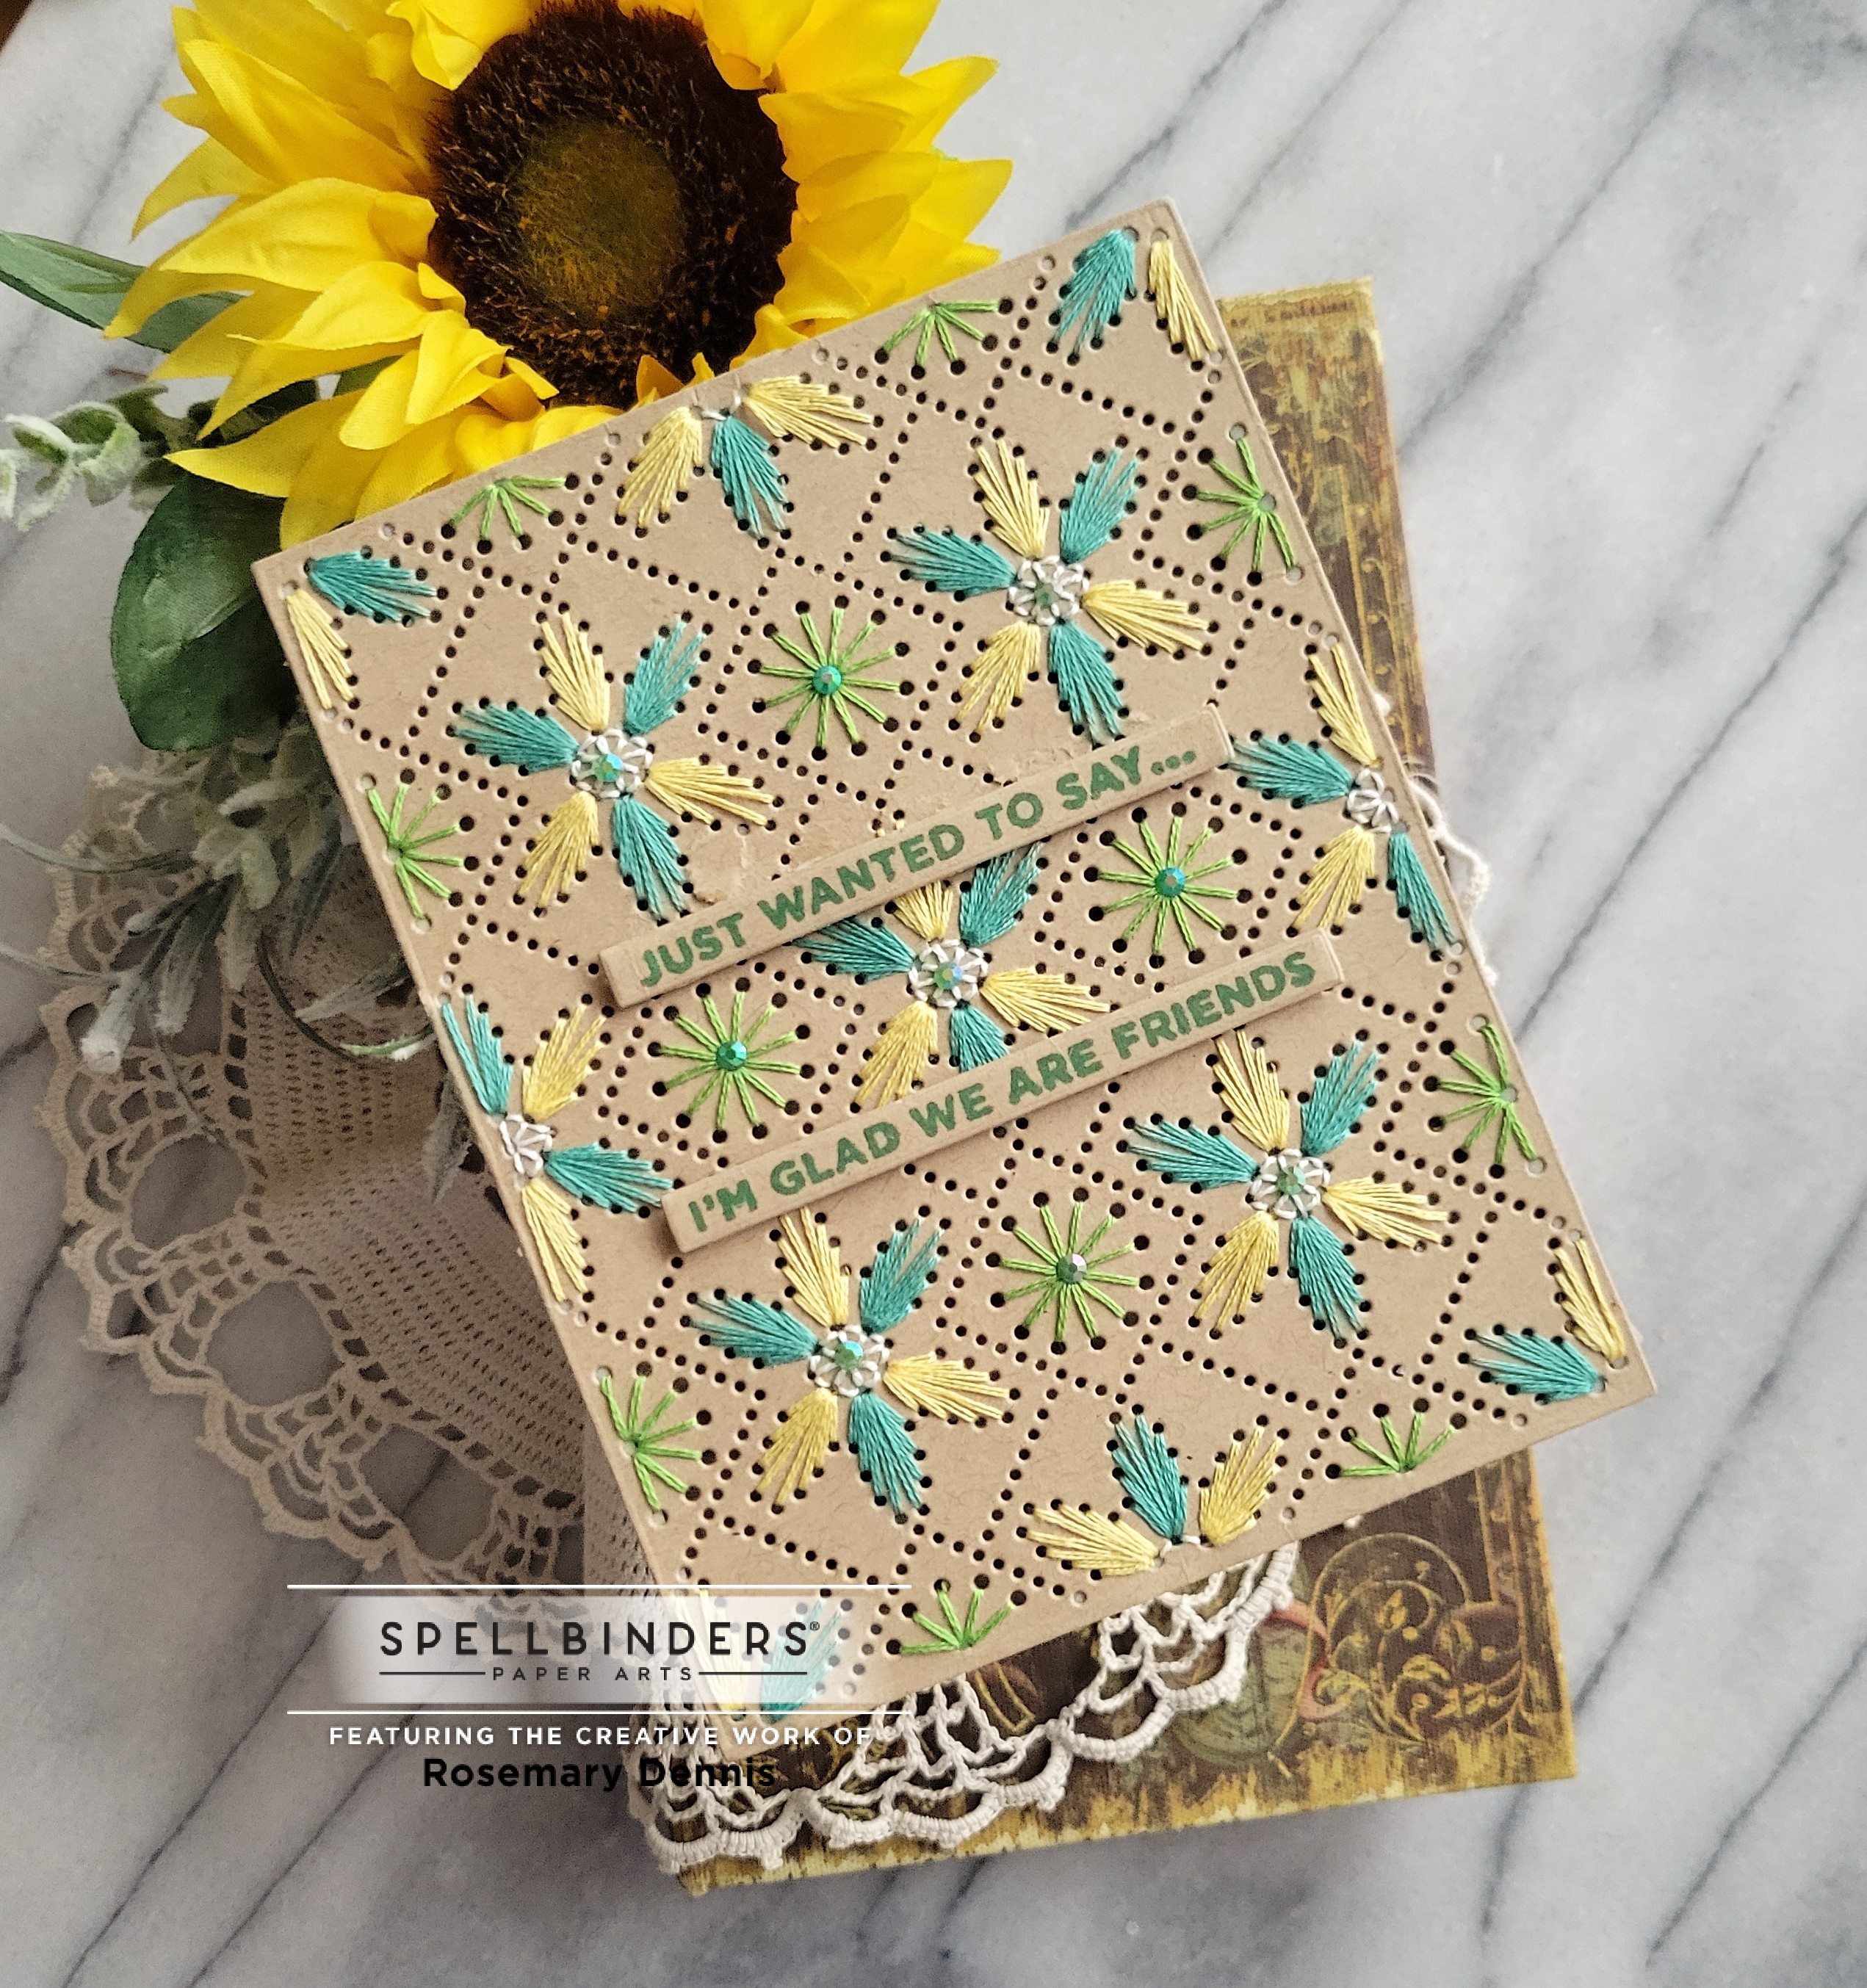
 Hello!  I'm back with two more cards I created with new products from the Spellbinders July release.  It is definitely Christmas in July right now!   Today's cards feature products from the Christmas Stitchmas collection.  My first card features the new Stitched Petal Diamond die and the colors from Color Throwdown.  (An affiliate linked list of supplies will be at the end of this post.  Using my links allows me to earn a small commission at no cost to you.  Thank you for your support.)


I am not going to lie, but this card front took a long time to stitch.  I could have made things easier if I had stitched in all one color, but I wanted to used the Color Throwdown palette because I love yellow, aqua and green with kraft.   So decided that the large flowers would feature some petals in yellow and some in aqua.  Once I finally got the stitching done it was easy to put the card together.  And as you may have noticed, this isn't a Christmas card.  I guess I could have gone Christmas with the colors, but decided to go with a friendship card.  I used sentiments from the Just Wanted to Say stamp set released last month and stamped then in VersaFine CLAIR green ink.  I finished off the card with tiny green gems.


This next card is definitely Christmas!  It features the new Stitched Joy die set and a new Glimmer plate called Plaid Tidings.  You will be seeing more of that Glimmer plate in a few days.   Before I started making card I cross-stitched.   Cross-stitching is kind of what got me into card making as I started cross-stitching Christmas cards for family and close friends.  I stopped cross-stitching when I started having problems with my right shoulder.  Recently I decided to give cross-stitching a try again and I have been spending more time doing that then card making!  Because I used to stitch I have alot of floss.  I found a bag of coordinating floss that I was going to used to make something with and decided to use those colors for the main stitched piece on the card.  The Plaid Tidings was foiled in red a on dark green cardstock.  I die cut the piece to be stitched from kraft and then got to work.  To tie in the dark green a bit more I die cut the letters from the same dark green cardstock as the foiled piece.  I thankful that the lighting was right so you can actually tell that it is red foiling.   The are extra little dies in the Stitched Joy die set so I die cut three of them to create my little stitched cluster on the 'o'.  I finished this card with red and gold Spellbinders gems.

Affiliated linked supply list:


Thanks for stopping by and have a wonderful day. 


Wednesday, July 20, 2022

Simon Says Stamp July Release!

 Hello everyone!  Did you see?  The July release from Simon Says Stamp is now available.  You can find the Dream Big release here.  Simon was so kind and sent me the beautiful Fab Floral Plate to create with.  I made two cards that I'm sharing in this blog post.  (A list of affiliate linked products is at the end of this blog post.  Using my links allows me to earn a small commission at no cost to you.  Thank you for your support.)  Here is my first card:


The first card shows the die as it was intended to be used.  I die cut it from some of the Simple Stories patterned paper from the July Simon Says Stamp July card kit and white cardstock.  I adhered them together and then added the piece to the front of a white cardstock base.  I saved all the little petals that were die cut from the patterned paper so I could use some on my second card.  I then die cut the SSS Etched Berry Branch from a buffalo check and light greenish patterned paper that is also from the card kit and layered the two.  They were adhered to the card front.  I stamped a sentiment from the You Shine stamp set in VersaFine Clair Nocturne ink, trimmed it down and adhered to the card.  I thought the front looked a little plain so I added Trinity Stamps Rainbow Reflections jewels to the card.   The sparkle is so pretty in real life.


For this card I wanted to go a little bit outside the box and so I decided to use those leftover petals to create some flowers.  I die cut part of the main die from scrap white cardstock to use to help me get the right spacing for the petals.  The flower stems were die cut using the Simon Says Stamp Etched Layered Daisy Stem dies.  The stems were cut from the patterned paper from the July card kit.   I will admit it took me awhile to get the layout of the flowers the way I wanted it to.  At first I only had the two taller stems, but after I stamped the sentiment from the You Shine stamp set I got the idea to just use a few of the petals.  I think it worked fairly well.  The flower centers were die cut with a small circle die from black paper, adhered to the flowers and then covered with Nuvo crystal drops in Morning Dew.  I really like the whimsical look of my little flowers. 

Affiliate linked supply list:


Thanks for stopping by and don't forget to check out the new Simon Says Stamp release!


Friday, July 15, 2022

Spellbinders July Release

 Hello!  The brand new Spellbinders release is available and it is filled to the brim with all kinds of wonderful Christmas themed products, as well as new cardstock colors, pop up glitter foam colors and much, much more.  You can see the entire release here.  I have two cards to share today.  (A list of affiliate linked supplies is at the end of this post.  Using my links allows me to earn a small commission at no cost to you.  Thank you for your support.)   Here are my cards:


My first card uses the new Winter Welcome Sled die set.  This die set is so much fun!  Along with the sled there are dies to create a pair of ice skates, as well as the dies I used to create my poinsettia and pine branches.  I used silver glitter cardstock for the base of the sled and then die cut rest of the sled from white cardstock.  After putting the sled together I created the poinsettia and pine branch cluster that I adhered to the sled.  I added the sled to a light gray cardstock panel that I embossed with a Spellbinders embossing folder called Forevergreen.  That folder was released last year.  The sentiment is from the Mini Christmas Sentiments Glimmer set and was foiled in black.  That set was also released last year.  I finished off the card with tiny crystals on the sled and a few more scattered around the sled.  I'm going to add this to the Simon Says Stamp Wednesday challenge of make your own background. 


This next card used the new Balsam & Berries stamp set, as well as the Mix & Match Holiday Greetings die set.  I heat embossed the large frame image from the set on Rainforest cardstock using red embossing powder and then die cut it with a rectangle die.  The sentiment was die cut multiple times from the red cardstock, stacked and then adhered to the card.   I'm a little "up in the air" about this card.  I like red and bright green together, but I think I have a little too much of it, lol.  Let me know what you think.

Affiliate linked supply list:

Thanks for stopping by and have a lovely day!

Sunday, July 10, 2022

rainbow leaves...

 Hello!  Seems like forever since I last posted on my blog.  I'm popping in today with a card for the current PoppyStamps challenge, as well as a card that I made for last week's Paper Players challenge that I posted on Instagram in order to get it entered in time.  I was excited to see that the card earned an honorable mention from one of the design team members.   


I think it was last fall or early winter that I picked up this PoppyStamps Maple Symphony die from a sale that they had.  They had tons of great deals and I got several more dies along with some freebies!  Gotta love freebies, lol!  Well, I hadn't had the chance to use it until now.  I don't often recreate cards using rainbow colors, but my sweet friend Greta is guest designing for this month's PoppyStamps challenge.  I just had to play along.   This gave me a chance to pull out this die and create a little rainbow of leaves swirling down my card.  And wouldn't you know it?  There were enough leaves for all the colors of the rainbow:  red, orange, yellow, green, blue, indigo and violet!  I used distress oxide inks for the leaves.  Since they are so small for the most part I was able to use residual ink left on various blending brushes!   I adhered a few layers of cardstock to the back of my top panel to get it more stability.  The leaves were inked and then popped back into their spots using thin foam squares.  The sentiment is a new Memory Box foil plate and die set that I foiled using matte gold foil.   Aren't you supposed to find gold at the end of a rainbow?   Very clean and very simple. 


My next card is the one that I shared on Instagram.  Take a look:


I used products from the Simon Says Stamp July card kit and did some very simple watercoloring with my Jane Davenport watercolors.  I just love the vibrant colors I get from her palettes!   After coloring the images I fussy cut them out as I don't have the dies, yet!  Again, another simple card, but I love how it turned out. 

Thanks for stopping by and have a lovely day!

Tuesday, July 5, 2022

Waffle Flower July Release Blog Hop!

 Hello everyone!  I am so excited because today I am hopping along with a fabulous group of talented designers sharing projects created with new products from the July Waffle Flower release.   Thank you to Nina, the owner of Waffle Flower, for having me as a guest designer for this release!  You should have arrived here from Dana Kirby's blog.  If you just dropped in, please head to the Waffle Flower blog to start at the beginning of the hop. Waffle Flower is giving away 3 gift certificates to the Waffle Flower store.  Leave a comment on the Waffle Flower blog and each blog on the hop for a chance to win.  You can find all the details on the Waffle Flower blog.   I have four cards to share with you today.  (I have an affiliate linked list of supplies at the end of this post.  Using my links allows me to earn a small commission at no cost to you.  Thank you for your support.)   Let's get started.


This first card was created with the new Layered Winter Bird die set and a sentiment from the Merry Christmas Duo stamp and die set.  Love this new stamp set.  So very versatile.  There are two large Merry Christmas sentiments in the set and both have matching dies.  Many of the sub-sentiments can be used on their own like I did with this one.  I decided that I was going to have my birds be cardinals so I die cut them from red, yellow and dark brown cardstock.  I assembled them and then added a bit of shading with a dark (actually called Cardinal!) red Copic marker.  The little branches they are sitting on are part of the die set.  Those were cut from dark green cardstock.   A panel of kraft cardstock was die cut with a rectangle die, the birds arranged where I wanted them so I could place the sentiment and stamp it.  I used VersaFine CLAIR Acorn ink for the sentiment.  I adhered my birds and branches to the panel and then added it to a red cardstock base.  A few little red gems were added for a bit of sparkle. 


For this card I used the new Layered Poinsettia stencil set.  Isn't it gorgeous?  I inked up one layer using Delicata Golden Glitz ink and the other with my favorite red ink, Cherry Cobbler from Stampin Up!  I made sure to let the Golden Glitz ink dry before adding the red ink so there was no smearing.  I finished off the card with the scripty Merry Christmas sentimetn from the Merry Christmas Duo stamp and die set.  I stamped the sentiment in watermark ink on vellum, applied gold embossing powder and heat set.  I then die cut it with the matching die.  May add a sub-sentiment at a later date. 
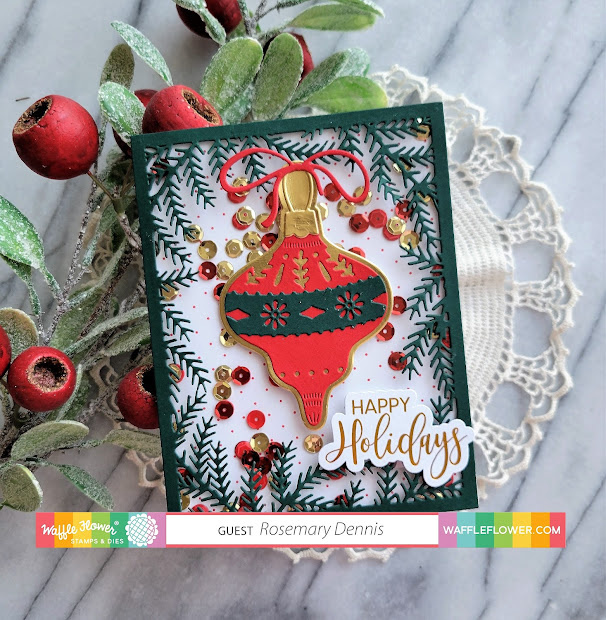

This card uses the new Layered Ornament die set as well as the new Pine Branch Panel die.   Again, I used traditional Christmas colors of red, green and gold.  I had all those supplies on my desk so I just decided to keep going with them.  That is until you see my last card!    I die cut the panel and the ornament from the various cardstocks you see.  I put the ornament together and then I was a bit stumped as what to do next.  A traditional shaker?  Nope... a edge to edge shaker!   I used some patterned paper from the Waffle Flower Half-Half Dot Christmas 5.5 x 8.5 pad.  I trimmed out the piece I wanted and then created my edge to edge shaker around it.  I added red and gold sequins and then sealed up my shaker.  I adhered the frame using glue just around the edges so the little pine branches pop up slightly.  I added the ornament and a die cut sentiment from the new Essential Christmas foiled die cuts.  

Now for my "odd duck" card, lol!


For this card I went with a blue, white and silver color scheme.  The stars background was created using a new hot foil plate called  Scattered Stars.   There is also a Scattered Stars die.   It doesn't look like it in this photo, but I did foil the stars with blue foil.  I have a photo below that captures the blue foil perfectly.  After foiling my white cardstock I die cut it down with a smaller rectangle die.   Aren't those little ornaments adorable?  They are from the new Small Ornaments die set.   There is a solid ornament and then an ornament with the detailing so you can layer them.  I used silver for the solid and dark blue for the detail layer.   The string were cut from silver.  I adhered my ornaments and then added a sentiment from Merry Christmas Duo that I embossed in silver on vellum.  I used the smallest Waffle Flower Nesting Rectangle Frames die to create my label.  
There is all the pretty blue foiling.  Your next stop on the hop is Jung AhSang.  I also wanted to let you know that all orders placed at Waffle Flower through Thursday, July 7th will receive a mystery gift.  No code required!   Waffle Flower also has a Last Chance sale category.  Make sure you check that out for savings up to 25%Thanks so much for stopping by and have a lovely day!

Affiliate linked supplies:

Spellbinders Platinum 6

Spellbinders Glimmer hot foil system

Spellbinders blue foil

WF Scattered Stars Hot Foil Plate

WF Merry Christmas Duo Stamp and Die combo

WF Layered Winter Birds die set

WF Pine Branch Frame die set

WF Layered Poinsettia Duo stencil set

WF Layered Ornament die set

WF Small Ornaments die set

Bearly Art Glue

Spellbinder Essentials Rectangles

Waffle Flower Half-Half Dots Christmas paper pad

Spellbinders Cosmic Sky cardstock

Wow Gold Embossing Powder

Ranger Super Fine Silver embossing powder

VeraFine CLAIR Acorn ink

VersaMark watermark ink

Delicata Golden Glitz ink

Wagner Heat Tool

Have a wonderful day!

Saturday, July 2, 2022

Spellbinders July Club Kits

 Hello everyone!  Can you believe it is already July?   Here in the northwest we don't often have really good summer weather until the middle of July, but this year has been really bad.   There were several days in June when I actually thought it was more like October!  Given our unseasonable weather it has been hard for me to remember that it is summer and that July is here!  Since it is the beginning of July that means all the new Spellbinders clubs have been released.   You can find all the information about the clubs and how to join right here.   Due to the fact that I accepted a crafty opportunity at the last minute (you will see those project in just a few days!) I was scrambling a bit to get my cards done with the July club products.   And I will say that as I made all these cards it was a case if anything can go wrong, it will go wrong!  (Affiliate linked products listed at the bottom of this post.  Using my links allows me to earn a small commission at no cost to you.  Thank you for your support.)   Anywhoo... here are my cards:


First up is my card featuring the July stamp and die club called Have a Chill Summer.  How cute are those popsicles?!   I used the colors from Color Throwdown and the sketch from Freshly Made Sketches for my very simple design.  I also used the July embossing folder called Geometric Stripes on the card.  The inks are from Pinkfresh Studio and after I stamped and die cut the popsicles I applied some watermark ink to the tops and a bit down one side, then added rainbow sparkle embossing powder and heat set.  The popsicle sticks are a two part stamp, but I only used the second part that adds the detail.  I stamped that on kraft cardstock with brown ink.  I die cut those and then adhered them to my popsicles.  I layered on the white embossed strip, the popsicles and that fun sentiment.   Clean and simple!

This next card features the July Glimmer club called Add a Stripe of Color.  Along with the foil plate there is a die that cuts out stripes.  I tried to incorporate the die into my card, but it wasn't working.  The foil you get this month is rose gold, but since my card is going to the new Color Hues challenge (thanks to the team for the runner up honor!) I used red and blue.  I even got the twist in there of stars and stripes!  Since it is hard to tell in this photo that I did in fact use red and blue foil I have a second one below that shows the true color of the foil.  The sentiment is from an older Glimmer club and the tage I used is from the Assorted Tags die set that was released a few months ago.  The stars were die cut from a strip of red foil that I had left over from a failed attempt at foiling the stripes in red. 


This final card showcases the embossing folder.  It ended up being red and blue, too, but I'm not going to add it to the Color Hues gallery.  I had a piece of red dotted paper on my desk and I thought it would be fun to emboss it and I do like how it turned out.  I added it to a card base and then stamped the sentiment from Just Wanted to Say (released in June) and the happy birthday from a stamp and die club from earlier in the year in blue because I still had the blue ink out.   I think I will add this to the Simon Says Stamp Wednesday challenge of anything goes


Affiliate Linked Supply List:


Thanks for stopping by and have a lovely day!