"We do not remember days, we remember moments." Cesare Pavese

Wednesday, April 29, 2020

It's Wednesday...

Hello and welcome!  It is Wednesday (and the last Wednesday in April... how did that happen?) and that means that I have a post up on the A Jillian Vance Design blog today.  Here is a little peek of my project:


Looks a little bright and happy to me!  I hope you will head over to the AJVD blog to check out the full project.  Thanks for stopping by and have a lovely day!

Tuesday, April 28, 2020

Creating with Jane Davenport Whimsical and Wild Stamps!

Hello!  I hope your week is off to a good start!  It is Tuesday (in case you have lost track of the days, lol!) and I'm popping in to share two cards that I made with stamps from the newly released Jane Davenport Whimsical and Wild collection.   These stamps are based on her Whimsical and Wild Happy Hour Art Journal book.  I am creating with the Panda Thank You and Brave Bear stamp sets.  First up is a card using the Brave Bear stamp set.   I stamped the main setimage on Canson watercolor paper with VersaFine CLAIR Nocturne ink.  I let it dry and then colored the image with Tonic Studios AquaFlow pens.   Once I was finished coloring the image and it was dry I deepened some of the shadows on the bear with a dark brown Polychromos color pencil.   I die cut the image with the elongated octagonal die from the Becca Feeken Sentimental Finery die set.  I then used the largest die from that set to cut some black cardstock and adhered it to a black cardstock base so that it is just an  subtle look in the background.   The main image was then popped up on foam tape.  I finished by stamping the sentiment on black cardstock with VersaMark watermark ink, applying white embossing powder and heat setting.   The sentiment was trimmed out and adhered to the card front.  As the layout of my card is similar to the sketch from the Paper Players I will be posting it there.


The second card using the Panda Thank You was done in a similar manner except that I heat embossed the image with WOW! black embossing powder.  I also used the AquaFlow pens to color the image.  I haven't used the AquaFlow pens much and a couple had never been opened so coloring both images was a bit of a learning process for me.  And I ended up using the orange color for the young girl's dress as part of that process.   But I do like how it turned out.   Once the piece was dry I decided to ink up the edges with watermark ink and apply embossing powder.  I went with Platinum embossing powder for the edges.  I decided to create a custom sized card so that my piece would have a border around it.  My card size is 4 3/4 x 6.  Because the piece was a little warped with all the watercoloring and heat embossing so I used foam tape to adhere it to my cardstock base.   These stamp sets are a little outside my comfort zone as they lend themselves to mixed media, but I sure had a fun time working with them and going outside that comfort zone.

Thanks for stopping by and have a wonderful day!  Compensated affiliate links used where possible.

Saturday, April 25, 2020

with love...

Hello!  I'm popping in with a clean and simple card for the following challenges:  Freshly Made Sketches, Color Throwdown and Reverse Confetti Stock Your Stash. I just love the Throwdown colors this week, as well as the fun clean and simple sketch from FMS! The Stock Your Stash challenge is to make a card for a mom, dad or grad.  Most of my Reverse Confetti stamps and dies lean more toward mom-type cards so that is what I made.  I used the following stamp sets and dies:  Wreaths Confetti Cuts, Butterfly Blossoms and Mod Floral Stack.  I stamped the little flower cluster from Butterfly Blossoms in Memento Tuxedo Black, colored very simply with two yellow Copics and two dark blue Copics and then die cut with the matching die.   I die cut the small wreath from the Wreaths die set from kraft cardstock twice and adhered them together.  I then die cut a piece of white cardstock with a rectangle die, wrapped it with bright green twine and tied a bow.  The wreath and flower cluster were then nestled in next to the bow.  I used some thinly cut foam tape to adhere the wreath and glue to adhere the flower cluster.   The sentiment (from Mod Floral Stack) was stamped using VersaFine Clair Nocturne and then the panel was adhered to a white cardstock base with foam tape.  I finished by adding a second little bow to the first one and applying Nuvo Crystal Drops in Morning Dew to the center of all the flowers and the little bow.


Thanks for stopping by!  I hope you have a lovely day!

Friday, April 24, 2020

Spellbinders/Becca Feeken Flourished Fretwork dies

Hello!  I hope you have had a good week and got the opportunity to be creative!  In between trying to do school with my 13 year old and all the other things I have to do around the house I am still managing to get my creative time in... YAY!  Today I have the pleasure of sharing with you a couple of cards that I made using newly released dies from Becca Feeken for Spellbinders.   Spellbinders was kind enough to send me two different sets.  First up is a card that I made with the Sentimental Finery etched dies.  There are four dies in the set, but for my card today I only used two.  If you have never seen Becca's dies before you should really check them out... they are amazing!  Full of detail and so easy to work with.  I die cut the large rectangle die from Memory Box glitter cardstock in a pale blue.  I then used the die that is like an elongated octagon to die cut white cardstock.  I adhered the glitter die cut to a white cardstock base using foam tape and then the white octagon to the center using glue.  I layered up lots of die cut ephemera pieces from the Feeling Hoppy March card kit in the center of the octagon.  (You can buy the ephemera pack separate from the card kit which is what I did.)  So quick and easy!  I'm going to post this card to the current Card Concept challenge.  This one fits the bill a little more than other card I posted a few days ago.  The category would most likely be clean and layered.


The second card uses the Fluted Tracery etched dies and this time I did something a little different.  I used the main die to create my card base!  The largest die in the set is slightly larger than an A2 sized card base so in order to create the card you will need to make a card base a bit larger than 4 1/4 x 5 1/2.  I made my base 4 1/2 x 5 1/2 from light aqua cardstock and that was the perfect fit as you have to hang part of the die over the fold so that you don't cut out two individual pieces, but a card base.  Hope that makes sense!  I then die cut that same die from white cardstock, but this time I included the insert piece that created the beautiful decorative border and leaves the solid center.  I adhered this to my card base.  There is a smaller die that cuts a beautiful emerald shape piece that is full of intricate cut work.  I die cut that from glitter cardstock and adhered it to the center of my card.  I finished out the card with a butterfly from the ephemera pack I mentioned above along with a sentiment that I foiled using my Glimmer Hot foil system and gold foil.  That sentiment was die cut with a banner die and adhered along with the butterfly.  I have included two photos so that you can see how the card stands.


These dies are just so gorgeous and I am so thankful to Spellbinders for having the opportunity to work with them.  Thanks for stopping by and have a wonderful day!  I have used compensated affiliate links for some of the products used in my blog post.   If you decide to purchase through my links please know that I appreciate it!
  

Wednesday, April 22, 2020

Simon Says Stamp Sunny Days Ahead Release!

Hey everyone!  I'm popping in to share a couple of cards that I made with a brand new background stamp called Tulip Background that is part of the new Simon Says Stamp Sunny Days Ahead release! You can find all the new products here.   To make my cards I decided to stamp the full background on some smooth Bristol cardstock with VersaFine CLAIR Nocturne ink and then color with ZIG Clean Color Real Brush makers in pink, purple, yellow and green, of course, for the stems and leaves.   Once all the coloring was done (and it took a long time, lol!) I let the piece dry and then trimmed it into two pieces.  Each piece was trimmed further to fit an A2 size card front.  On the first card I decided to die cut the Rainboot Planter die from Simon Says Stamp and color it in with ZIGs using the same colors I used for the background.  I adhered a strip of silver cardstock to the panel and then adhered it to my cardstock base.  The boots were adhered along with a sentiment from the SSS stamp set Hello Darling.   I finished with some Pretty Pink Posh sparkling clear sequins.  I'm going to add this one to the Simon Says Stamp Wednesday challenge of flower power.

My second card is similar to the first just put the panel on the other side of the card, added a strip of black cardstock.  I stamped the sentiment (from the SSS Stronger Together stamp set) on additional black cardstock with VersaMark watermark ink, applied white embossing powder and heat set.  The sentiment was trimmed down and adhered to the card front with foam tape.  Super, super simple.
Thanks for stopping by.  Simon Says Stamp is open for business so you can shop the new release.  Just remember... their ship times are a little bit longer than usual.  Happy shopping!


It's Wednesday!

Hey everyone!  Hope you are having a good week!  It is Wednesday and that means that I have a post up on the AJVD blog.  Here is a little peek:


I used a free digital image that you can find here and download.  I hope you will head over to the AJVD blog to check out the full project and to let me know what you think.

Sunday, April 19, 2020

flowers...

Hello!  Got a couple of cards done that feature flowers.  The first card I'm sharing is for April Altenew inspiration challenge and Freshly Made Sketches.   As I was thinking about what kind of stamp set I wanted to use for the Altenew inspiration challenge I remembered the lovely Dotted Blooms stamp set and so I decided to pull that one out.  When I pulled it out I discovered that I had already colored up the image using some distress inks on watercolor paper.  And I also discovered that I had colored the image using two of the colors from the inspiration color palette!  Mind you, I had colored this a couple of months ago!  Anyway, at the time I was trying to do some no line coloring and hadn't been happy with the results.  But when I pulled out the piece I decided that it wasn't too bad.  I did add a little bit more color to the image before die cutting it.  I die cut some white cardstock and then stamped the image on the panel with Altenew Silver Stone ink.  I then adhered the colored image over top slightly off set.   A strip of white cardstock was die cut with an AJVD Sentiment Strip 2.0 die and stamped with a sentiment from the set using the same Silver Stone ink.  I adhered the panel to the light gray card base with foam tape and then adhered the sentiment.


Since I was on a roll with Altenew stamp set I decided to pull out the Vintage Roses stamp and die set to create a clean and simple card for CAS(E) this Sketch and Color Throwdown.   This was my first time using the Vintage Roses stamp set.  I do not know how long I have had this set, but it has been awhile!  I started out stamping the flowers and leaves in my mini MISTI, but soon discovered that stamping the leaves with the MISTI was not working out so well.  So I switched to my good old acrylic blocks and that got the job done! The flowers were stamped in Altenew Rouge, Crimson and Velvet inks and the leaves in Limestone, Silver Stone and Industrial Diamond inks.   After diecutting all the flowers and leaves I determined how I would arrange the leaves so that everything would fit per the CTS layout and then adhered them behind the flower, trimming off a little bit of the stems for the small leaf cluster.  A white piece of cardstock was die cut with an AJVD rectangle die and then I laid out the flower clusters so I could determine where to stamp the sentiment.  Placed the panel in my MISTI and stamped the sentiment (from the Dotted Blooms) in VersaFine CLAIR Nocturne to bring in the black component of the CTD color combo.  Super clean and simple!


Thanks for stopping by and have a lovely day!

Thursday, April 16, 2020

Spellbinders Kaleidoscope Dies and a Sale!

Hello!  Hope you are getting lots of creating done as we stay inside to stay safe!  I have a couple of cards to share today that feature dies from Spellbinders.  I am a Spellbinders affiliate and they have been kind enough to send me product to work with and some of my favorite Spellbinders dies are their kaleidoscope dies.  They have a wide variety of these dies and I happen to have all of them (I think!).  My first card was made using the newly released Kaleidoscope Tile dies, as well as the Kaleidoscope Triangle dies.  Both these dies sets are perfect for making more masculine cards.  For my card I die cut the tiles and triangles from black, dark gray and medium gray cardstocks and then adhered them together.  I trimmed down a piece of white cardstock to fit a card front and then adhered the triangles to the panel as you see.  The tile was placed on it's point between the two triangles and adhered using foam dimensionals.  I foiled the sentiment with silver foil using my Glimmer machine, die cut it with the banner die and adhered it to the tile.  The finished panel was adhered to a medium gray cardstock base.

The second card uses the new Kaleidoscope Strip die set.  This die set is very unique in that there are two dies that can be used to die cut one of the layers or they can be used separately to die cut a piece of cardstock to create a place to layer your die cuts.  For my card I opted to use the dies to create the three layers of the kaleidoscope border.  I die cut the middle layer from a pretty bright pink foil cardstock and then top and bottom layers from white cardstock.  I cut an additional piece of the foil cardstock to adhere to my card base.  The border was then adhered to that.  I added a sentiment from the Spellbinders Stay Wild stamp set and then added white jewels to the top of the border strip.   I'm going to add this to the current Card Concept challenge for my clean and layered card that focuses on the bright pink color in and the detailing in the tray in the inspiration photo.


If you stuck with me this far I wanted to let you know that Spellbinders is having a big Spring Cleaning Sale.   There all kinds of deals with items starting at $1!  Please click on the banner below to head to the sale!

Thank you if you decide to shop the sale through my link!  I really appreciate it!  And thank you for stopping by today!


Wednesday, April 15, 2020

Hello!

Hello everyone!  I hope that everyone is well and staying safe.  Today is Wednesday and that means I have a post up on the A Jillian Vance Design blog.  Here is a little peek of my card:


Thanks for stopping by.  I hope you will head over to the AJVD blog to see the full card.  Have a lovely day!

Monday, April 13, 2020

sending you sunshine

Hello!  It is a brand new week and I have a card to share!  I did some more coloring with my Copic markers over the weekend and the end result was the card I'm sharing today and another card that will be on the AJVD blog on Wednesday.   This card is for the Paper Players challenge (a lovely color combo... my yellow is a little brighter than So Saffron) and the MFT sketch challenge.  Haven't played along with the Paper Players in ages.  Not because I haven't wanted to play along, but mostly because life just gets in the way, lol!  Anyway, I recently got the MFT Floral Fantasy stamp and die set and just had to color it up.  It helped that the shape of the floral image was perfect for the sketch.  After I finished doing my coloring I die cut it with an AJVD rectangle die and adhered it to a white cardstock base.  I didn't use any foam tape as I want this to be very flat so I don't have to put extra postage on it when I mail it out!  I stamped the sentiment using an MFT sentiment set, die cut with a slanted sentiment strip die (by MFT, but no longer available) and then die cut a second one from gray.  They were adhered together and then attached to my card with foam tape.  I finished with a few sparkling clear sequins from Pretty Pink Posh.


Thanks for stopping by today, stay safe and have a lovely day!

Friday, April 10, 2020

tulips and feathers!

Hey there!  Well... it is Friday... I think!  Like a lot of people I seem to be losing track of days.  I was out and about for a little bit and kept thinking that it was Saturday!  Anyway... I have a couple of cards to share and one features tulips and the other featuring feathers.  First up is the tulip card.  As I think I mentioned before I love tulips and when I saw the Reverse Confetti Tulip stamp set I had to have it.  I don't have the matching dies, yet, but hopefully will get them soon.  I used the main tulip image to stamp my own background and the colored all the tulips in the current colors from Color Throwdown.  I had actually started the card on Tuesday night before I knew what the colors would be and was going to color all of them pink, but thankfully it got too dark for me to color and so I was able to make the switch to coloring them pink, yellow and orange and then all the stems green, of course with my Copic markers.  After all that tulip coloring I needed some real tulips so when I had to make a trip to our local store I picked up some tulips that they had on special.  I got five bunches (five stems in each bunch) for $10.00!  Once the coloring was done I trimmed the panel down to fit a card front and because this is going to be a mother's day card for my mom I heat embossed the word mom in white on vellum, wrapped that around my panel and then added the second sentiment that I heat embossed in white on black cardstock.   I only trimmed the long sides of the panel so I added little strips of black cardstock to my card base to make the colors pop a little more.   This will be going to CTD, as well as the Reverse Confetti Stock Your Stash challenge (I went with mom).


The second card is for Freshly Made Sketches and the minute I saw it I knew I wanted to use a fun little stamp set that I recently got from Altenew.  As many of you know Altenew has several subscription programs and one of them is called Mini Delights.  I decided to subscribe and got the first stamp and die set which happens to feature a feather.   I started the card by inking up the center of my white cardstock panel with a chevron stencil from Altenew using Altenew Industrial Diamond ink.  I then stamped the feature twice using black ink (VersaFine CLAIR Nocturne) and then used the small image in the set to stamp the tip of the feather with the Industrial Diamond ink, as well.  The panel was die cut and then I arranged and adhered the feathers.  The sentiment is from the Altenew Leaf Canopy stamp set and was stamped using Industrial Diamond, as well.  This card is doing to someone who will probably be super surprised to receive it!  I can't wait to find out his reaction!

Thanks for stopping by, stay safe and have a wonderful Easter weekend!

Wednesday, April 8, 2020

It's Wednesday (I think... lol!)

Hello!  I don't know about you, but with all this stay at home stuff I have kind of lost track of the days!  But I have a post up on the A Jillian Vance Design blog and so that means that it is Wednesday!  Here is a little peek of my project:


I hope you will head over to the AJVD blog to check out my little spring time project.  Stay safe and have a wonderful day!

Tuesday, April 7, 2020

Spellbinders Special and Free Gift!

Hey there!  I'm popping in to let you know that Spellbinders is open for business and right now they have a couple things going on.   First up is your opportunity to purchase select past kits.  This includes the card kits, small and large die kits, Glimmer hot foil kits and Fun Stampers Journey stamp of the month kits.  Just click on the banner below to check out all the available kits.   This opportunity ends on April 12, 2020.


If you spend $75.00 on the Spellbinders website you will receive free with your order a set of Washi tapes valued at $45.00!   See banner below:


Thanks for stopping by, stay safe and have a wonderful day!  These links are compensated affiliate links.  Thank you if you decided to shop through my links!

Monday, April 6, 2020

Butterflies!

Hello!  I'm keeping busy creating in my crafty area... how about you?  Today I'm popping in with two cards that I made using the Spellbinders April Add-on die set called Even More Sentiments Etched die set.  This die set works back to several Spellbinders die kit of the month sets including the April Small Die Kit, t
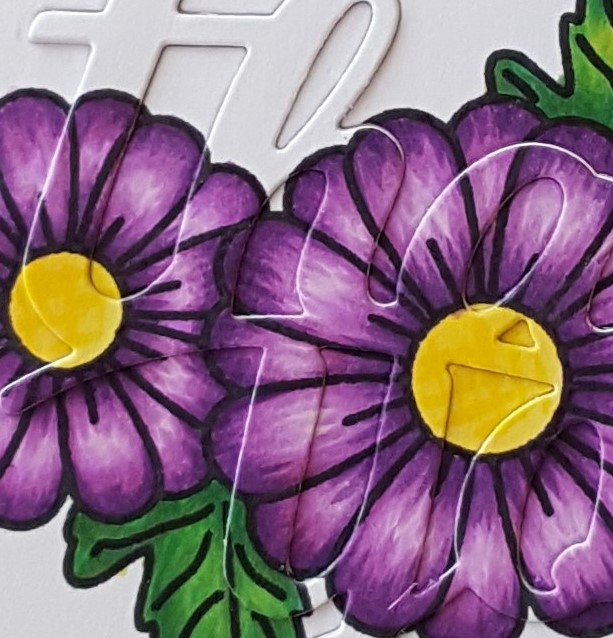
he April Large Die Kit and the November 2018 Large Die Kit.  I subscribe to the small die kit, but unfortunately I don't have my kit yet.  However using other Spellbinders products that I already have I created two cards using the die set.  First up is a card that I think could be used for several different occasions.  I combined the die that says 'so sweet' with a butterfly, flower and leaves that I foiled using my Glimmer Hot Foil System and pink foil.   The little stamped sentiment is from a Spellbinders sentiment stamp set.   I used a Spellbinders classic rectangle die, cut from white cardstock as my backdrop for the butterfly, flower, leaves and sentiments.  The die set includes eight sentiments and then a rectangular label that allows you to die cut the sentiments and then die cut a backing for the sentiment should to decide to do that.  I die cut the sentiment from pink cardstock and the label from white and adhered them together.  I created a card base using the same pink cardstock used to cut the sentiment and then layered up all the elements.

The second card is more masculine in feel, but I think it would work for both guys and gals even though it has a butterfly on it!  I used the Sedona emboss and cut folder and embossed some light gray cardstock.  I then die cut the sentiment grateful from teal cardstock, cut it out with the label die and then die cut a backing label from white cardstock.  The two were then adhered together.  I looked through my little box of goodies and found some Spellbinders butterfly stickers that were part of the Stay Wild card kit that I purchased several months ago.  I found one that worked well with the gray and teal and adhered that to the center of the embossed panel that I had trimmed down to fit the card front.   The sentiment was then adhered over the butterfly.  I created a card base using the same gray cardstock as the embossed panel and then adhered the panel.

Here is a photo of the two cards together:

 If you haven't tried out the Spellbinders clubs yet, you really should.  They are a really great value!

Thanks for stopping by, stay safe and have a wonderful day!

Saturday, April 4, 2020

Simon Says Stamp Blog Party!

Hello and welcome to the Simon Says Stamp United We Craft blog party!  I hope that you are enjoying the huge list of crafters that Simon Says Stamp has put together to inspire you to get creative during this difficult time!  Just like you I have lots of wonderful Simon Says Stamp products in my stash and today I decided to use the absolutely lovely Beautiful Day stamp set that was released several years ago in one of Simon's monthly card kits.  I just love flowers and butterflies and since this set includes butterflies I just had to get the kit.  Today's card is pretty simple.  I stamped one of the leaf images on white cardstock with Memento Tuxedo Black ink and then colored simply with Copic markers in shades of green.  I was going to color the butterfly in blues or purples, but the decided to go with a color that I don't often use:  orange.  I wanted something bright since I will be sending this out to cheer up someone I care about and what is brighter than orange?   I stamped the butterfly in Tuxedo Black on white cardstock and then colored it.  I die cut it with the matching dies and then added Nuvo Crystal Drops in Morning Dew to the butterfly and let it dry.  The sentiment was arranged on the panel, stamped with VersaFine CLAIR Nocturne, then I trimmed down the panel and adhered it to a Fog cardstock base.  I finished off the card by adding the butterfly and sequins in orange and yellow.


Thanks for stopping by, stay safe, get creative and have a wonderful day!

Thursday, April 2, 2020

just for you...

Hey there!  Hope you are staying busy as we all stay home right now!  I did some more Copic coloring the other day and this time I colored up some tulips using the Simon Says Stamp Sketch Tulip Bouquet stamp set.  I love most flowers, but I love tulips the most.  I even had them in my wedding bouquet!   I don't have any blooming in my yard right now.  I'm too lazy to plant them in the fall, lol!  But I can have them blooming all year round on my cards, right?  This card is for Color Throwdown and Freshly Made Sketches.  I had colored the tulips before I knew that two of the colors from the Throwdown combo would be pink and green!  Love it when things turn out that way.  I just had to figure out how to incorporate gray and kraft into my design to complete my card.  I think I managed to do a pretty good job of working it in!

Thanks for stopping by and stay safe!

Wednesday, April 1, 2020

Happy April!

Hello and happy first day of April (April Fool's Day, too!).  I hope that everyone continues to stay safe during this kinda crazy time!  I have a post up on the A Jillian Vance Design blog today and here is a little peek of my card:


I hope you will head over to the AJVD blog to check out the full project and thanks for stopping by!