"We do not remember days, we remember moments." Cesare Pavese

Wednesday, March 30, 2022

happy wednesday!

 Happy Wednesday everyone!  Crazy to think that March is almost over!  I'm over on the AJVD blog today with another guest designer post.  Here is a little peek:


I hope you will head over to the AJVD blog to check it out.  Thanks for stopping by and have a lovely day!

Saturday, March 26, 2022

Just saying hello

Popping in today with a clean and simple card for Freshly Made Sketches and Color Throwdown.  The inspiration photo at CTD features carrots and I almost went that route but decided to feature green more than the other two colors of tan and orange.  Take a look:

I used all Simon Says Stamp products for my card.  The berry stem is called Etched Berry Branch.  I die cut it from bright green and kraft cardstock.  I adhered them together offsetting slightly so you can just see the kraft peeking out from behind the green.  The striped images are from a Simon Says Stamp set that is no longer available called Hello Darling.   It was stamp in tan and orange inks.  I adhered the berry stem and then added orange enamel dots to the stem.  The sentiment is from another Simon Says Stamp set called Sunshine Flowers.  I stamped it in tan ink and then adhered my panel to a kraft cardstock base.  


Thanks for stopping by and have a great day!

Thursday, March 24, 2022

a kind word...

 Hello!  I'm popping in today with a card for a couple of challenges:  Sunday Stamps and the Paper Players.  The challenge at the Paper Players is clean and simple with flowers so I just had to play along. 


I used the color combo from Sunday Stamps to color up my Honey Bee Stamps tulip bouquet with Copic markers.  I was able to use most of the Sunday Stamps color, but I did add in a little bit of blue.  I hope that is okay.  I used my Birch Press Pinpoint Radial plate to add interest to my background.  The sentiment was stamped in VersaFine CLAIR Nocturne ink and die cut with the matching die.  I die cut the bouquet, popped it up on the background along with the sentiment.  To fill in the background a little more I added lots of sparkling clear sequins. 


Thanks for stopping by and have a lovely day!

Wednesday, March 23, 2022

guesting at a jillian vance design!

 Happy Wednesday everyone!  I'm guesting over on the AJVD blog today and I'm sharing a card that I made with one of their newly released floral sets.   All the sets are just gorgeous!  Here is a little peek:


I hope you will head over to the AJVD blog to check out my card.  Thanks for stopping by and have a lovely day!

Tuesday, March 22, 2022

Simon Says Stamp Hello Gorgeous Release

 Hello everyone!  I'm popping in to share two cards that I made with a die from the new Simon Says Stamp Hello Gorgeous release.   SSS was so kind and sent me the fun Stained Glass Sun die to create with.   You can find the full release right here. (Affiliate links used where possible.  Using my links allows me to earn a small commission.  Thank you for your support.)

For the first card I created a clean and simple shaker.   I have some fun patterned papers that feature rainbows, suns and lots of bright colors.  If you look closely at the patterned paper behind the shaker window you can see it has little suns on it!  I filled my shaker with seed beads in white and silver, as well as clear and white sequins.  The sentiment is from the Simon Says Stamp Sunshine Flowers stamp set and was stamped in a fun bright yellow ink.  I'm going to add this to the Simon Says Stamp Wednesday challenge because I do love to make a shaker card!


For the second card I used more of the patterned paper and did some stenciling with stencil butter. How fun is that paper?  I just love it!

For this card I decided to use the Stained Glass Sun die to create a stencil.  First attempt didn't work out.  With the second attempt I decided to use vellum and then used Pixie Spray.  That worked better, but I created a problem for myself when I added glitter to the yellow Stencil Butter that I used.  It stuck everywhere, lol!  Thank goodness I had an oval die that I could use to cut out the stenciled sunburst.  You can see a little bit of the glitter around the edges.  I die cut the patterned paper, adhered it to a bright pink cardstock base, add the stenciled oval and the added the die cut sentiment.  The sentiment was made with two different Simon Says Stamp dies:  Hello and Sunshine.  I'm going to add this to the challenge at Global Design Project.  Their challenge is a theme one:  rainbows!  I think I have that covered, lol!

Make sure you check out the Hello Gorgeous release.  Thanks for stopping by and have a great day!

Saturday, March 19, 2022

because you're worth it...

Hello!  I back with another card using new products from the March Spellbinders releases.  Today's card is super simple.  I used the current Color Hues combo of yellow and pale teal, as well as the layout from Freshly Made Sketches.  (Affiliate links used where possible.  Using my links allows me to earn a small commission at no cost to you.  Thank you for using my links.  I used my Platinum 6 for all die cutting and embossing and my Glimmer for the hot foiling.)


All of the products used today are from the new Celebrate You collection from Spellbinders.  Specifically, I used the new Splatter embossing folder, the Assorted Tags die set and a sentiment from the Celebrate You Glimmer Sentiments hot foil plates.   I die cut the light teal cardstock with a Spellbinders Essentials rectangle die and then embossed it with the Splatter embossing folder.  I was going to use the entire piece, but my first idea wasn't doing it for me so I decided to trim the piece down and adhere it directly to my white cardstock card base.   In the Assorted Tags die set is a thin die that you can use to create a piece of twine to thread the tags on.  I die cut two and adhered them to the light teal strip for a little bit of added interest.  My bloggy friend, Linda, had created several different cards using both the embossed and debossed sides of cardstock.  I thought it would be fun to deboss two of the tags I die cut from yellow cardstock and then foil the sentiment on the third tag.  I adhered the tags as shown and then added a little twine bow to the tag with the sentiment.  Like I said... super simple!

I hope you will check out the new Spellbinders release.  Thanks for stopping by and having a lovely day!

Wednesday, March 16, 2022

Paint Your World...

 Hello and happy Wednesday!  I'm popping in with two cards that I created with more new products from the Spellbinders March release.  The two cards were created with products from the Paint Your World collection by Vicky Papaionnou.  These new dies are just so much fun! (Affiliate links used where possible.  Using my links allows me to earn a small commission at no cost to you.  Thank you for your support.  I used my Platinum 6 for all the die cutting and my Glimmer for all foiling.) Take a look at what I made:


This first card was created with the Butterfly Burst die set and was inspired by the sketch at Sunday Stamp so I will be adding it to the gallery there.  I wanted to make the butterflies the focus of the card so I decided to keep things predominately white.  I also wanted bright spring colors so I went with orange and yellow.  I used Carved Pumpkin and Mustard Seed distress oxide inks to ink up white cardstock.  I die cut the butterflies and the ends of the brush bristles from the inked up pieces.  I die cut all the other parts of the card from white cardstock.  Then I got to assembling the card.  To add just a little bit more color I determined where the paintbrushes would be, and how the butterflies would cascade out and then added a little bit of the Carved Pumpkin and Mustard Seed behind where the butterflies will be.  I added all my elements to the card front.  I foiled the sentiments from an older Glimmer sentiments set and added those to the card.  


Both cards took me a while to create, but this second one took the longest!   However, I think the end results was definitely worth all the time it took.


For this card I was sort of thinking of the paintbrushes being the ground that the tulips are planted in.  They could also be viewed as pots, your choice!  This die set is called Artful Tulips and I die cut the brushes from kraft and the bristles of the brushes from two shades of green cardstock (Peridot and Rainforest from Spellbinders).   I had a "live and learn" situation arise as I was putting the paintbrushes together.  I decided to adhere the bristles first and then add the tulip leaves second (die cut from a darker green).  This was a mistake, but like I said it was a "live and learn" moment!  I made it work by figuring out how to tuck the leaves into the bristles.  The tulips were die cut from Spellbinders Pink Sand and Dahlia cardstocks, assembled and tucked into the bristles and leaves.  I finished with a little tag that is from another new die set called Assorted Tags.  I used an Essentials rectangle to die cut Raindrop cardstock and then added some stenciled clouds using white pigment ink.  I adhered the paintbrushes with foam tape and added the little butterfly (die cut using a butterfly die from Butterfly Burst set).   The sentiment is from a Spellbinders stamp of the month from May of last year and was stamped on the small tag.  I adhered the tag and the little twine bow.  Going to add this to the Simon Says Stamp Wednesday challenge as dies are a favorite thing.   I'm also going to add this to the new Card Concept challenge of spring garden.  I guess my card is clean and layered and uses the overall idea of a spring garden.  And looking at the color palette... I have all the colored represented in my card! 

I hope you will check out the new release.  Thanks for stopping by and have a lovely day!

Monday, March 14, 2022

Spellbinders March Release

 Hello everyone!  Today is release day over at the Spellbinders website and this release is a fantastic one!  You can find all the new products right here.  Today I am sharing three cards that I made with beautiful new stitching dies.  Lets get started! (Affiliate links used where possible. Using my links allows me to earn a small commission at no cost to you.  Your support is appreciated!  I used my Platinum 6 die cutter for all the die cutting and the Glimmer hot foil system for the foiling.)


This new stitching die collection is called Spring into Stitching and this card uses two of the new stitching dies:  Stitched Petal Frame and Stitched Medallion.  I used the Stitched Petal Frame as a backdrop for the Stitched Medallion die.  The medallion was die cut from heavy weight vellum and then I added the stitching with light pink embroidery floss.  I used three strands of floss for all my stitching.   I die cut the Stitched Petal Frame from Spellbinders Pink Sand cardstock twice, stacked them and then adhered them to a card base made from Spellbinders Silver Fox cardstock.  I used foam adhesive behind the points where I added the stitching in order to pop the medallion up.  To make sure that the foam dots were secure I added a bit of Bearly Art glue to the foam dots.  To finish off the card I added the foiled sentiment to the center and light pink pearls.   The foiled sentiment is from the Celebrate You Glimmer Sentiments from the Celebrate You collection.


Given that I am a clean and simple kind of gal I think that this card is my favorite of the three cards I made.  This card was created with the Stitched Flower die set.  I die cut the flowers and leaves from white cardstock and then did my stitching in light blue and medium blue for the large flower, yellow for the small flower used as the center and a medium green for the leaves.  I foiled geometric outline image (from Geo Foliage Glimmer hot foil plates and dies from the Yana's Blooms collection) in silver foil on Spellbinders Glacier cardstock.  The panel was die cut with an Essentials rectangle and adhered to a white cardstock base.  I foiled the sentiment from the Celebrate You Glimmer plates in silver as well.  Everything was adhered to the panel and then I finished with a few Fashion Silver embellishments.   I'm going to add this card to the current As You See It challenge of spring flowers and the Simon Says Stamp Wednesday challenge


This card took me the longest to make because of all the stitching.  Because I used to do a lot of cross-stitching I have alot of embroidery floss.  I was able to find three shades of  teal for all the stitching to match the background cardstock that I used.  I die cut the Stitched Petal Frame from white cardstock and then did all the stitching.  For the background I used Spellbinders Waterfall cardstock.  I used the lightest shade for the center, the small corner areas and the little round areas.  The medium shade was used for the petals in the center of the panel and the darkest shade for the outer petals.   I love how it turned out!  I finished with foiled sentiments from the Celebrate You Glimmer sentiments set and tiny white gems from the Color Essentials Crystal Mix gems pack

I will be back in a few days with a more projects created with new products from the March release!  Thanks for stopping by and have a lovely day. 

Thursday, March 10, 2022

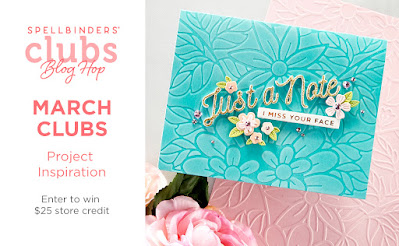
Spellbinders March Club Kits Blog Hop!

 Hello!  Today a multitude of designers are sharing projects created using products from the Spellbinders March club kits.  And because this is a blog hop there are prizes to be won!  Make sure to leave a comment on the Spellbinders blog by 11:59 MST on March 13, 2022 to be in the running to win one of three $25 gift certificates!   You should have arrived at my blog by way of Erin Thompson's blog.   (Compensated affiliate links used where possible.  Using my links allows me to earn a small commission at no cost to you.  Thank you for using my links.)


The gnomes in this month's stamp and die club kit are just too darn cute!  This time I used the he gnome from the set along with the fun little balloon.  I stamped everything with Memento Tuxedo Black ink and then colored everything with Copic markers.  I pulled the colors from the rainbow patterned paper that you see in the background.  Once I was done with my coloring, I die cut all the images with my Platinum 6 die cutter.  The patterned paper was die cut with the largest rectangle from the Essentials rectangles set and adhered to a white cardstock base.  I thought the patterned paper was so cute that I didn't want to completely cover it up so I die cut a vellum rectangle using a smaller Essentials die.  A strip of green patterned paper was cut, adhered across the bottom of the rectangle and then I added my little gnome and his balloons.  The sentiment was stamped in a dark blue ink and then cut with the matching dies.  I love having the matching dies!  Once I adhered the sentiments I added foam tape behind all of my elements so I could pop up the vellum panel.  I also added Nuvo drops in Morning Dew to the polka dots on the balloons, the tops of the balloons and the gnomes hat.  Since my card has a spring theme I'm going to add it to the Paper Players challenge.  I will also add this to the Simon Says Stamp Wednesday challenge


Your next stop on the hop is Karen Yagel.  You can check out all the club kits here.   Thanks for stopping by and have a lovely day!

Saturday, March 5, 2022

hang in there...

 A quick post of a card that I made for Freshly Made Sketches and the Altenew monthly challenge for March.  I already posted this card to the Altenew challenge through Instagram and would have posted it to Freshly Made Sketches that way, too, but for some reason I am not able to when I use Instagram.  Anyway, the card is pretty simple and straightforward.

For a few months over a year ago I was getting the Altenew Paint-a-Flower monthly subscription.  When I realized that I was not getting the opportunity to actual make anything with the stamp sets I was getting I decided to cancel.   One of the sets that I did get was PAF Chamomile.  Fun fact about me:  I absolutely cannot stand Chamomile tea.  In fact I do not like most herbal teas.   I stamped the image with Tuxedo Black ink and colored with Copic markers.  I added a little bit of grounding with a gray Copic and then stamped the sentiment with VersaFine CLAIR Nocturne ink.  I trimmed the panel and some dark gray cardstock for a mat per the FMS layout.  The layers were adhered together and then I attached the panel to my card front with foam tape.  Easy peasy lemon squeezy!

Thanks for stopping by and have a lovely day!


Tuesday, March 1, 2022

Spellbinders March Club Kits

 Hello and happy March everyone!   I'm popping in with a few projects I created with the Spellbinders March club kits.  Most specifically I'm using the Glimmer kit and the stamp and die kit.   Normally I also share a project with the embossing folder, but unfortunately due to supply issues I did not receive the March embossing folder.  It is beautiful and you can still check it out here.   Now... on to my cards! (Affiliate links used where possible.  Using my links allows me to earn a small commission at no cost to you.  Thank you for using my links.   My Glimmer hot foil system was used for all foiling and the Platinum 6 was used for all die cutting.  I also used Bearly Art glue.)


This card was created with the March Glimmer kit called Glimmer Edge Roses.  I foiled the rose and leaves using Aura foil, colored it with Copic markers and then die cut it with the matching dies.  The background piece that the rose sits on is an older Spellbinders kaleidoscope die.  I die cut it from bright blue and white and then adhered them together.  I used a rectangle die from the Fluted Rectangles die set to cut additional bright blue cardstock.  I adhered the bright blue panel to a white cardstock base and then added the square piece, the rose and leaves.  I foiled the sentiment with Aura foil, die cut it and adhered it to the card front.   As many of you know the people of Ukraine are under attack.  I used the colors of the Ukrainian flag for my card.  I will be posting this card to the current Color Hues challenge.

For my second card using the Glimmer Edge Roses I used the leftover foil and one of those plates that allows you to use that leftover foil to create a different kind of look.  I really love how the roses and the leaves turned out.  I used the layout from the Paper Players so I will be posting my card there.   Another older Spellbinders kaleidoscope die set was used as a backdrop for my roses and leaves.  One layer was die cut from Glacier cardstock and the other from white.  I used one of the dies from the Fluted Ovals die set and cut it from Spellbinders Glacier cardstock.  The sentiment is from a stamp set by Sushma Hegde and was embossed in gold on vellum.   


Since I still had my Copics out when I began to make my card using the March stamp and die kit I decided to continue to use them and add bright blue to the yellows and greens I was already using. This kit is appropriately called Spring Gnomes.  I just love how my little she gnome turned out!  After coloring and die cutting all my pieces I added some Nuvo Jewel drops in Morning Dew to the centers of the flowers and the little polka dots on the banners.  I then die cut some smooth bristol cardstock with an Essentials rectangle die and did a little ink blending and stenciling.  I used Mowed Lawn distress oxide ink for the grass and Salty Ocean for the sky/clouds.  More of that bright blue cardstock was used for the larger rectangle that I adhered to a white cardstock base.  I added the scene rectangle to the card front along with the sentiment from the set.   I was so happy to see that Spellbinders included dies that cut out the sentiments with this month's kit!  


Going to post this little cutie to the current Simon Says Stamp Wednesday challenge before it closes! Thanks for stopping by and have a lovely day!