"We do not remember days, we remember moments." Cesare Pavese

Thursday, February 10, 2022

you make me happy...

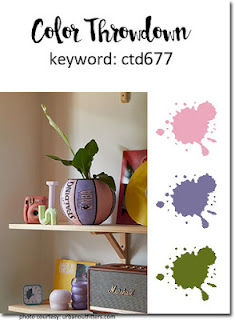
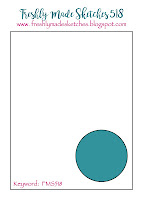
 Hello!  It has been awhile since I last posted.  I have been working on things, but I can't post them just yet.  I finally got sometime the other day to make a quick card for my two favorite challenges:  Freshly Made Sketches and Color Throwdown.


One of the stamp companies that got me going on my stamping journey was Stampin Up! and I still love their products.  I recently purchased their Rainbow of Happiness bundle.   Generally I'm not drawn to rainbow stamp sets, but there was something about this bundle of products that caught my attention.  I started by die cutting the small rainbow die from blue and gold cardstock.  I trimmed down the blue piece into a rectangle, applied washi tape to the back and then inserted the gold rainbow pieces inside.  I used green glitter cardstock to die cut the little rainbow border, as well as a little heart.  White cardstock was die cut with an AJVD Stitched Dot rectangle die and then temporarily adhered it to the card front so I could determine where to place the sentiment.  I stamped the sentiment using VersaFine CLAIR Twilight ink and then adhered the border and the rainbow piece.  I finished with the little green glitter heart and some tiny gold stars that I found in my stash. 


Thanks for stopping by and have a lovely day!

Thursday, February 3, 2022

Spellbinders February Club Kits

 Hello!  I'm popping in to share cards I have made with the February Spellbinders club kits.  You can find out all about the club kits right here.    My cards this month all share a similar look because I decided to use some patterned paper from P13 for all the cards.  First up is my card using the embossing folder kit. (Affiliate links used where possible.  Using my links allows me to earn a small commission at no cost to you.  Thank you for your support.)  Spellbinders has several different offers going on and an opportunity to win a limited edition aqua Platinum 6 die cutter.  Make sure to scroll down to the bottom for all the details.


The name of this month's embossing folder is Sketch Floral and as you can see it has a really lovely floral design.  When I started making my card I had tried a technique Jennifer McGuire shared where you ink up the embossing folder with a brayer.  I don't know if it was the ink I used or what, but the technique didn't work that well for me.   So I moved on to another technique she shared where you ink up the embossed cardstock directly using the brayer.  I flipped the embossed piece over to the flat side and inked up the panel.  I then trimmed it down to fit my card front.  I used some P13 The Four Seasons Summer patterned paper to hot foil the sentiment from the February Glimmer kit with my Glimmer using bright pink foil.  The P13 patterned paper is very heavy weight and smooth perfect for getting a good result when foiling.  I then wrapped the strip around my embossed panel and secured it in the back.  I adhered my panel to a white cardstock base.  Since I still had part of the embossed panel left I trimmed out one of the flowers, adhered it with foam tape and then added some Spellbinders Crystal Mix gems in white to the center of the flower. 


For this card I focused on the Glimmer kit of the month called Anytime Glimmer Sentiments.  Some of the sentiments are in the pretty script font that you see on my card and they are meant to be at an angle.  As you can see I was able to place this particular sentiment in a straight line fashion (hope that makes sense!).  I also used bright pink foil to foil the sentiment.  I trimmed down a piece of the patterned paper with an Essentials rectangle and then added the two thin strips of bright pink paper.  The panel was then adhered to my card front.  I foiled sentiment on another piece of the P13 patterned paper with my Glimmer, die cut it with a smaller Essentials rectangle and adhered it to my card front.  I finished the card off with a little flower and two leafy stems from the February stamp and die kit.  The Crystal Mix gems were also added to the small flower. 

The final card is a mini slimline.  I used up scraps that I had from making the two other cards to make this one using the February stamp/die club kit.   I stamped the cute typewriter from the stamp set on bright green patterned paper using a bright green ink.  I then die cut it using my Platinum 6.  The sentiment was stamped on a scrap of the patterned paper that didn't have a pattern on it with the same bright green ink and then die cut with another die from the kit.  When you die cut the typewriter it cuts a slit which allows you to slip the small rectangle through and secure in the back.   I also stamped a little heart from the stamp set on bright pink patterned paper with a dark pink ink three times and die cut them.  The little flowers were created using another scrap of the patterned paper with no pattern on it.  I used the same bright green and dark pink inks.  I adhered my patterned papers to my mini slimline card base and then popped up the typewriter and the little hearts.   The flowers were then tucked in behind the typewriter.  I finished by adding Glossy Accents to the hearts and typewriter keyes.  I think this fits the Simon Says Stamp Wednesday challenge so I will be posting it there. 

Currently Spellbinders is offering 25% off on many Spellbinders Essentials items.  Click on the banner to check out the sale. 


If you want a chance to win one of three limited edition aqua Platinum 6 click on the banner below to enter.  Good luck!


Thanks for stopping by and have a lovely day!

Tuesday, February 1, 2022

butterflies...

 Hello and happy first day of February!   I'm popping in with a card for the Pinkfresh Studio monthly challenge and the Paper Players.   I often want to play along with Paper Players, but the week speeds by and I find that the challenge has ended.   However, when I saw their current challenge (a tic-tac-toe one) and it featured butterflies I just had to play along.   The Pinkfresh Studio challenge this month is to use one of the challenges from 2021.  I'm using the one from September of leaves and greenery.


I recently purchased some acetate from Spellbinders that is for hot foiling so when it arrived I had to try it out.  My first couple of tries didn't work, but the hotter my Glimmer got the better result I got.  I foiled the Pinkfresh Studio Small Butterflies hot foiled plate using Aura foil from Spellbinders.  I will tell you that die cutting the acetate is not the easiest thing to do.  I'm glad that I have a Gemini Jr.   That thing exerts enough pressure to cut through the acetate fairly well.   I then just die cut the butterflies from some patterned paper from P13 and adhered the butterflies together so you could see the foiling better.  For the Paper Players challenge I chose the row of butterflies, birthday and stenciling.  I used the Daisy Wreath stencils from Pinkfresh Studio for my stenciling and just used the leaves stencils.  I used Bundled Sage distress oxide ink was used for the stenciling.  The leaves border die was a free one from Scrapbook.com.  It is a collaboration between Scrapbook.com and Pinkfresh Studio.   I used more patterned paper from P13 to die cut the leaf border and the circle.  The rectangle was die cut from off white cardstock using a Pinkfresh Studio Folk Edge rectangle dies.  I layered everything up, added the foiled sentiment (from Pinkfresh Studio) and then finished off the butterflies with some little white gems. 


Thanks for stopping by and have a lovely day!


Friday, January 28, 2022

Happy Friday!

 Hello and happy Friday!  I'm popping in with two more cards I made with products from the Spellbinders January release.  First up is a card for Color Throwdown that I made using the Be Bold Color Block Big Congrats die. (Compensated affiliate links used where possible.  Using my link allows me to earn a small commission at no cost to you.  Thank you for your support.)
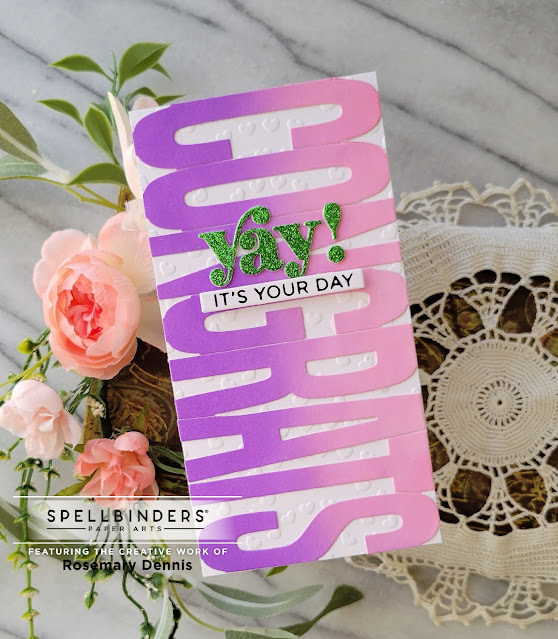

I did some inkblending with distress oxide inks in Kitsch Flamingo and Wilted Violet on smooth bristol cardstock.  I let the piece dry for a few hours before die cutting with the Big Congrats die.   I was going to just adhere the letters to a white piece of cardstock, but decided to use the new embossing folder from the Spellbinders embossing folder club for some additional interest.  This particular word die creates a mini slimline card.   I have some pre-made slimline card bases so I used one and simply trimmed it down so the that letters fit perfectly.  I adhered the embossed background and then added the letters.  The small word was die cut from green glitter cardstock and twice more from white.  I adhered then all together and added them to my card front.  I finished things off with a sentiment that I foiled in black with my Glimmer.  I die cut it down and added it to the card front with foam tape.  


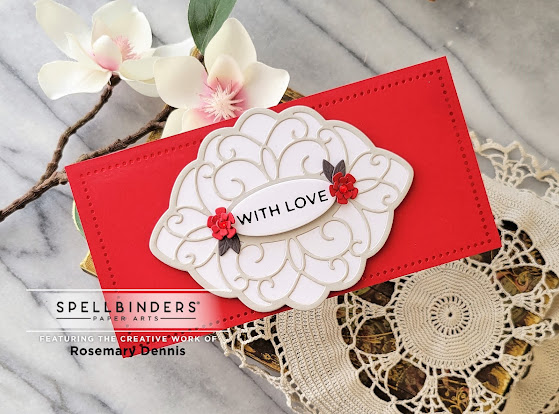
The second card was created using a new die set from Becca Feeken for Spellbinders.  This die set is called Filigree Marquis from the Classically Becca collection.  For this card I used the colors from the current Sunday Stamps challenge.  I started by foiling a medium piece of red cardstock with red foil to create a darker red.  I used a Spellbinders Glimmer club kit from last year called Mini Nested Glimmer Dots.    I adhered my panel to a mini slimline card base.  I then die cut two of the layering dies from the Filigree Marquis set from light gray cardstock.  I cut the base layer by itself from white and adhered them together.  The sentiment was foiled in black with my Glimmer, die cut with the small oval from the set and adhered to the center of marquis shaped die cut.  I attached this piece to my card front.  I finished by die cut small flowers from the red cardstock and leaves from a dark gray cardstock and adhering them to the card front.   Little red gems were added to the center of the flowers.


I think I will enter this one in the Simon Says Stamp Wednesday challenge, as well. 

 
Thanks for stopping by and have a lovely day!

Sunday, January 23, 2022

More Spellbinders January Release...

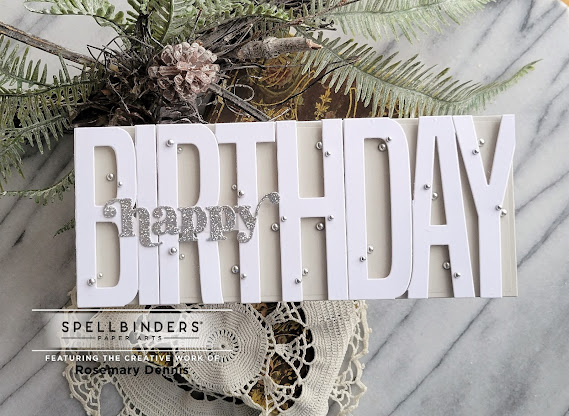
 Hello!  I'm popping in today with a couple of cards that I made using more products from the Spellbinders January release.  First up is a card created with the Be Bold Color Block Happy Birthday die set. (Compensated affiliate links used where possible.  Using my links allows me to earn a small commission at no cost to you.  Thank you for your support.)

The Be Bold Color Block line is so fun and Spellbinders has upped the ante by adding more word dies, as well as other products.  I decided to make a very clean design and used the Color Hues combo of  silver and white.  I die cut all the large letters from white and the smaller ones from silver glitter cardstock.  I  die cut Spellbinders Silver Fox cardstock with a slimline die from the Hemstitch line and adhered that to a slimline card base.  I then adhered the large letters with foam tape and the small letters with glue.  I finished by adding lots and lots of Spellbinders Fashion silver pearls. 


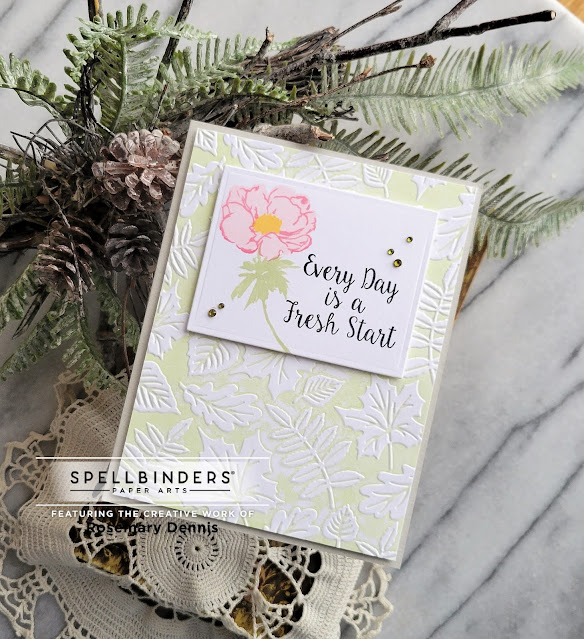
The second card uses new stamps from Sushma Hegde's collection called Into the Wilderness.  The set I'm using today is called Layered Anemones.  I used the layout from Freshly Made Sketches for my simple designed.  I used the largest flower and stem from the set for my card.  I stamped the flower using two shades of pinkish ink from Altenew and then a medium yellow ink from Altenew for the center.  The stem was stamped with a light green ink from Altenew.  The sentiment was stamped with VersaFine CLAIR Nocturne.  I die cut my panel using a classic Spellbinders rectangle nestabilities die.  I added a few green gems from the Color Mix Essentials line from Spellbinders.   The background was created by using a brayer to add ink to the Spellbinders Falling Leaves embossing folder.  I used Memento New Sprout ink and then ran it through my Platinum 6.  I really like the soft look it provides. 


Thanks for stopping by and have a lovely day!


Sunday, January 16, 2022

two cards to share...

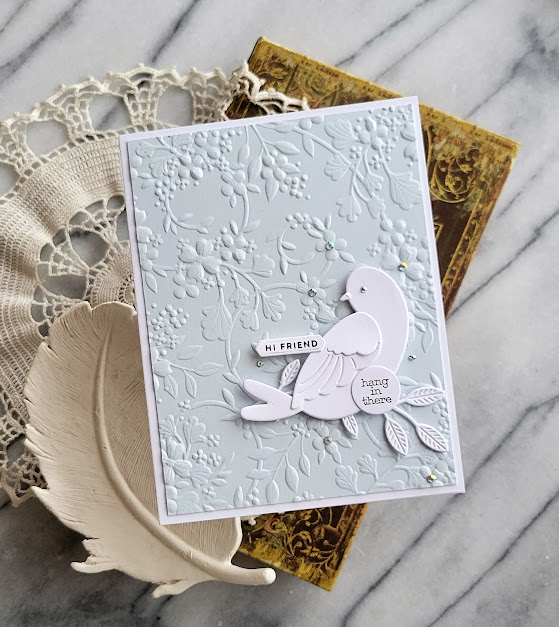
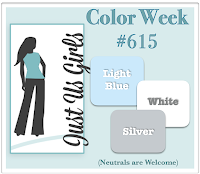
 Hello!  Popping in with a couple of cards that I had a chance to make and both feature new products!  First up is a card for Freshly Made Sketches.  I just checked and my card also works for the current JUGs challenge.

One of my dearest friends contacted me to let me know that her mom is in the hospital with a whole range of problems.  It is a particularly trying situation for my friend because her mom lives in Chicago, and she lives here in Washington state.  Her mom has already undergone one surgery and will have another once she has recovered enough to do the next surgery.  My friend is hoping to go to Chicago for a quick visit in between those surgeries.  I created this card with her in mind.  I had the soft blue background that I embossed with a Simon Says Stamp embossing folder already made.  I die cut the Memory Box Serene Bird & Branch from white cardstock and assembled the bird.  I arranged everything per the FMS layout.  I added the sentiments from the Simon Says Stamp Thanks & Encouragement Word Mix stamp and die set and some tiny silver Spellbinders rhinestones. 

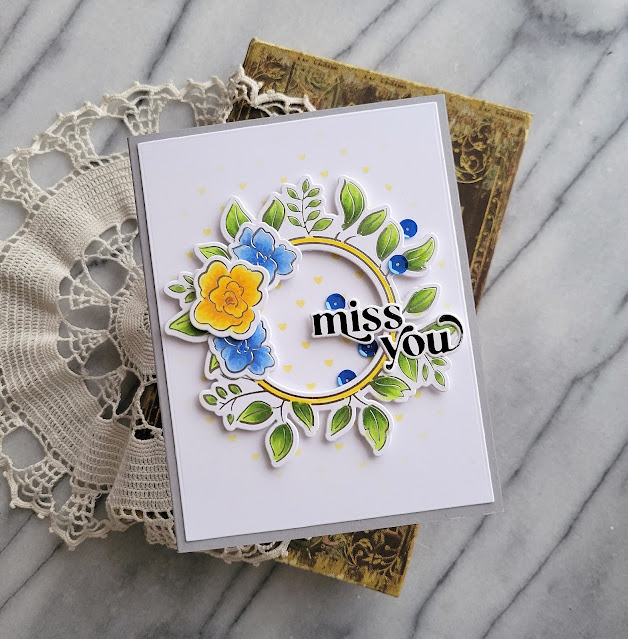
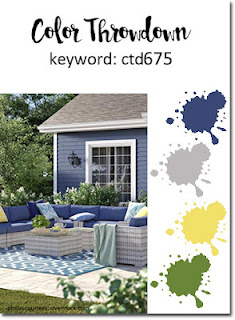
This next card is for Color Throwdown and the Simon Says Stamp Wednesday challenge.  I think I will be sending it to my niece who is away at school in Texas.  She just went back after being home for the holidays, but we all miss her!

I used one of Simon Says Stamps new hot foil plate and die combos called Sketched Rose Wreath.  I hot foiled the wreath and flowers with my Glimmer using silver foil.  I then die cut everything and colored them with Copic markers in yellows, blues and greens.  After that was done I die cut my panel of white cardstock and did a little bit of stenciling with a tiny heart stencil and Squeezed Lemonade distress oxide ink.  I finished with the sentiment from Pinkfresh Studio that was foiled in black and some blue sequins.  I was so fixated on the blue, green and yellow colors from the CTD combo that I forgot about the gray!  I guess my silver foiling could fit that, but to bring in the gray I added my panel to a gray cardstock base!  Problem solved!  


Thanks for stopping by and have a lovely day!