"We do not remember days, we remember moments." Cesare Pavese

Showing posts with label patterned paper. Show all posts

Tuesday, July 21, 2026

faded memory lane...

Hey there!  Popping in with a project that I have been wanting to make for several months.  I finally got the chance a few days ago and now I'm sharing it with you!   Let's look at what I made.


At heart I am a clean and simple girl, but on occasion I love to create projects that are more shabby and vintage.  This is one of them.  I previously shared a card I made using products from the 49 and Market Faded Memory Lane collection.   Even though the products are shabby and vintage I was able to create something clean and simple with the products.  This project, however, lands more on the vintage and shabby side for sure and I love how it turned out.  


One of the products I purchase was a pack of laser cuts and one of the laser cuts was the large floral piece that fills the upper left corner of my project.  Since I'm not a fan of slimline cards or card sizes larger that an A2 I knew I would not be able to use that laser cut unless I made something different:  a decor piece.  I started with a Tim Holtz frame and base.  I covered the base with patterned paper from the Faded Memory Lane 6x8 paper pack and then painted the frame with a light beige paint.  When the paint was dry I brushed on a light sage green making sure to not add too much.  When that was dry I added some Gilded Foundry wax and heat set it.  I also added some Gilded Foundry wax to the patterned paper in the upper right corner.  Finally, the foundry wax was also added to all the laser cut images I used.  Did I go a little crazy with the foundry wax?  Maybe, but I love it!  


I layered on all of the images and then added the little sentiment strips that are also laser cuts.  The frame was added using collage medium, a heavy object placed on top and it was allowed to dry.  Once dry I added the large floral piece by gluing parts to the frame and using 3d foam pads in areas that are inside the frame.   

I'm going to add this to the Simon Says Stamp Wednesday challenge of fabulous florals and the Simon Says Stamp Monday challenge to use text.  Thanks for stopping by and have a wonderful day!


Saturday, June 20, 2026

I'm So Grateful...

 Hello!   Well, it has been a while, again, since I last posted.  This seems to be my pattern:  Post several cards then disappear for a week or so.  Don't think the pattern will change anytime soon, either.   It isn't that I'm not making things because I am.  I just can't share what I have made yet.  But I'm here today with a "I just want to make something" card.  I will be sending this one off to Color Hues (yellow and black), Freshly Made Sketches and Just Us Girls (moodboard).   So, let's see what I made.


I had been going through some cards that I had made a long time ago and came across a card that I had made using this pretty Memory Box die set called Cottage Flower Stem.  I decided that I need to find that die set and make another card with it.  And here it is, lol!  I die cut just the flower from yellow cardstock and the flower with stem from white cardstock.  I did add a little bit of distress oxide ink in yellow to the flower center and to the bottom layer to provide a little contrast.  For the FMS portion of the card I die cut a piece of patterned paper from the Simple Stories Simple Vintage Indigo Garden using a small rectangle die.  I created the flower and then adhered that to the white flower stem.  The rectangles were layered on a white cardstock panel and then I added the flower.  I thought about having the leaves be black, but decided against that as I felt I had enough black already.  I did add some pale yellow sequins, tho.  Finished with the sentiment from the Simon Says Stamp Thanks, Mom stamp set. I thought about creating a card for JUGs using lots of flowers, but decided that this single yellow flower worked for the challenge.   Let me know what you think.


Well, that's it for me.  Thanks for stopping by and have a wonderful day!

Monday, June 8, 2026

Masculine Cards

 Hello!  I'm popping in to share two cards that I made for my mom to give to her grandsons for their birthdays.  Both were made with products from the 49 and Market Wanderlust Explorer collection.  I will be posting the cards to the following challenges:  The Paper Players (masculine), Simon Says Stamp Monday challenge (masculine) and Simon Says Stamp Wednesday challenge (masculine, as well).  The products I used while aren't from Tim Holtz have similar vintage vibe.  Let's have a look at the cards. 


Both cards have the exact same layout.  For this card I used a large airplane laser cut, as well as a backpack and a camera.  The patterned paper from the Wanderlust Explorer features a map in the background.  I layered everything on a kraft cardstock base and then added the gold foiled Memory Box sentiment.

For the train I used a patterned paper that features faded images of tickets and travel schedules.  The large train laser cut was paired with a steamer trunk, another vintage camera and the "happy birthday" sentiment from Memory Box.


That's it for me.  Thanks for stopping by and have a wonderful day!


Thursday, June 4, 2026

Guest Designing for Not 2 Shabby!

Hello!  Popping in to share my first of four cards I will be sharing this month as a guest designer for Not 2 Shabby Shop.  They have lots of fun and playful branded products in their shop, as well as products from other companies.   You can check them out here.  I was contacted by them a few months ago about guesting for them and said yes!   This month I will be creating with products from their monthly paper pad club, as well as using some of their preprinted sentiment strips.  Let's look at the first card I created.


 Aren't those little turtles just the cutest things?  This card will be going to one of my great nieces for sure!  I did make a bit of a mistake in that I should have put the smallest turtle (the one with the ice cream cone) in the center, but sometimes you can still make a rookie mistake, lol.   The turtles are from the Sweet & Playful Turtles ephemera pack and the papers are from the Cute Sea Critters and Playful Prints 6x6 paper pads.  I used the layout from Freshly Made Sketches (did flip it upside down, tho) for the card.  Finished with the sentiment (from Simon Says Stamp) that I stamped on the same paper I used for the main background.  I will also be posting this over at Seize the Birthday as it does have the topping of sweet treats!  This card just makes me smile.  How about you?


Well, that is it for me today!  Thanks for stopping by and have a wonderful day.


Thursday, May 7, 2026

Go Navy!

 Hello!  Can't believe it is already May!  Time is just flying by and honestly, I don't like it!  But what can I do?  Not much.  I'm popping in today to share two cards that I made for someone who is graduating from the United States Naval Academy on May 16th of this year.   I have a niece who is currently finishing up her junior year at the Naval Academy, and it is her boyfriend, Frank, who is graduating.   My sister (my niece's mom) asked if I could make a card for him from the family and I said, yes!  Then she told her daughter and suddenly I was making two!   It was a little nerve wracking to come up with an idea for the second card, but I accomplished the task.  So, let's see what I created.


First up is the card that I made that is from the family.  A couple of summers ago I purchased some 49 and Market products called Summer Porch.  They have a nautical theme and I thought for sure I could find something to use on the card and I was in luck!  I knew that Frank rowed for one of the Naval Academy crew teams so I was excited to see the set of oars in a pack of chipboard images.  There was also the anchor!   I die cut some of the more nautical themed patterned paper using the postage edge dies from Pinkfresh Studio as a background.  I used dark blue patterned paper to die cut the USNA and 2026.   The little blue rope was from a pack of ephemera.  I adhered the USNA and 2026 to one of the postage background pieces and then stamped the "class of:" in between.  I then layered on all of the various pieces.  I finished with the Naval Academy motto Ex Scientia Tridens (which in Latin means From Knowledge, Sea Power) and Semper Fidelis.  I included Semper Fidelis because Frank will be commissioned as a Marine Corp officer instead of a Naval officer when he graduates.  I will be adding this one to the current Die Cut Diva's challenge of celebrations


This is the card that I made for my niece to give to Frank.  I hope that she likes it.  My sister did so that is a good sign!  I'm going to put this card into the current JUGs challenge because it does have a big die cut sentiment.  I used the Naval Academy colors of navy and gold for the letters and numbers.   I die cut both and then adhered them together offsetting so that the gold showed.  I was very careful when positioning everything using my T-square ruler to keep everything straight.   I used the computer to generate the word "ACADEMY" printing it in dark blue and then trimming it down and backing it with the same gold cardstock used for the lettering.   I added the Naval Academy motto (also computer generated) as well as the "class of:".  The finishing touch was the anchor charm and the little gold heart.  The charm was a bright shiny silver, but I was able to tone it down by adding some distress foundry wax in the color Gilded.  I heat set it and then wiped most off it off.  Love how it turned out.   I really hope that Frank likes the cards.  


Well, that is it for me.  Thanks for stopping by and have a wonderful day!


Wednesday, December 3, 2025

December 25th

 Hello!  Posting has been sporadic, again, lol!  Have been making things and will be sharing some of them on Friday so stay tuned!  I did want to try to play along with JUGs before they take a break until January.  The challenge there is anything goes with stenciling.  I'm also playing along with the Paper Players which is a tic tac toe board.  I went with stenciling, Christmas and patterned paper.  Finally I will be adding this to the SSS Wednesday challenge.   In case you didn't know it is now DieCember over at Simon Says Stamp and so the Wednesday challenge is to use dies.   Whew that was a lot, lol!  Let's take a look at what I made.


Going through my stuff (I have too much!) and I found the Waffle Flower Postage Collage Christmas stencil set.   I honestly did not know that I had even purchased it.  Is that bad?   Well, now I know I have it and so I put it to use making today's card.  Since I was pressed for time I used the suggested distress ink color combo on the Waffle Flower website.   Blue wasn't included in the color combo, but I added it in for the sky behind the house and the reindeer.  Once I was done stenciling I also added some light gold embossing paste to the image with the trees.     I die cut the entire panel with the Postage Collage die and then layered it on some dark green plaid patterned paper.  To bring in a little bit more patterend paper I die cut some red with tiny dots using the smallest poinsettia die from an older Waffle Flower die set.   I created my poinsettia and added a drop of Nuvo drops in Limoncello.  Once that was dry I added everything to a card base along with a Memory Box sentiment tab and I was done.


Well, that's it for me!  Thanks for stopping by and have a wonderful day.


Saturday, September 27, 2025

Papertrey Ink September Release - Part 2

 Hello!  I'm back to share three more cards that I made with products from the Papertrey Ink September release.   With all these beautiful Christmas themed products to work with I'm sure to get most of my Christmas cards made for the season!  Let's have a look at what I made.


This first card was made with the new Into the Blooms: Snowdrops die set, the This is Big Happy Holidays stamps and dies, the Stitched Snowflakes cover plate die, Rounded Rectangle dies and In Frame: Ovals dies.   I die cut the snowdrops from green and white cardstock and then added a little bit of Broken China distress oxide ink to the white pieces.  The stems were die cut from a medium green cardstock.  I adhered all the piece together with liquid adhesive and thin foam squares in a few places.  I then die cut pale blue cardstock with the largest In Frame: Ovals die.  I kept the two pieces together by securing them in place on the back with washi tape.  White cardstock was die cut with the largest Rounded Rectangle die and then run through my die cutting machine with the Stitched Snowflakes die.  I adhered that to a pale blue cardstock base and then layered on the ovals and the snowdrops.  I finished with the Happy Holiday sentiment.   I didn't stamp the sentiment and then die cut it as I wasn't sure I could get the die to line up correctly.  So, I die cut first, left the die cut in place, aligned the sentiment on top and then stamped using black ink.  Worked like a charm.  I die cut additional layers, adhered them together and then adhered the sentiment to the card front with liquid adhesive and thin foam squares.   A little bit of sparkle was added as well using Rock Candy glitter.   Going to add this card to the Simon Says Stamp Wednesday challenge of anything goes.


For this card and the third one I went with a traditional red and green theme with kraft instead of white as the background for a more homespun feel.  This card uses Love to Layer Christmas Tree dies, Fresh Greens hot foil plate, Rounded Rectangle Pierced dies and a sentiment from the Merry Motifs stamp and die set.    I had recently found a sheet of watercolor cardstock that I had used to create this dark green backgound using distress mica sprays.  I decided to use it for my Christmas tree.  I used Memory Box patterned paper from one of their Christmas pads for the garland and little ornaments.  I decided to bring gold into the mix with the star, little sparkle ornaments and the gold hot foiled frame.  The background needed a little something else, so I used one of the smaller pierced Rounded Rectangles to die cut the patterned paper I used for the garland to place behind the tree.  The sentiment was stamped in a dark red and die cut.  I then die cut a second layer from gold foil cardstock and adhered it behind the sentiment slightly off set.  It looks so pretty in real life. 


 I think this final card really has a homespun feel too it.  Again, done in red and green with kraft.  I think I should have maybe embossed the sentiment black, but there it is in white!  This card was made with Build a Christmas Tree dies, This is Big:  Happy Holidays sentiment set and the Rounded Rectangle Stitched dies.  Memory Box plaid cardstock was used for the background.   After die cutting the garland from a red cardstock I decided to jazz things up a bit by using red glitter cardstock for the ornaments.  The kraft bows dial the glitz back a little for a more homespun fell.  After layering everything on the tree and adhering it to the plaid background I stamped the sentiment on vellum and embossed in white.  Again, thinking maybe I should have used black, but what is done is done, right? 

Well, that is it for me.  I have made it through a large portion of the September release, but still have several more products to share.  So, I will be back later in the week with more Christmas cards!  Thanks for stopping by and have a wonderful day!


Monday, August 25, 2025

fall themed thinking of you card...

 Hello!  I'm popping in with a card for the August Pinkfresh Studio challenge.  The theme is pattern play and I thought that meant patterned paper.  Oops, I was wrong, lol!  Good thing the challenge is anything goes.  Have a look at what I made.


Because I thought the theme was playing with patterned paper I immediately thought of my nice stash of 49 and Market papers.  Fall is coming (even though it is kind of warm here in the PNW!) and that is where my mind went.  So, I got out my 49 and Market Vintage Orchard patterned paper as it has a fall feel to it.  The next product I pulled was my PFS Berry Branch stamp, die and stencil suite of products.  The stamp set is actually a Christmas themed one, but I think I have used the stamp for more fall themed card than Christmas ones, lol!  I love that the stamp is versatile like that.  I stamped the image using PFS Doe ink and then used distress inks in Bundled Sage, Forest Moss, Scattered Straw and Aged Mahagony for the stenciling.   Once the stenciling was done I die cut the image with the matching die.  The patterned paper was die cut using a PFS Folk Art Rectangle die and then layered on a card base.  The sentiment is from the PFS Amazing Things stamp set and was stamped in the Doe ink.  I die cut the sentiment and additional layers to give the sentiment a bit more stability.  Simply layered on the elements and I was done!


That's it for me.  Thanks for stopping by and have a wonderful day!


Saturday, July 26, 2025

Christmas wishes...

 I didn't do much in the way of "Christmas in July" this year.  Just wasn't feeling it.  But I recently purchased a stencil and die set from Simon Says Stamp called Festive Swag.  When I saw that it was stencil week at Just Us Girls, I decided to put my new products to use.   


I paired the stenciled piece with patterned paper and a pre-printed sentiment from the 49 and Market Evergreen Season collection.  I used distress oxide ink in Candied Apple, Lumberjack Plaid, Evergreen Bough, Rustic Wilderness and Pine Needles for the swag.  I used the Pinkfresh Studio Postage Edge dies for the two patterned paper layers.  Now I have one Christmas card ready to go!


That's it for me.  Thanks for stopping by and have a great day!


Saturday, July 12, 2025

Birthday cards...

 Hello!  Stopping in to share a couple of birthday cards that I made using products from the 49 and Market Summer Porch collection.  It is one of my favorites.   Let's have a look at what I created.


I will be sending this one off to Freshly Made Sketches.  It is a very simple take on the sketch facilitated by the fact that I could use patterned paper to create the corner elements on the sketch.  The center portion was easy as I just added a frame, the flower pot and butterfly laser cuts.  The sentiment is from a Simon Says Stamp set that I stamped on a scrap of Summer Porch patterned paper and die cut with the matching die.  

The second card is for the JUGs challenge.  This week is word week and the word is water.  Let's have a look.


This card is on it's way to Scottsdale, Arizona.  My niece recently graduated from the University of Washington - Tacoma with a finance degree and got her first job at an organization located in Scottsdale.  She starts her job on July 14th and her birthday is July 15th!  I'm hoping this card reminds her a little bit of the Pacific Northwest.   For this one I used the largest postage edge die from Pinkfresh Studio to die cut the patterned paper from the Summer Porch collection.  I added the postage stamp in the one corner and the leafy stem, berries and butterfly in the other.  The sentiment is from the same Simon Says Stamp set I used for the first card.  I finished off the inside with another sentiment.  Another super simple card.  


Well, that is it for me.  Thanks for stopping by and have a wonderful day!


Monday, March 10, 2025

a nordic bunny...

 Hello!  I'm popping in to share a card I made for a few challenges:  Color Throwdown, Seize the Birthday and Poppystamps.  I don't often participate in the Poppystamps challenge, but the challenge this month is cute critters and a few months ago I purchased the super cute Nordic Winter Rabbit.  I have been wanting to make something with the dies and the Poppystamps challenge was the perfect vehicle.  The CTD combo was perfect, too!   Let's have a look.


For my bunny I went with a combination of solid cardstock and a bit of patterned paper.  The patterned paper is from the Memory Box Poinsettia Plaid 6x6 pad.   I used the same patterned paper for the circle that the bunny is sitting on.  That was die cut with the Poppystamp Scallop Pinpoint Rings set.  The main body of the bunny was die cut from kraft, as was the outer scalloped ring.  I used my favorite light blue cardstock to die cut the main parts of the bunny's sweater and hat.  I also used the light blue to die cut the background using the Scandinavian Snowflake background die.  I layered that on my white cardstock base, centered my circle element and then finished with my little nordic bunny and a Memory Box preprinted happy birthday label.   


Well, that's it for me!  Thanks for stopping by and have a wonderful day.


Saturday, January 11, 2025

one more for ctd...

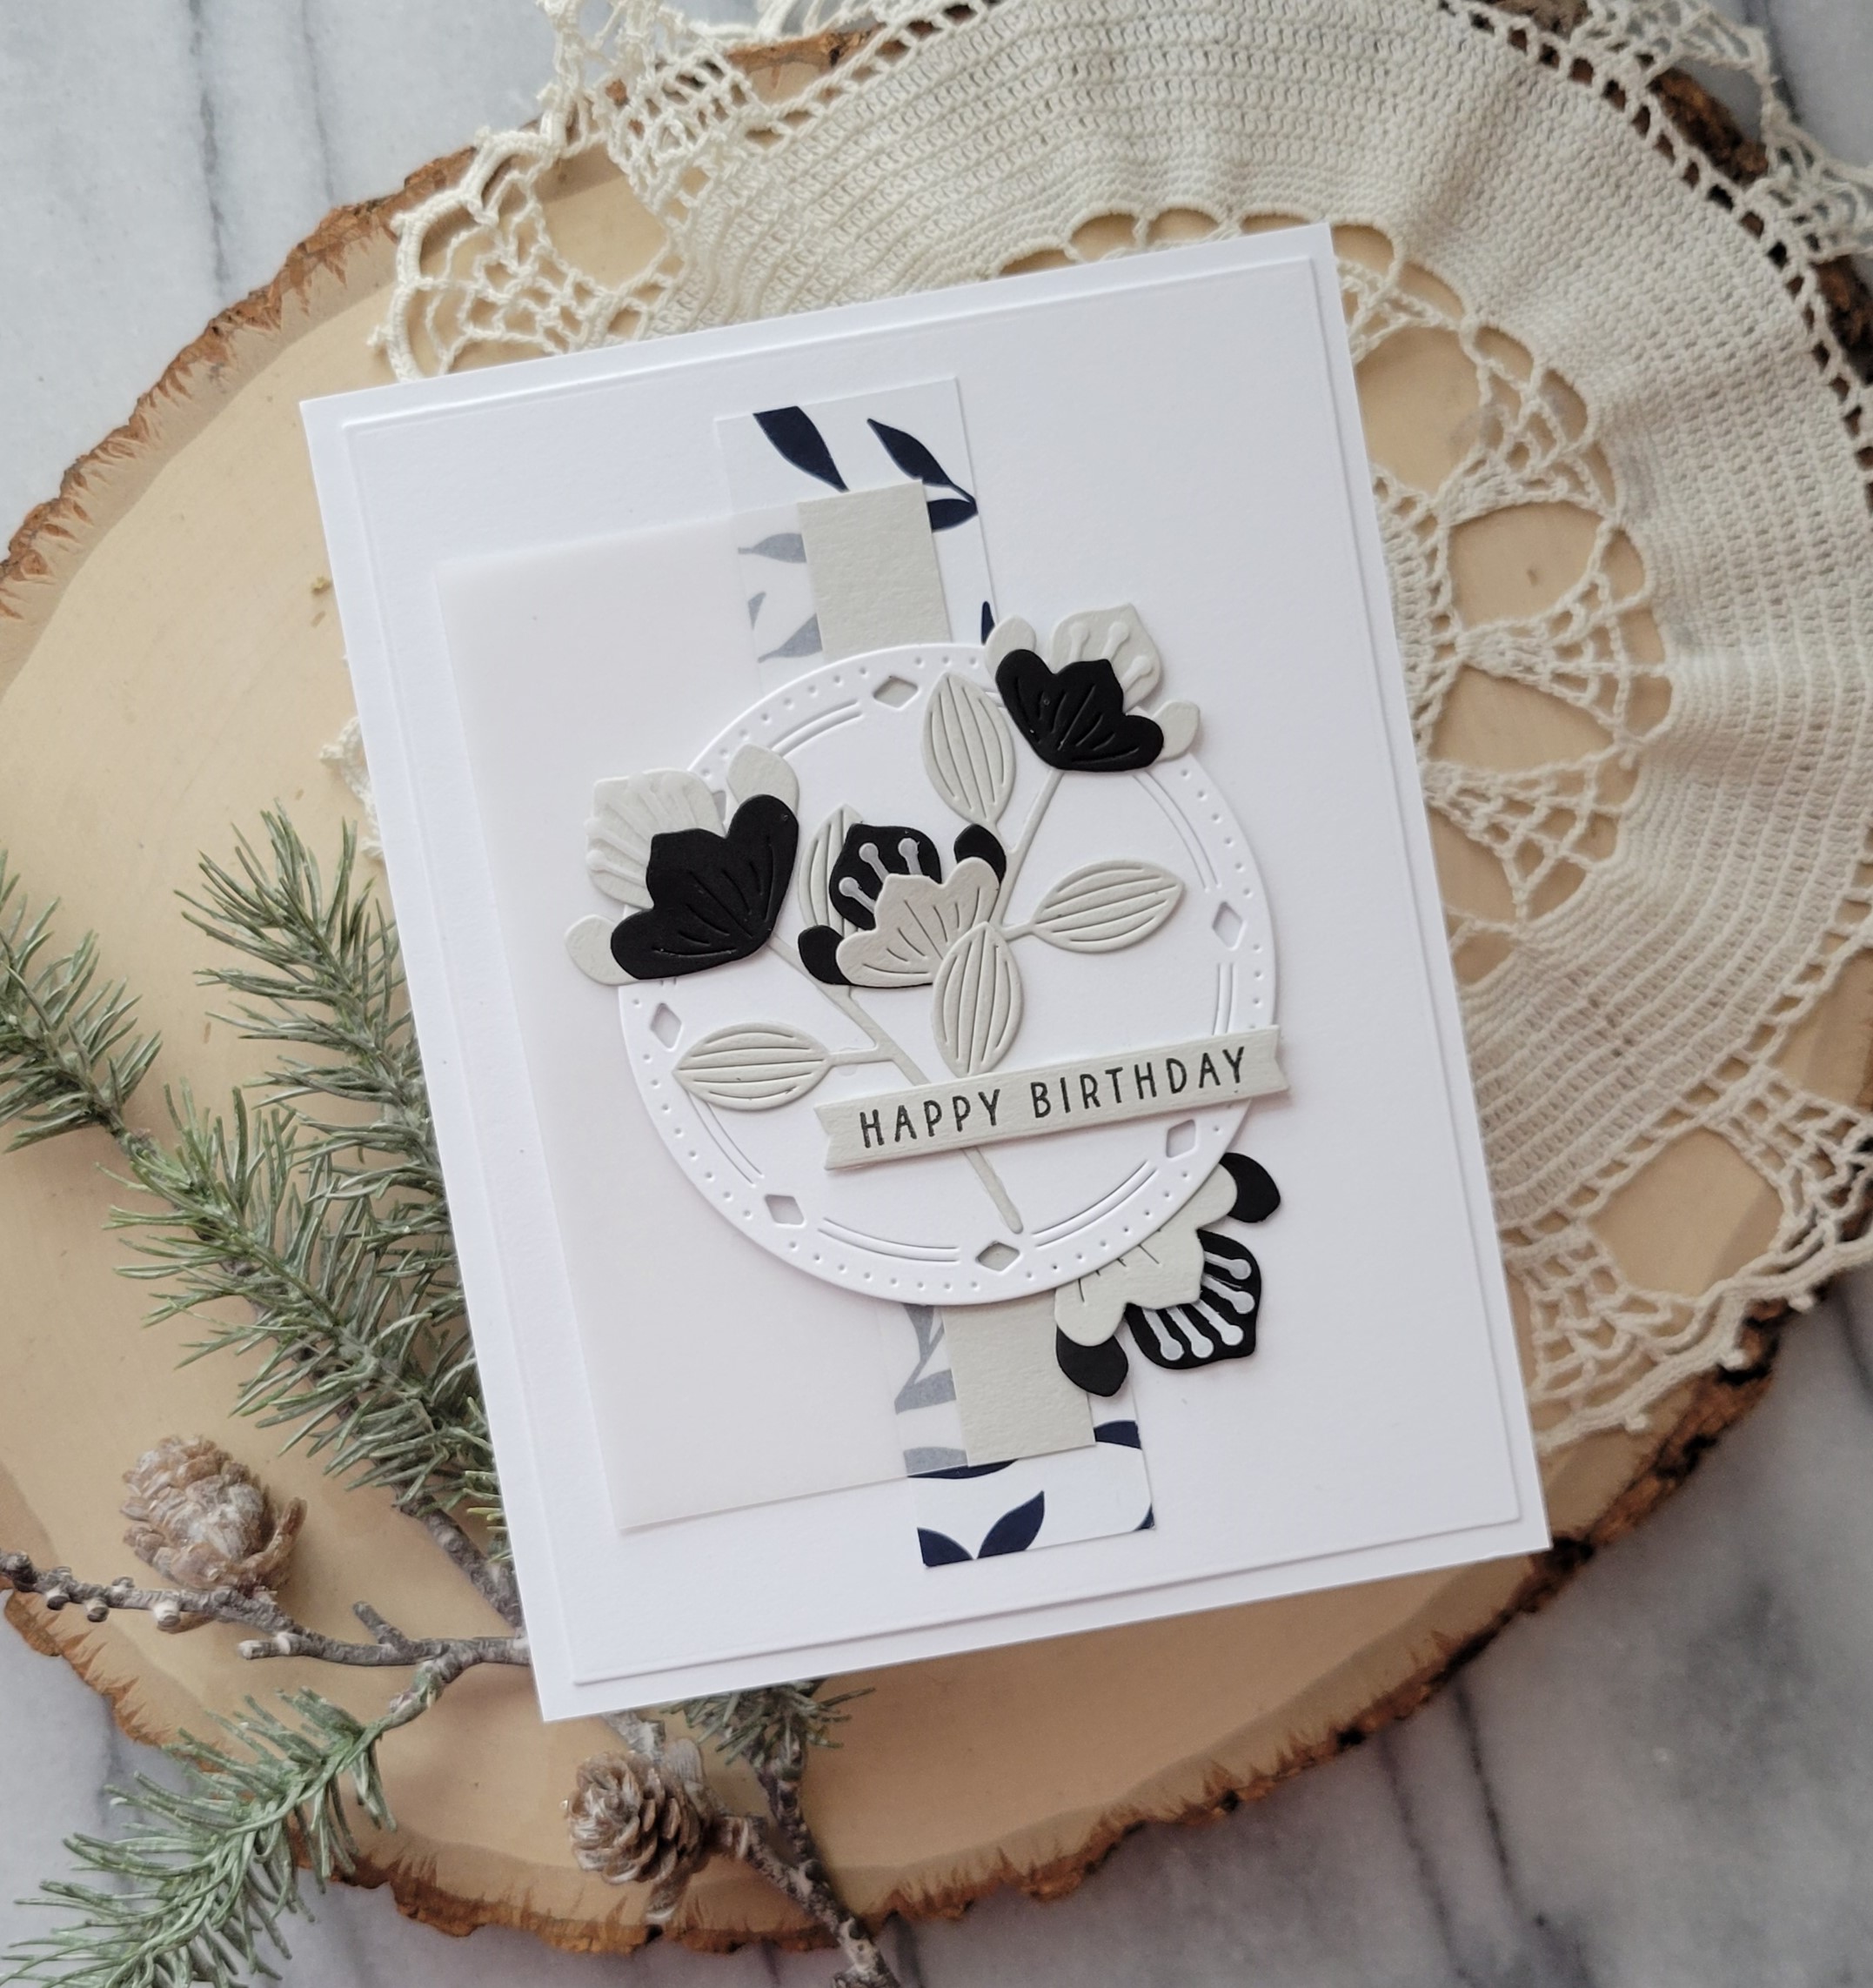
Couldn't resist making another card for Color Throwdown so I combined it with the current Freshly Made Sketches layout and the Simon Says Stamp Exotic Blooms die set.  Let's have a look at what I made.


 Pretty simple.  Die cut the flowers from black and light gray cardstock and the flower centers from vellum.  I then layered them as you see.  Die cut the circle using a Pinkfresh Studio circle die and layered them one.  I found some black and white patterned paper in a paper pack from Altenew that I trimmed down for one of the elements on the sketch.  I used vellum and a strip of the light gray for the other element in the sketch.  I layered everything on a white cardstock panel making sure to allow the patterned paper to peek through the vellum  I then layered on the circle with thin foam squares.  The one larger bloom was tucked in at the bottom and then I added the stamped and die cut sentiment.


That's it for me.  Thanks for stopping by and have a wonderful day!

Saturday, October 12, 2024

merry & bright...

 Hello!  I'm popping in with a card for Freshly Made Sketches that I made using products from Evergreen Season by 49 and Market.   I think this also fits the Simon Says Stamp Wednesday challenge to add texture.  I have lots of texture in those layers, lol!  Let's have a look!


I haven't had much time lately to make cards because my son is learning how to drive (finally!) and I the one spending the time in the car with him as he learns.  He is a good driver, but the process is taking longer than I thought it would.   Very different from when I learned to drive.  Anyway, being short on time I turned to the laser cuts and ephemera pieces from Evergreen Season along with pretty patterned papers to get my card made.  Yes, there is a tag underneath all the greenery, lol!   I die cut the two pieces of patterned paper with a rectangle die.  I then used the same rectangle die on the angle to cut the top piece and layered the two together.  I added the red twine to the tag, added thin foam squares to the back and then adhered it to my card front.  I layered on all the laser cut elements and the merry & bright banner.   It doesn't show well in the photo, but I did add glossy accents to the pine cones and then sprinkled on some Rock Candy glitter.  


Well, that's it for me!  Thanks for stopping by and have a wonderful day.


Saturday, October 5, 2024

fall cards...

 Hello, hello!  Popping in with a couple of fall themed cards to share.  I thought our normal wet and dreary fall weather had arrived the other day, but nope!  We are back to sun and relatively warm temperatures.  It's a little annoying as I really want to wear my warm and cozy tops, but some days it is too warm!  Oh well, I'm sure the wet and cold will be here soon enough, lol!   And I should not be complaining anyway, my corner of the world has not faced the devastation that the southeast has!  Absolutely sickened by the response of the current administration, as well!   Anyway, you came here to see cards, so here they are.


This one will be heading off to Freshly Made Sketches.  I generally don't make cards as busy as this one, but felt in the mood, lol!  All the papers, stamps and dies are from a Simon Says Stamp fall themed card kit I got last year.  Finally putting it to good use!  I used distress oxide inks for the leaves.  I inked up the leaves using the tiny distress ink blenders and they worked like a charm.  I pounced on one color and then was able to add the secondary color exactly where I wanted it to go!  To make things easy on myself I die cut all the images first, left them in the cardstock and then lined up the images.  It worked perfectly.   I trimmed down the background paper, added some additional pieces behind it for strength and adhered it to my card base.  The gingham paper was die cut with a tag die from the kit, the leaves adhered along with the sentiment.  I finished everything off with the two little bows.  I really like how it turned out.  Will add this one to the current Time Out challenge, as well.


This card is for Color Throwdown and as you can see I used that pretty tag again!  It was right there at my finger tips so why not?   The mushrooms are from a die set from the Greetery.  I inked them up with distress oxide inks and then adhered them together.  I had the embossed background panel on my desk as well so decided to use it, too.  I went with the debossed side as sometimes I like that look better than the embossed side.  The embossing folder is from Simon Says Stamp and came in the card kit that I used to make the first card.  I die cut the tag from off white cardstock, inked up one corner with distress oxide ink that was left on the blending brush and then added the mushrooms.  The sentiment is from the Greetery Oakwood sentiment set.  I finished off the card with the double bow at the top of the tag.   More my usual clean and simple style!   Adding this card to the Simon Says Stamp World Card Making Day line up.  

 s

Well, that's it for me!  Thanks for stopping by and have a wonderful day. 

Thursday, July 25, 2024

Simon Says Stamp Cheering for You Release!

(Please see my Birch Press Design post here.)

 Hello, again!  I'm popping in to share a couple of cards that I made using products from the Simon Says Stamp Cheering for You release that is now available over at Simon Says Stamp.  Let have a look at card number one.


Simon Says Stamp was so kind and sent me the super cute Halloween Friends stamp set. (You can also get the Halloween Friends dies and the Halloween Friends bundle.) They also sent me a package of clear acrylic card bases.  I combined the two to make this card.  I stamped all the images with Memento Tuxedo Black ink and then did simple Copic coloring of the images.  I just love that cute little pumpkin!  I trimmed out all the pieces and set them aside.  I used the Simon Says Stamp Ticking background stamp to create the background.  I inked it up with Spiced Marmalade distress ink and stamped it on white cardstock.  I then die cut the panel with the Simon Says Stamp A2 Nesting Frames die and adhered the images with foam squares.  I used liquid adhesive to adhere the image panel to the front of the clear card base.  I then die cut 3 additional panels of white cardstock.  I added one behind the top panel, one inside the card and then one to the back.  Before adding the inside card panel I did stamp it with a sentiment.   Simple, but cute, I think!


For this card I found a very old piece of Halloween patterned paper that I had already die cut with a rectangle die.  As you can see it has the faint image of 31 on the paper and I thought that was the perfect place to add these two little cuties from the stamp set.  I stamped them on white cardstock with Tuxedo Black ink and then colored them simply with Copic markers.  I trimmed all the images out.  The little trick or treat bag is a separate image and I was able to trim out the interior so I could hang it on the arm of my little Frankenstein!  I just had to use that cute little pumpkin, again!  I finished with a sentiment stamped on SSS Fog cardstock to coordinate with the Fog cardstock base.


Thanks for stopping by and don't forget to check out the new Cheering for You release!  

Wednesday, April 24, 2024

Birch Press Design Post

 Hello!  Popping in to let you know that I have a post up on the Birch Press Design blog today and here is a little peek.

I hope that you will head over to the Birch Press Design blog to check out my projects.  Thanks for stopping by and have a great day!

Friday, February 23, 2024

thank you kindly...

 Hello!  I made a card and now I'm sharing it, lol!  This is for Freshly Made Sketches and Color Hues.  The Color Hues combo is lilac and mint two colors that I don't often put together, but I challenged myself to give it a try.   Here's what I made.


I used Shaded Lilac and Salvaged Patina distress oxides and ink blended the Memory Box Cottage Flower Stem.    I used Waffle Flower Crafts 1+ blender brushes and tried to add some shading.  You can see a little bit of it on the leaves, but my Shaded Lilac pad was really juicy and despite adding several layers of color to the center of the flower, there isn't much difference.  Oh well, I tried!  I did use a little bit of Antique Linen for the flower center.  I have several Memory Box patterned paper pads and I found these neutral plaid that has a bit of minty color to it.  I used that along with strips of light gray and white cardstocks that I embossed with my old favorite Sizzix Swiss Dot embossing folder.  The sentiment is a new product from Memory Box/Open Studio called Greetings Tabs.   The tabs come in black and white, circle or strip and feature either thank you sentiments or birthday sentiments.   Perfect for when you just need to add a quick sentiment to a card.  

Since I did do some ink blending I'm also going to add this to the Memory Box February challenge of ink blending.   I'm also going to add this to the Simon Says Stamp Wednesday challenge


That's it for me!  Thanks for stopping by and have a wonderful day!