"We do not remember days, we remember moments." Cesare Pavese

Wednesday, September 29, 2021

Spellbinders All Aboard Card Kit Blog Hop!

(Please check out my A Jillian Vance Design blog post here.)

 Hello everyone!  Welcome to the Spellbinders All Aboard card kit blog hop!  You should have arrived from the blog of Jennifer Kotas.   If you want to start at the beginning please head to the Spellbinders blog.  As I indicated this is a blog hop to share more inspiration using the limited edition All Aboard card kit.   And since this is a blog hop there are prizes to be won!  Spellbinders will be picking three winners from all the comments left on the Spellbinder blog. Commenting ends on Sunday, October 3rd at 11:59 pm.   Each winner will receive a $25 gift certificate! 


For my card I wanted to show that you can definitely use this kit to create something other than a holiday type project.   I used the die set to create a card for my little nephew, Max.  He will be three soon and like a lot of little boys he loves Thomas the Tank Engine.  So I decided to create my little engine and the little car in the color way of Thomas the Tank Engine which is red and blue with some touches of black and gold.    It took me a while to figure out how I would do my background, but I finally settled on a some light blue cardstock from the kit that I very lightly stenciled with some clouds.   I have a photo below where you can see the clouds better.  For the track I used just as simple strip of black cardstock.   I die cut all the pieces from blue, red and black and then assembled the train and cart.  There are dies in the set to create trees so I die cut the parts from two shades of green cardstock (from the kit) and a scrap of brown and then assembled them.  They were adhered as you see.  I popped up Thomas on the card front with foam tape.  I finished off my Thomas with a gold glitter #1.   The one came from the sheet of foam glitter alpha stickers in the kit.  I simply trimmed it down to fit on the train.   Packages in green and dark blue with gold metallic bows were added to the cart.   The sentiment is from the Spellbinders May stamp of the month.  I personalized the card using the foam glitter alpha stickers from the kit.  


This photo shows the stenciled background.   I think Max will really love this Thomas the Tank Engine inspired card.   Your next stop on the hop is Jenny Colacicco.    You can pick up the All Aboard card kit here.   I hope you enjoyed my project today.  Thanks for stopping by and enjoy the hop!

happy national coffee day!

 Hello everyone!  Today is national coffee day and that means that the Coffee Loving Cardmakers are hosting a blog hop of sponsors over on their blog.  A Jillian Vance Design is a super sponsor and if you head over to the AJVD blog you can enter to win a $20 gift certificate to the AJVD store!  Normally on Wednesdays I post my project over on the AJVD blog, but today is a little different.  I will be posting my card here (and over on the AJVD blog) with all the details as to how I created my card.   So lets get started!


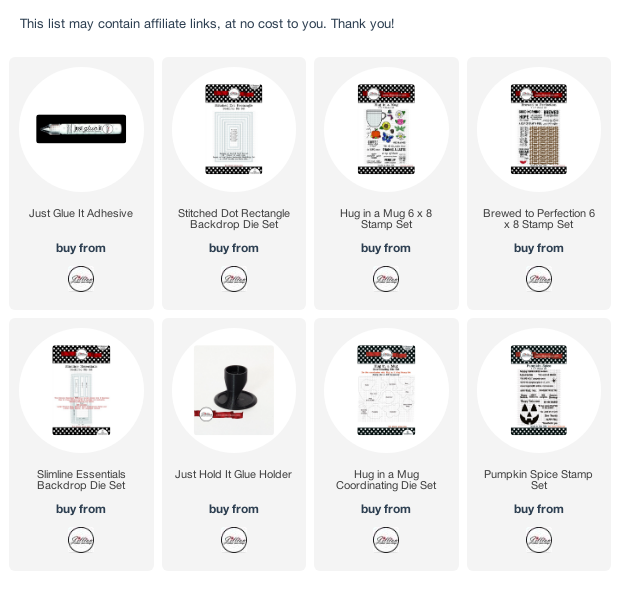
I used a lot of different AJVD products on my card!  I started with the coffee bean background from the  Brewed to Perfection stamp set.  I stamped the image on kraft cardstock with dark brown ink, die cut it with a rectangle die and then inked the edges with Gathered Twigs distress oxide ink.  I used the sketch from Sunday Stamps for my card and so I die cut  orange and yellow cardstock per elements in the sketch and inked them with distress oxide inks in Mustard Seed (yellow) and Ripe Persimmon (orange).  I layered those on my coffee bean background.  I stamped the mug from Hug in a Mug on red cardstock with dark brown ink and then added some shading with a dark red Copic marker.  The mug was then cut with the matching die.   I stamped the pumpkin image from the Hug in a Mug on white cardstock with Memento Rich Cocoa ink and then colored with Copic markers.  I cut the image with the matching die.   The sentiment (from the Pumpkin Spice stamp set) was stamped on kraft cardstock with VersaFine Acorn ink, die cut it with a label die and then inked the edges.   I popped up the mug on the card front, added the sentiment and then popped up the pumpkin.   Also going to add this to the Simon Says Stamp Wednesday challenge of anything goes.

A Jillian Vance Design products used:


Thanks for stopping by, don't forget to head over to the AJVD blog to enter to win a $20 gift certificate and have a lovely day!

Monday, September 27, 2021

autumn blessings

 Hello!  I hope your week is getting off to a good start.   I'm popping in with a quick post to share a card that I made for the Inspired By challenge.   Inspired By always has really fun inspiration photos and sketches.  Over the last few months I have often wanted to play along with their challenges, but due to other commitments I have not had the time.  But this weekend I was able to find that time... YAY! 


I love leaves and especially leaves during the fall.  I have several different die sets that I can use to die cut leaves.  For this card I used the BotaniCuts Mighty Oak die set from the Greetery along with sentiments from the Bittersweet stamp set from the Greetery.  I started by laying down water on watercolor cardstock and then adding in yellow, red and brown using Nuvo Aqua Flow watercolor pens.  I blended the colors to my liking and then dried the panel with my heat tool.  I die cut leaves twice and branches once and then assembled my leaves.  There are also cut little acorns in the die set!  There is some purply colors in the inspiration photo so to bring that in I watercolored more watercolor cardstock with purple and blue Nuvo Aqua pens.  My first panel was way too purple so I went back to the drawing board and made one with a more subtle wash of color.   Maybe this one was too subtle, lol!
After the panel was dry I die cut it and adhered it to a kraft cardstock base.  I stamped the word autumn using light and dark yellow inks and the word blessing in brown.  I then adhered my branch and the two additional leaves.


Thanks for stopping by and have a lovely day!

Saturday, September 25, 2021

Rejoice!

 Hello!   I'm popping in with another card that I made with a die set that is part of the Spellbinders September release.  This die set is called Rejoice Nativity etched dies and is from the Christmas Traditions collection.  (Affiliate links used where possible.  Using my links allows me to earn a small commission at no cost to you.  Thank you for your support.)


Initially I struggled to come up with a color palette that I liked to use for my card.  Then I remembered the Color Throwdown combo this week and thought the neutral colors would work perfectly for my card.    I used the large oval die and the die that cuts out the starry background to die cut the night sky from black cardstock.  I then used the oval frame and the die that cuts thee creche scene from kraft cardstock.  I used just the oval die to cut silver glitter cardstock and back the night sky with that.  You can't really see it in the photo, but it looks really pretty in real life.  I die cut the hill background from gray and then adhered that along with the creche scene to the sky.   The die set also comes with an ornament topper so I cut that from gray as well and added it to the top of my scene along with a bow tied from kraft colored twine.   Mary, the baby Jesus and the shepherd were die cut from off white cardstock.  I used glue to adhere Mary and the shepherd and then popped up baby Jesus with some foam tape.  The piece was adhered to an off white cardstock panel and then added to a kraft card base.  I added the sentiment strip that I hot foiled with my Glimmer in black foil.   The finishing touch was the two little flowers that I made using gray cardstock and a die from the Christmas Blooms die set.  Crystal gems from the Crystal Mix Color Essentials gems pack.

Thanks for stopping by and have a lovely day!

Thursday, September 23, 2021

a blessing

 Hello!  Hope you are having a great week.  Popping in with a card for the Paper Players, as well as the Card Concept.  I have been on a clean and simple kick lately and just had to make a card for the Paper Players clean and simple challenge.   I loved the photo/inspiration colors for the Card Concept so I put them together.  

I hope my card has enough of a fall feel for the gals at the Paper Players.  I thought the sunny yellows that I used for my little acorns and flower along with the large sentiment stamped in brown gave it that fall feel.  I added some Pinkfresh Studio Espresso gems that my sweet friend, Greta, sent me.  I thought they provided an additional fall touch.   The stamps and dies are from the Greetery.    


Thanks for stopping by and have a lovely day!


Wednesday, September 22, 2021

happy first day of fall!

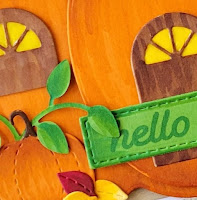
 Happy fall everyone!  Hope your week is going well!  I'm popping in to let you know that I have a post up on the AJVD blog today and here is a little peek:


I hope you will head over to the AJVD blog to see my project.  Thanks for stopping by and have a lovely day!

Tuesday, September 21, 2021

Spellbinders September Release!

 Hello friends!  Spellbinders September release is now available on the Spellbinders website.   This month there are new stitching dies available and I have two cards to share that I made using some of these new stitching dies and a sentiment from a new Glimmer hot foil plate set.  (Compensated affiliate links used where possible.  Using my links allows me to earn a small commission at no cost to you.  Thank you for your support.)


 For my first card I used the Circular Stitch Background and the Sparkling Mandala etched dies.  I decided that I wanted to a red and aqua color scheme for my card.  I got a piece of Spellbinders Waterfall cardstock and then went through my extensive collection of embroidery floss to find floss that matched the cardstock.  I was able to find some floss that was a perfect match!    It was easier to find a red floss as I just needed one that was fairly dark.  Once I had my floss choices I started stitching using three strands of the floss.   It can be a little tricky securing the floss to the back of the mandala, but I just used tiny pieces of tape.   Once I was done I added the little red and clear gems stones from the Spellbinders red mix and crystal mix Color Essentials gems.   For my background I used the Circular Stitch Background to emboss the Waterfall cardstock and then die cut it with an Essentials rectangle die.  I adhered the panel to a white cardstock base and then popped up my mandala.  The sentiment is from a stamp set that was part of the July release called Holiday Gnomes.  At the time I was creating projects with the July release the Holiday Gnomes stamp set was not available and so I wasn't able to create with it.   The stamp set is super cute and so I will be making a project with it in the future.  The sentiment was stamped in watermark ink on vellum and embossed with red embossing powder.  I trimmed it down to a thin strip, wrapped it around the card front and secured it in the back.  I finished off the card with additional tiny red gems


For my second card I used the Circular Stitch Background die as it was intended.   To create my panel I taped the stitching die and the rectangle die together and ran them through my die cutting machine with dark red cardstock.  The resulting panel covers the entire front of the card.  I love that I can use the rectangle die separately from the stitching die!  I have some gold baker's twine that is not very thick and I used that for my stitching.  I kept my stitching simple and just die the circular areas.  I definitely want to create a panel with more stitching.   I knew I wanted to place my sentiment in the center of the panel so I made sure to only stitch portions of the circular elements that would be showing.  The sentiment is from the Christmas Greetings Glimmer hot foil plate set from the Christmas Traditions collection and was foiled using Polished Brass foil on dark green cardstock.   I die cut the sentiment using the circle die from the Jingle Word Frame die set and popped it up in the center of my panel.  The panel was adhered to a dark green cardstock base and then I added tiny Fashion gold pearls to the centers of the stitched areas. 

Thanks for stopping by today!  I hope you enjoyed my projects using these new products!

Saturday, September 18, 2021

clean and simple cards...

 Hello!  Popping in with two clean and simple cards today.  First up is a card for Color Throwdown, Freshly Made Sketches and the Pinkfresh Studios monthly challenge.   The idea to use my Pinkfresh ink cubes for my squares came from my friend, Greta.  She shared a card on Instagram where she used ink cubes to add squares of color.  I thought it would be perfect for the layout of Freshly Made Sketches.  I initially tried it with just pressing the colors on to scrap cardstock, but I didn't like that everything came out a little too wonky.  So I decided to press the colors (Sapphire, Slumber and Key Lime) on to white cardstock and die cutting with a small square Spellbinders dies.  I layered the squares on to a white cardstock panel and then added the sentiment (from a very old Pinkfresh Studio stamp set) and then added the leafy branch die cut from orange glitter cardstock.   I also added white crystal gems from the Spellbinders Essentials Crystal mix gems pack and the little white baker's twine bow.   And yes... I stuck faithfully to the sketch!  Sometimes when you have an idea that is a good as this one you just need to go with it!


This next card is for the MFT Design Superstar challenge.  I love creating clean and simple cards and so I had to play along with the challenge.  I used the MFT Spread Your Wings mini stamp set and matching dies.  I stamped 3 of the butterflies in Memento Tuxedo Black ink and colors with Copic markers in shades of blue-green.   After coloring and die cutting the butterflies I added some silver Nuvo Crystal Drops to the bodies of the butterflies as well as little dots on the wings.  Then I figured out how I wanted to arrange the butterflies on my card front.  I used two retired MFT die sets (Mini Stitched Scalloped rectangles and ovals) for the main panel and the small oval.  I was going to use a light gray panel, but decided to go with all white in the background so the butterflies would pop.  I arranged them in a manner that draws in your eye and adhered them to the card front along with the sentiment.  I almost added more dots of the Nuvo drops, but decided that in this case less is more!


Thanks for stopping by and have a lovely day!

Wednesday, September 15, 2021

Spellbinders September Club Kits Blog Hop!

 (To see my AJVD post please click here)

Hi everyone!  Today I'm participating in a blog hop for Spellbinders and we are showcasing projects made with all the different Spellbinders club kits!  And since this is a blog hop there are prizes to be won!  Spellbinders will pick three comments from all the comments left on the Spellbinders blog and each person will win a $25 gift certificate!   Commenting ends on September 19th at 11:59 pm and the winners will be announced in the blog hop post on Wednesday September 23rd.  You should have arrived here from Jill Hillards' blog.  If you did not, please head to the Spellbinders blog for the complete list of blog participants.  (Compensated affiliate links used where possible.  Using my links allows me to earn a small commission at no cost to you.  Thank you for your support.)

I have three projects to share that I created with the September card kit and the first one features the super cute telephone die that comes in the card kit.  I die cut the phone from pink, gold metallic and black cardstock and assembled all the pieces.  I pulled some patterned papers from the 6x6 pad to create the look of a table and wallpaper.  I popped up some die cuts from the die cut pack in the background and then popped up my telephone to complete my little scene.  Going to add this to the Simon Says Stamp Wednesday challenge of lots of layers.

This next card features the one of the cute little matryoshka dolls from the stamp set.  I stamped her in Memento Tuxedo Black in and then colored very simply with Copic markers.  I die cut here with a small rectangle die and then added one of the chipboard frames from the kit to the rectangle to frame her.  I added the gold smile puffy sticker to the frame and three little gold puffy hearts, as well as the happy birthday sentiment that is also a puffy sticker. 


This last card had me reminiscencing about my childhood and all the camping trips we took as a family.  We didn't have a camper, but we did travel in a station wagon!  I used papers from the 6x6 pad to create my background, then popped up the houses, car and camper die cuts.   I finished with the little gold puffy hearts and sentiments from the puffy sticker sentiments pack.  

I hope you enjoyed my projects today.  Your next stop on the hop is Jennifer Kotas!  Don't forget to check out all the Spellbinders club kits, as well as the Spellbinders Autumn Warehouse sale!  Thanks for stopping by!


Happy Wednesday!

 It is Wednesday and it is exactly the middle of September!  Yikes!  Fall will officially be here next Wednesday.  I love fall and with that in mind I have a fall themed card I'm sharing on the AJVD blog today.  I used a new AJVD product in a way that it wasn't actually intended for!  Here is a little peek of my card:


I hope you will head over to the AJVD blog to see my card and find out how I created my little fall basket!  Thanks for stopping by and have a lovely day!

Monday, September 13, 2021

Spellbinders Open House Halloween

 Hello everyone!  I back to share one final project that I made with product from the August Spellbinder release.   Today's card uses the new Open House Halloween etched dies  along with the original Open House die set.   (Compensated affiliate links used where possible.  Using my links allows me to earn a small commission at no cost to you.  Thank you for your support.)

For this card I created a mini slimline card.  Along time ago Spellbinders had a line of dies called Nestabilities.  I still have many of these original dies and one of the die sets was an elongated rectangle die set.  I discovered that the largest elongated rectangle worked really well with the Spellbinders July Glimmer kit which is a set of plates that hot foil a dotted border.  I die cut black cardstock with that elongated rectangle and then hot foiled the border with orange foil.   The door was cut from a dark gray cardstock and the door step (with that cute little sentiment!) and the transom window from a light gray.  The light behind my spooky web transom window was die cut from orange glitter cardstock.  I adhered those two pieces together and then adhered the door, transom and doorstep to my card front.  I finished off the card with a little skull doorknob, the numbers 31 (in orange glitter cardstock), the little spider (from a different die set called Spooky Boo) and the bat.   Going to add this to the Simon Says Stamp Wednesday challenge of sparkle and shine as I do have alot of that on this card!  

Thanks for stopping by and don't forget about the Spellbinders Autumn warehouse sale.  Click on the link here or in my sidebar.


Saturday, September 11, 2021

joyful blessings...

 Hello!  I hope things are good in your world!  Not too bad here.  My youngest made it through the first few days of high school with only one mishap!  He missed the bus on the 2nd day of school, but that was not really his fault as the district did not have the correct pick up time listed!  Oh well... we got it worked out so now he shouldn't miss the bus!   Anywhoo... I do have a card to share.  This one is for Color Throwdown and Fresh Made Sketches, as well as the Simon Says Stamp Wednesday challenge of sparkle and shine.  Spellbinders in currently have a warehouse sale.  Click here or on the banner below to head to the sale.  (Compensated affiliate links used where possible.  Using my links allows me to earn a small commission at no cost to you.  Thank you for your support!)


I created my card using a Spellbinders Glimmer plate called Autumn Leaves Border that I purchased several months ago.   As you can see it foils beautiful leaves in a border design.  When I got the plate I foiled the border twice on white cardstock with my Glimmer hot foil machine using gold foil and then set it aside for use at a later date.  Well... that day finally came.  I colored the leaves in the CTD color combo with Copic markers and then die cut it with the mid-sized Essentials rectangle die from Spellbinders.  Unfortunately this foil plate is no longer available at Spellbinders, but you can get it at Simon Says Stamp!  I die cut kraft cardstock with the largest Essentials rectangle die and popped up my foiled panel on that per the sketch.  The sentiment is from the Mini Christmas Sentiments hot foil plates and dies set.   It was foiled in gold, as well.  I finished off the card with gems from the Spellbinders Crystal Mix essentials gems.


Thanks for stopping by and have a lovely day!

Wednesday, September 8, 2021

happy wednesday...

 Hello!  Hope your week is going well.  Today is the first day of school for my youngest.  He was off and out the door very early this morning to wait for the school bus.  Since it is Wednesday that means I have a card up on the AJVD blog.  Here is a little peek:


I hope you will head over to the AJVD blog to see my project and to let me know what you think.  Thanks for stopping by and have a lovely day!

Tuesday, September 7, 2021

Becca Feeken for Spellbinders Holiday Medley Collection

 Popping in today to share two cards that I made with products from the amazing Becca Feeken for Spellbinders!  The products are part of her Holiday Medley collection.  As with all of Becca's products this collection is absolutely GORGEOUS!  (Affiliate links in this blog post.  Using my links earns me a small commission at no cost to you.  Thank you for your support.)


This first card was created with the Jingle Word Frame etched die set and the beautiful Pinstripe Bracket Card Builder Glimmer hot foil plates and die set.   I decided to go with an unconventional color scheme for both cards and used the beautiful Purple Mist  and Lilac Blossom cardstocks for both cards.  The Pinstripe Bracket Card Builder set contains two Glimmer plates that can be used separately, but I taped them together to create the foiled background you see on the card.   I used silver foil for the foiling with my Glimmer.  Once the foiling was done I die cut the panel down with the largest Essentials Rectangle die.   With the foiling done I got to work on the center piece of the card that was created with the Jingle Word Frame die set.    This die set comes with the scalloped circle die, a circle die to cut out a sold piece, an insert for the circle die that cut a beautiful filigree looking circle and the Jingle all the way sentiment die.  I didn't use the filigree inset this time around.  I die cut the large scalloped circle from the Lilac Blossom cardstock, the solid circle from white and the sentiment from the Purple Mist.  I cut the sentiment from the Lilac Blossom then stacked the sentiments with the top slightly offset so you can see the dark purple peeking out.  Everything was layered and adhered to the card front.   The card was a little plain so I die cut the flowers using the Christmas Blooms die set using the two cardstock.  I layered up the flowers and then arranged them on the card front.  I finished off the flowers with silver fashion pearls.

This card was created with the Mosaic Bracket Card Builder etched dies from the Holiday Medley collection.  This set of dies works seamlessly with the Pinstripe Bracket Card Builder Glimmer foil plate and die set.  I die cut the Mosaic Bracket Card Builder from white and Lilac Blossom cardstock and adhered them together slightly offsetting the purple behind the white.  I adhered this piece to the front of a white cardstock base.  I then foiled the bracket part of the Pinstripe Bracket Card Builder in silver foil on Lilac Blossom cardstock.    I then die cut this piece with the bracket die from the Mosaic Bracket Card Builder.  This set also comes with the word dies Happy Holidays as well as the shadow layer die.  Since I was foiling I decided to use the word dies to foil Happy Holidays in silver and then die cut the foiling with the shadow dies.  I love how it looks in person.  Below is close up of the foiled sentiment. 


I adhered the top bracket layer to the card front with foam tape and then popped up the sentiment with additional foam tape.  I finished silver fashion pearls. 

Thanks for stopping by and have a lovely day!


Saturday, September 4, 2021

Spellbinders September Card Kit

 Hello!  I hope your September is off to a great start!  I'm popping in to share three cards that I made with the beautiful Spellbinders September card kit called Together is the Best.  You can find out all about the Spellbinders club kits by clicking here.  


The contents of the kit are just beautiful and even includes the cutest die set that creates an old fashioned type phone!  I will be sharing a card I created with that die set later in the month.   All three cards I made today were created with pieces from the die cut pack from the kit, as well as chipboard frames, patterned paper and cardstock.  I used the sketch from Freshly Made Sketches for this card so I will be posting it there.  I covered one of the included card bases with some pink patterned paper from the kit and added a strip of light yellow cardstock.  I then die cut additional patterned paper and layered on a chipboard frame.  I adhered that piece to my card front.  I add the butterflies and the sentiment flag. 


For this card I covered a card front with patterned paper and then created my little collage of items from the die cut pack.  I finished off the card with some little puffy sticker hearts that are also included in the kit.


This card is the most complex of the three.  I die cut some foiled damask paper from the kit with the largest Essentials rectangle die and adhered that to a card base.  I then layered on two different chipboard frames, one round and one square.  I threaded some gold twine through the holes in the sentiments and adhered them to the chipboard frames.  I then added the die cut floral clusters.  I love how all three cards turned out, but I think this card is my favorite. 

Thanks for stopping by today!  I hope you will check out the Spellbinders club kits.  They are a great value and so much fun!

Thursday, September 2, 2021

Stamptember Blog Party!

 Hello and happy Stamptember everyone!   I'm so excited to take part in the Simon Says Stamp Stamptember blog party this year!   This isn't a blog hop, but an opportunity to see what many different papercrafters have created with Stamptember products.  The full list of participants can be found on the SSS blog .  I have two cards to share with you, as well as an opportunity to get a free product from Simon Says Stamp with any purchase from Simon Says Stamp.  Check out the graphic below for more details.  Gotta move quick though as the offer expires tonight at 11:59 pm EDT!   You can find the entire Stamptember release right here.   (Compensated affiliate links used where possible.  When you use my links I earn a small commission at no cost to you.  Thank you for your support.)


Simon Says Stamp kindly provided me with the fun CZ Designs Love that Student stamp set to create with.  I shared this card over on Instagram on the 1st.  Super simple design.  I found blue, red and green cardstocks and trimmed a strip from each.  I didn't want them to all be the same width so the red one is slightly smaller.  I adhered the strips to a white cardstock panel and then die cut the panel with a rectangle die so that everything would have a nice finished edge.   The sentiment was created by using the large word student from the sent along with the smaller sentiment.  I first stamped the large word on vellum with VersaFine watermark ink and heat embossed in black.  I trimmed the strip down leaving room to make sure I could stamp the smaller sentiment.  I adhered the sentiment with thing foam strips.   The apple was embossed on vellum in red, trimmed out and popped up.  


I really had fun making this next card.  I don't often make backgrounds using small stamps, but that little pencil in the Love that Student set really got me thinking about different ways to use it.  I tried out a couple of ideas that didn't really work, but loved it when I did a test run of a background.  I stamped the pencil on the yellow cardstock with VersaFine Clair Acorn ink.  I then colored in the erasers and the pencil tips in red and black.   The sentiment was stamped on vellum with watermark ink, embossed in red and then die cut with the rectangle die (a very old die from Simon Says Stamp that is no longer available.).   I popped up the sentiment with strips of foam tape and then added the little stars to the corners.  The larger red stars were created using one of the stars from the stamp set that I embossed in black on vellum and then filled in with Nuvo Crystal drops in Berry.  Adding this to the Simon Says Stamp Wednesday challenge to stamp it!


Thanks for stopping by today!  I hope you enjoyed my projects and that you get a chance to check out the entire Stamptember release!  Have a lovely day!


Wednesday, September 1, 2021

Happy September!

 Wow... just like that the summer is pretty much over and it is back to school time.  My kiddo doesn't start until next week.  I have to be honest and say that I don't like how our district has gone to always starting the school year after Labor Day, but I only have to deal with it for four more years so I think I can live through it, lol!   Anywhoo... it is Wednesday and that means I have a post up on the AJVD blog.  Here is a little peek:


I hope you will head over to the AJVD blog to see the full project.  Thanks for stopping by and have a lovely day!