"We do not remember days, we remember moments." Cesare Pavese

Thursday, January 19, 2023

Simon Says Stamp Kisses Release

 Hello and happy Thursday everyone!   The new Simon Says Stamp Kisses release is now live on the SSS website.  You can find the entire release right here.  This release is full of love and Valentine's Day vibes and works perfectly with the Hugs release that happened in December.  You can see that release here.  

Simon was so kind and sent me a beautiful hot foil plate simply called Damask.  I created two cards with the foil plate.  One using the plate in the traditional way and the other using the plate to deboss like a letterpress.   An affiliate linked list of products will be at the end of this post.  Using my links allows me to earn a small commission at no cost to you.  Thank you for your support.  Let take a look at my first card.

My first card uses the plate for hot foiling.  I decided to foil the image on light pink cardstock with red foil.   I have learned that some foils work better than others for foiling, especially when it comes to colored cardstock.   So the foiling wasn't perfect, but sometimes you just have to embrace "not so perfect".  I wanted the image to be a focal point so I trimmed it out.  I die cut a panel of the same pink cardstock with a rectangle die and then embossed it with the SSS Blossom Field embossing folder.  The sentiment is from the SSS XL Love Greetings stamp set.  I embossed it in white on vellum, trimmed the vellum into a strip, wrapped it around the panel and secured it on the back.  The panel was then adhered to a white cardstock base.  This card works for the current Color Hues challenge of red and pink so I will be adding it to the gallery there. 


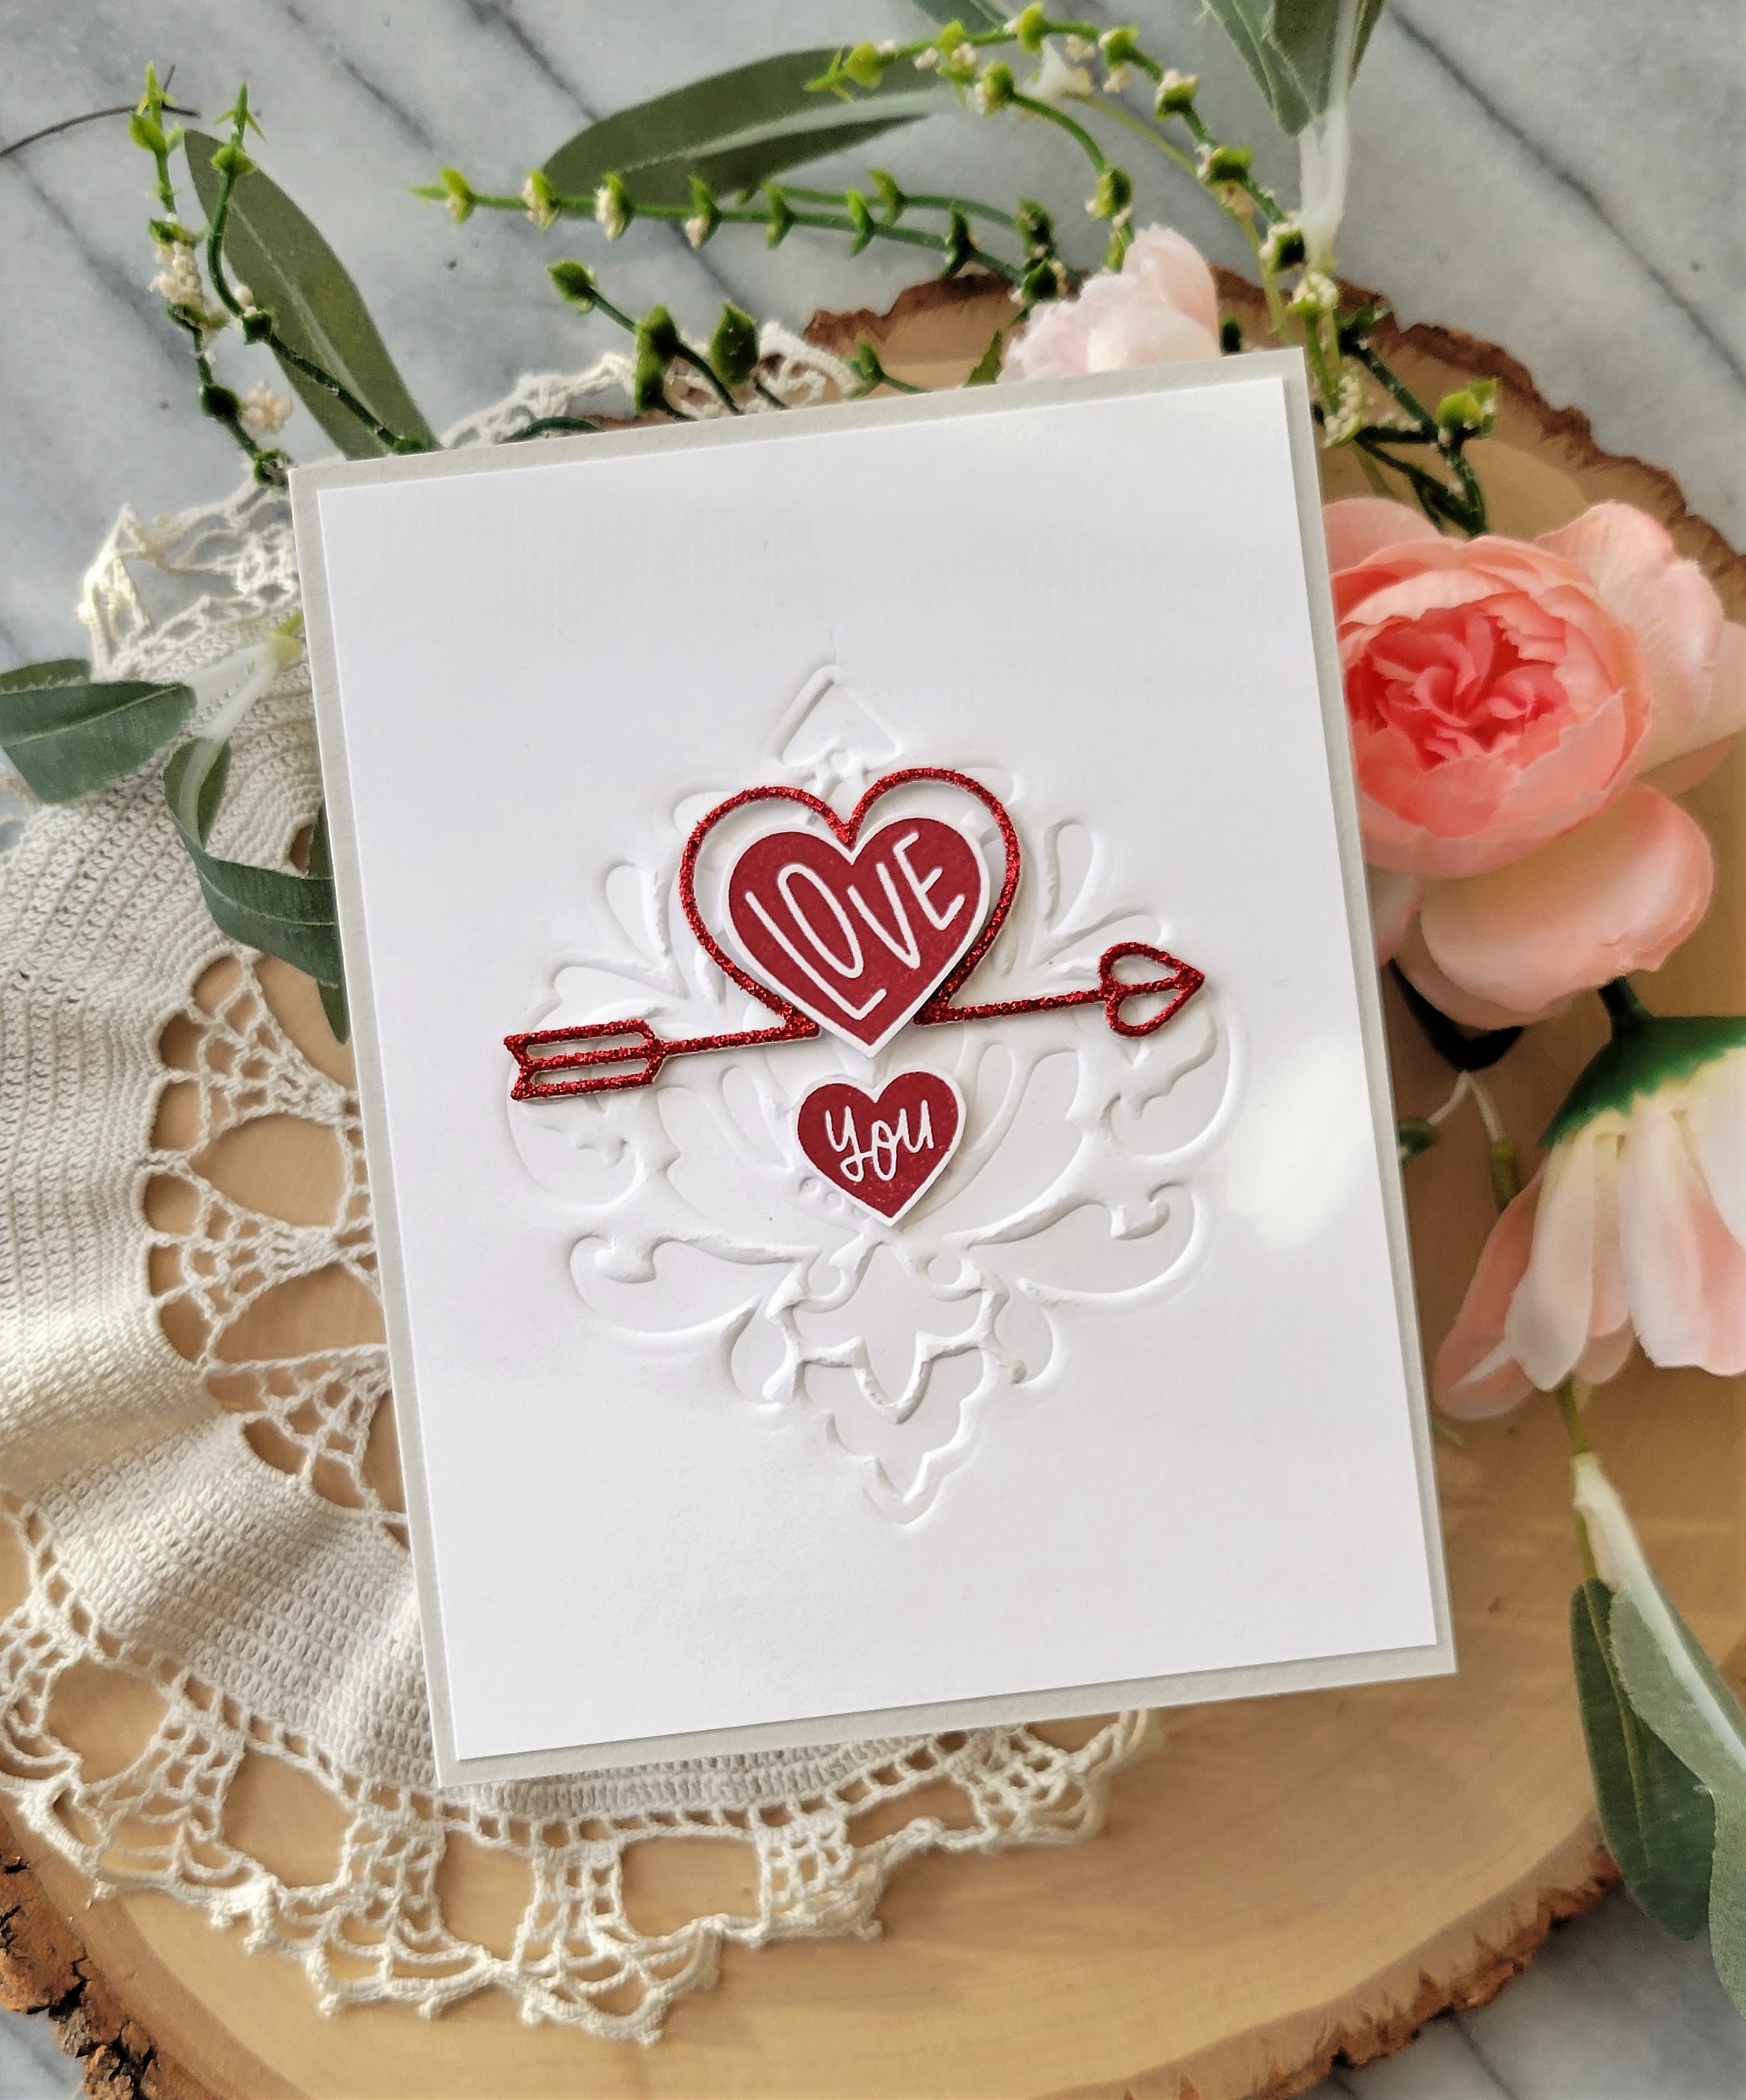
I have never used a foil plate to create a letterpress or debossed look, but when I saw this foil plate, I decided I wanted to give it a try.    My first attempt created a slightly debossed look, so I simply placed the plate back into the same spot and ran it through my die cutter using a thick embossing mat.  The mat was thicker than I wanted to use, but I can't find my other embossing mat.  There was some cracking of the cardstock, but again, I'm embracing "not so perfect", so I went with it.  And honestly, I really like how it turned out.   I used the cute little Heart Arrow die from Simon.  I got it last year (I think) as a freebie, but this is my first time using it.  I die cut it from Simon's red glitter cardstock, scraps of other cardstocks and then adhered them all together.  Now to figure out a sentiment.   I thought it would be fun to place a heart in the center of the heart arrow, so I looked at the XL Love Greetings stamp set again, saw the hearts that have "love" and "you" in them and thought they were perfect.  I adhered the arrow with liquid adhesive.  I then used thick foam dots to pop up the "love" heart in the center.  I then used a thinner profile foam square for the "you" heart.  I finished off the card by adding it to a SSS fog gray cardstock panel.

Affiliate linked supply list:


Thanks for stopping by and don't forget to check out the new SSS Kisses release!


Wednesday, January 18, 2023

a new adventure

 Hello and happy Wednesday everyone.  I'm popping in to let you know that I have joined the Birch Press Design team!  I'm super excited to be working with a company that is located in my "backyard".  If you don't know, Birch Press Design is part of Memory Box.  Memory Box is located in Seattle, Washington.  I'm about 30 miles down the road from Seattle in Tacoma, Washington.   I have always loved Memory Box dies and I love the Birch Press Design dies just as much.   Here is a peek of my card:

I have a post up on the Birch Press Design blog today and you can click here to take a look.  I will be posting there twice a month.  

Thanks for stopping by and have a great day!

Thursday, January 12, 2023

snowflakes...

 Hello!  Popping in with a quick post to share a card I made for a few challenges:  Freshly Make Sketches, Paper Players and JUGs.   The JUGs challenge closes this evening so gotta get the card posted.  Let take a look.

I will admit that the card is very similar to the last card I posted, but that is because the FMS layout for this week is very similar to the layout from last week.  I also used a tag on this card just like I did with the previous card.  I recently purchased the Birch Press Felicity Snowflakes die set and used those for my little snowflakes.  I die cut them from light blue and dark blue cardstocks then layered them.  I die cut the tag from white cardstock, added the twine and then added the tag to a light gray cardstock panel.   The snowflakes were added along with a sentiment that I stamped in blue ink.  The sentiment is from the Birch Press Contempo Greetings stamp set.  I like that there is a matching die set that allows you to die cut the sentiment.  I finished off the card with the final snowflake and small blue rhinestones that were added to the center of each snowflake. 


Thanks for stopping by and have a great day!


Saturday, January 7, 2023

love you...

 Look at me!  Posting again, lol.   Like I said in my last post I have been enjoying cross-stitching, but I was also a little burned out on paper crafting and needed a bit of a break.  But you know that I can't resist participating in my two favorite challenges:  Color Throwdown and Freshly Made Sketches.  I just love the color palette that Amy has this week and was inspired by the sweet little bird in the inspiration photo.  Making my idea work with the FMS sketch was a challenge, but one that I was up for.  Take a look:


I had to dig through my cardstock to find the right color to die cut my little bird from.  This little cutie is called Perched Reed Bird from Memory Box and is one of the first MB dies that I purchased.  I just love it.  The little leafy stems are from a new to me Poppystamps die set called Orchard Leaves.   The sentiment is one that I stamped along time ago using the Simon Says Stamp Thanks and Encouragement Word Mix stamp and die set.   I thought the tag was the perfect size for my little bird, leaves and sentiment.  I added a little crystal to the bird for the eye and some black and white twine to complete the tag. 


Thursday, January 5, 2023

a card and other things...

 Hello!  I hope your new year is off to a great start.  So far so good in my neck of the woods.  I have a card to share today and a peek at what else I have been doing over the last 6-7 months.  First up is my card.  This is for Color Hues and Simon Says Stamp Wednesday challenge to use something new. 


Pink and gold are such a classic color combination and so I just had to play along with the challenge.  I had recently gotten the Birch Press Piped Icing Star and so I used that for my card.  As you can see the star and accompanying snowflake are quite large so I just made them the focus of my card.  The sentiment is from an older Simon Says Stamp snowflake stamp set and I thought it worked perfectly with my card.   I used woodgrain cardstock from Memory Box for the background to provide a little more interest.  The die set and the woodgrain cardstock are my something new. 


Now on to the other thing that I mentioned at the start of my blog post.  Many years ago, before I started paper crafting, I was a cross stitcher.   But gave it up after I started having problems with my right shoulder (I'm right handed).   During COVID I started watching videos by papercrafter Nichol Spohr and in June of 2022 she started posting what are called Flosstube videos.   In her first video she shared that she had cross stitched for a long time and then gave it up, too, but for different reasons and had recently started stitching, again.  After watching her video, I got inspired to pull out a couple of patterns that I had and finish them.  During the process I discovered that stitching didn't bother my shoulder as much as it had in the past and now, I am stitching like crazy!   In fact, I have been enjoying stitching more than I have cardmaking which is why I have shared so few card related posts.  Many of my finished stitches have been turned into cute little pillows with the help of my mother-in-law who sews.   Today I'm sharing a recently fully finished object (or FFO in the stitching world) and a stitch that I finished but have not fully finished yet. 


This FFO is my favorite so far.  My MIL finished the back of the pillow with a beautiful poinsettia fabric and then once I got it home I added the red tassels.  I just love how it turned out.  


This is another favorite stitch that I completed right before Christmas.  I plan to finish this one not as a pillow, but on a display piece.  I know what I will be buying to finish it, I just have to get in a little practice with some smaller stitches that I will be finishing as ornaments.  Once I get the ornaments completed then I will finish this cutie!  

Thanks, stopping by today.  I hope you enjoyed seeing my card and what else I have been up to over the last few months.  If you happen to be on Instagram you can check out my feed (@rosigrld) and see other things I have stitched.  Have a lovely day!


Sunday, January 1, 2023

Guest Designing for the Poppystamps Challenge and Happy New Year!

 Hello!  Wow... can hardly believe that it is 2023, but here we are.  Wishing everyone a great start to the new year.  I'm having a great start as I am the guest designer for the January Poppystamps challenge.  This month the theme is "let it snow".   You can find all the details regarding the challenge here on the Poppystamps blog.  


I had a lot of fun creating my card using several different Poppystamps products as well as a Tim Holtz distress mica spray called Shiny Bauble.    


I started by spraying some Memory Box watercolor cardstock with the Shiny Bauble mica spray and letting it dry completely.  The I die cut the piece using the Poppystamps Snowflake Loop die set.   I then brushed on some distress collage medium and sprinkled on Rock Candy glitter (although you can't really tell in the photo).   I die cut a rectangle from light blue cardstock and adhered my snowflake loop to the panel.  The die set comes with a single large snowflake that I adhered to the snowflake loop.  The large hello is from the Poppystamps Birthday Wishes Poe Script hot foil plates and die set and the subsentiment is from the Modest Greetings 2 hot foil plate and die set.   As I was making the card I started out foiling the sentiments in silver on white cardstock, but I didn't like it.  Then I did silver on the light blue and I still didn't like it.   Decided to do light blue foil on the light blue cardstock and I loved it!    The sentiments were popped up in the center of the circle with thin foam squares.  I finished off the card with lots and lots of light blue Open Studio Fairy Jewels.  

Thanks for stopping by and make sure you check out the Poppystamps challenge.  There is a chance to win a $20 gift certificate!  Have a lovely day!