"We do not remember days, we remember moments." Cesare Pavese

Showing posts with label Glimmer Hot Foil. Show all posts

Saturday, September 27, 2025

Papertrey Ink September Release - Part 2

 Hello!  I'm back to share three more cards that I made with products from the Papertrey Ink September release.   With all these beautiful Christmas themed products to work with I'm sure to get most of my Christmas cards made for the season!  Let's have a look at what I made.


This first card was made with the new Into the Blooms: Snowdrops die set, the This is Big Happy Holidays stamps and dies, the Stitched Snowflakes cover plate die, Rounded Rectangle dies and In Frame: Ovals dies.   I die cut the snowdrops from green and white cardstock and then added a little bit of Broken China distress oxide ink to the white pieces.  The stems were die cut from a medium green cardstock.  I adhered all the piece together with liquid adhesive and thin foam squares in a few places.  I then die cut pale blue cardstock with the largest In Frame: Ovals die.  I kept the two pieces together by securing them in place on the back with washi tape.  White cardstock was die cut with the largest Rounded Rectangle die and then run through my die cutting machine with the Stitched Snowflakes die.  I adhered that to a pale blue cardstock base and then layered on the ovals and the snowdrops.  I finished with the Happy Holiday sentiment.   I didn't stamp the sentiment and then die cut it as I wasn't sure I could get the die to line up correctly.  So, I die cut first, left the die cut in place, aligned the sentiment on top and then stamped using black ink.  Worked like a charm.  I die cut additional layers, adhered them together and then adhered the sentiment to the card front with liquid adhesive and thin foam squares.   A little bit of sparkle was added as well using Rock Candy glitter.   Going to add this card to the Simon Says Stamp Wednesday challenge of anything goes.


For this card and the third one I went with a traditional red and green theme with kraft instead of white as the background for a more homespun feel.  This card uses Love to Layer Christmas Tree dies, Fresh Greens hot foil plate, Rounded Rectangle Pierced dies and a sentiment from the Merry Motifs stamp and die set.    I had recently found a sheet of watercolor cardstock that I had used to create this dark green backgound using distress mica sprays.  I decided to use it for my Christmas tree.  I used Memory Box patterned paper from one of their Christmas pads for the garland and little ornaments.  I decided to bring gold into the mix with the star, little sparkle ornaments and the gold hot foiled frame.  The background needed a little something else, so I used one of the smaller pierced Rounded Rectangles to die cut the patterned paper I used for the garland to place behind the tree.  The sentiment was stamped in a dark red and die cut.  I then die cut a second layer from gold foil cardstock and adhered it behind the sentiment slightly off set.  It looks so pretty in real life. 


 I think this final card really has a homespun feel too it.  Again, done in red and green with kraft.  I think I should have maybe embossed the sentiment black, but there it is in white!  This card was made with Build a Christmas Tree dies, This is Big:  Happy Holidays sentiment set and the Rounded Rectangle Stitched dies.  Memory Box plaid cardstock was used for the background.   After die cutting the garland from a red cardstock I decided to jazz things up a bit by using red glitter cardstock for the ornaments.  The kraft bows dial the glitz back a little for a more homespun fell.  After layering everything on the tree and adhering it to the plaid background I stamped the sentiment on vellum and embossed in white.  Again, thinking maybe I should have used black, but what is done is done, right? 

Well, that is it for me.  I have made it through a large portion of the September release, but still have several more products to share.  So, I will be back later in the week with more Christmas cards!  Thanks for stopping by and have a wonderful day!


Tuesday, September 23, 2025

PaperTrey Ink September Release!

 Hello, hello!  Have you seen the September release from PaperTrey Ink?  It is absolutely amazing!!  PaperTrey Ink generously sent me products from the release.  I will be sharing projects that I have made with the release over the next few weeks.  Let's take a look at the first set of cards I made using release products.


Who doesn't love the Christmas poem Twas the Night Before Christmas?  When I opened the package from PaperTrey Ink and saw the Twas the Night Before Christmas products I was in heaven!  I loved reading the poem to my boys when they were little.  I would read it almost every night until Christmas day arrived.  I read it so much I could recite it from heart!   Besides using the Twas the Night Before Christmas products I also used the new, Nutcracker Magic stamps and dies, Storybook Scroll die collection and the Cover Plate:  Stitched Snowflakes die.   Kept things simple by using PTI Rustic Cream cardstock for everything.  The scroll and accompanying pieces were diecut and then inked with Antique Linen distress ink for an aged look.  I then assembled the scroll.   The Twas the Night Before Christmas stamp set includes the main sentiment and then a few small images to use with the sentiment.  I used one to place at the bottom of the scroll.  For the top of the scroll, I used an image from Nutcracker Magic for the swag at the top.   The sentiment and the larger swag were stamped in brown ink to keep the aged look going and then inked with Antique Linen distress ink. The larger swag was colored with Copic markers.  I stamped the smaller swag in green ink and the berries using a light red.  I then added red berries using Nuvo drops.    Rustic White cardstock was die cut with the Stitched Snowflake die and then I assembled the card.  Thought about adding some glitter, but decided against it.  Maybe next time!


For my second card I used the 2 Corinthians stamp, outline die and background dies and the Merry Motifs hot foil plate.  I used the color palette from Color Throwdown so I will be posting this card in their gallery.  I hot foiled the Merry Motifs on light blue cardstock using Skybright hot foil.  The larger of the two background dies was used to cut dark blue cardstock and the smaller one die cut the same light blue cardstock used for the foiled background.  The sentiment was stamped using Altenew Terracotta ink.  I did also use an image from the Merry Motifs stamp and die set stamping the image with the Terracotta ink.  Die cut the image and the sentiment and then layered everything on a card base. 


That's it for me, but I will be back soon with more projects made with this fabulous release.  Stay tuned, lol!  Thanks for stopping by and have a wonderful day!


Thursday, January 30, 2025

Birch Press Design Block Print: Crane

 Hello everyone!  Can you believe that January is almost over?!  What an amazing month this has been!  Today I'm popping in to share my second Birch Press Design card for the month of January.  For this card I used the new Block Print: Crane die set.  Let's have a look.


I knew I wanted to create a scene where the crane was standing on a shoreline with some reeds.  When I saw the current Freshly Made Sketches sketch I thought it would be a great way to get my card going.  For the banded element in the sketch I tore strips of patterned paper from two different Memory Box 6x6 paper pads (Anemone Plaid and Poinsettia Plaid).  I adhered the strips with glue to a white panel of cardstock.  I left an area with no glue so that I could slip some of my "reeds" and the crane's legs behind the first bluish strip.  I then die cut the panel with a rectangle die.


The "reeds" were die cut from some of the scrap patterned paper that was left after I tore the green and brown strips using the Budding Twigs Contour Layers dies.  There are two dies in the Budding Twigs die set.  Each die cuts three pieces that are supposed to be layered together to create the budding twig.  I only used one layer from each die.  I placed the die on the patterned paper so that I would mostly just cut the piece I needed.  I cut a bunch, but didn't use all of them.  Because the card already had a more masculine feel I die cut the crane from light gray, white and brown cardstock.  I layered all of the pieces and then inserted the crane in behind the first blue strip.


Then I began adding my "reeds".  I inserted most of them into the little pocket I created, but added a few in front to give the reed cluster a fuller look.   I finished off the card with a sentiment from the Sugar Script Sentiments 1 hot foil set that I foiled in matte gold.   

Well, that's it for me.  I'm also going to add this to the Simon Says Stamp Wednesday challenge of anything goes.  Thanks for stopping by and have a wonderful day!


Thursday, November 28, 2024

Happy Thanksgiving!

 Hello and Happy Thanksgiving to everyone here in the US celebrating!  I'm popping in with my second Birch Press Design post for the month.  Can't believe that we are less than a month away from Christmas.  Thanksgiving coming so late this year really speeds things up doesn't it?   Since Christmas is so close I thought I would share a Christmas card today.  Let's have a look.

I started my card by picking out two shades of red to use with the new Rosebud Arch Contour Layers die set.  Even though this die is a more spring-like die I thought it would be lovely used for a Christmas card.  I did also use two shades of green for the stems.  I die cut everything and adhered all the pieces together.  I did add a bit of sparkle to the buds with some Rock Candy glitter.  I love that stuff!   The Merry Christmas was die cut from the darker of the two reds three times, layered together and then adhered to the shadow layer that was die cut from white cardstock.   


I wanted something a little more for the background so I decided to pull out my Herbarium Layering die set.  At first I was going to use layer A to emboss the background, but then decided that I would do a little hot foiling with it.  I used silver matte foil and I love the pretty background it provides to the card.  Fun fact:  I have NEVER actually used all of the Herbarium layers together on a card!  I have only used the top layer for embossing and now hot foiling!  Need to use all the layers together soon.


With all the pieces completed it was time to put everything together.  The Rosebud Arch creates the perfect spot for a sentiment, even one as large as the Merry Christmas.   Well, that is it for me.  Thanks for stopping by and have a wonderful day!  Going to add this to the Simon Says Stamp Wednesday challenge of anything goes.


Friday, October 25, 2024

more clean and simple mixed media...

 Hello!  I'm back and like the title of my post says I have more cards created in a clean and simple style that feature some mixed media!  Love combining things that don't seem like they belong together, lol.  Let's have a look at what I made.


This card is for Freshly Made Sketches and I just love how it turned out!   I used lots of distress mica sprays and I think the Fossilized Amber distress spritz for the leaves.  The whole thing started when I created the tag I used on this card.  I had alot of the sprays left over in my splatter box and so I decided to grab a piece of watercolor cardstock and soak up all the leftover sprays.  The end result was a brownish color.  Once it was dry I added some additional mica spray in Mulled Cider and Harvest Moon (I think, lol).   I let it dry and then die cut the leaves using a leaf die from A Jillian Vance Design and a set of leaf dies from Simon Says Stamp.   A piece of off white cardstock was die cut with a rectangle die and then I worked on the arrangment of the leaves.   When I had that done to my liking I took a picture so I could get the placement just right.  I glued down the leaves and then added the sentiment from the Simon Says Stamp Cozy Autumn Hugs stamp set with strip of foam tape.  I finished with the little bow.  


This next card is for Color Throwdown and I will also be adding it to the Just Us Girls gallery as I added a little bit of stenciling.   Take a look.


The CTD colors this week are orange, cream and kraft.  I thought the newly released Birch Press Design Splendid Cosmos Contour Layers die would look pretty in those colors.  I die cut the main flower from off white cardstock (PTI's Rustic White) and then added orange ink (Pinkfresh Studio Apricot) to the center of the flower extending it out on the petals.  Got a little too much on that one bottom petal, but I think it looks fine.  I die cut the center pieces from kraft cardstock and then added a little bit of the residual orange ink on my brush to the pieces.   Everything was then glued together.  I originally had another ide for the card, but when I tried it I just didn't like it.  That happens sometimes, right?   So, I decided to sleep on it and in the morning pulled out a brick pattern stencil from MFT Stamps and added the partial brick pattern to a kraft cardstock panel using Picket Fence Studios Luxe Paper Glaze in gold.   Once dry I adhered the flower and then added the sentiment that I had hot foiled on cream cardstock in matte gold.   Again, clean and simple, but with a little touch of mixed media.  Try it sometime!


I was sad to learn of the passing of Color Throwdown team member, Barbara Anders.  She never failed to amaze me with her gorgeous cards!   Her talent will be greatly missed.  Thanks for stopping by and have a wonderful day!

Friday, October 18, 2024

celebrate today...

 Hello friends!  I'm popping in to share a card that was supposed to be posted to the Birch Press Design blog on Wednesday, October 16th.   Unfortunately, the BPD blog was hacked and Dave, the owner of Birch Press Design was forced to remove the entire blog!    I decided to share what I made here so those of you who aren't on Instagram or don't want to go to the BPD Facebook page can see what I made.  So here we go!


I used the recently released Meadow Berry Branch Contour Layers and Evening Moths dies set for my card.  I wanted bit of a fall/rustic feel for the card so I used orange Memory Box cardstock for the berries and two red Memory Box red cardstocks that are more on the coral side of red.  


I used glossy accents on the berries and moth and then sprinkled on Rock Candy glitter for some subtle sparkle.  I used a Poppystamps circle die set for the two circles in the background.  They were die cut from cream Memory Box woodgrain cardstock.   The background rectangle was die cut from Memory Box kraft woodgrain cardstock.  


After adhering all the pieces as you see, I finished the card with the Celebrate Today Noted Script hot foil plate that was foiled using matte gold foil.   A little side note about hot foiling.  I haven't done it in ages so I was a little worried that I had forgotten how.  Thankfully I remembered and my foiling turned out perfect!  

Well, that is it for me!  Thanks for stopping by and have a wonderful day!

Tuesday, July 16, 2024

Guesting at Color Hues!

 Hello, hello!  I have the distinct pleasure of being the guest designer over at Color Hues today and if you are looking for a color combo to help create some "Christmas in July" cards then Color Hues is the place to be!  The combo for the next two-ish weeks is red and green!   Take a look at what I created with those colors.


As you can see from my card I went with dark shades of the red and green.  My most favorite red in the crafting world is Stampin Up's Cherry Cobbler.  It is the most gorgeous dark red and it pairs perfectly with PaperTrey Ink's Pinefeather, a gorgeous dark hunter green.  I used two dies from Poppystamps:  Holiday Joy and Nordic Bird.  I die cut all the pieces for each from the Cherry Cobbler and Pinefeather cardstocks and then layered them as you see.   I did cut several of the word joy from the Cherry Cobbler and layered them together before adhering to the shadow layer cut from Pinefeather.   I decided to go with a cream background panel that I embossed with a Spellbinder holly embossing folder.  I adhered the joy using liquid adhesive and the added the bird using a combo of liquid adhesive and thin foam squares.  I finished with a foiled sentiment that I had in my stash.

I hope you will take the time to play along with the Color Hues challenge.  Thanks for stopping by and have a wonderful day!


Sunday, July 14, 2024

a masculine card...

 Hello!  I'm back with a masculine card for a couple of challenges:  Color Throwdown and Pinkfresh Studio July challenge.  The colors this week at CTD are navy, terracotta and kraft which said masculine to me.  Part of the challenge at Pinkfresh Studio is to use geometric design elements which also had me thinking masculine.  Let's have a look at what I made.


I did more direct to paper inking using two Altenew Fresh inks in the colors of Navy and Terracotta!  So happy I had those colors.    Once the ink had dried I die cut each piece with a circular and rectangular die (both from Pinkfresh Studio).  I layered them onto a debossed background that has circles on it that my friend, Greta, gave me.  I layered the rectangle flat on the panel and then added layers to the back of the inner rectangle and inserted it into the center.  I then adhered the circle using various layers of foam squares. I finished with the leafy die cut (from Pinkfresh Studio) and a foiled sentiment (Pinkfresh Studio).  Everything makes for a great masculine card or a card for a gal pal who appreciates navy, terracotta and kraft!


That's it for me.  Thanks for stopping by and have a wonderful day!


Wednesday, March 13, 2024

Birch Press Design Post

 Hello!  Popping in to let you know that I have a post up on the Birch Press Design blog.  Here is a little peek of what I created:

Thanks for stopping by and have a lovely day!

Thursday, January 11, 2024

Birch Press Design Post

 Hello everyone!  I'm popping in to let you know that I have a post up on the Birch Press Design blog today.  Here is a little peek:


Thanks for stopping by and have a wonderful day!


Friday, December 15, 2023

Jewel Snowflake

 Hello!  Popping in with a card for a few challenges, Freshly Made Sketches, Color Throwdown and Pinkfresh Studio monthly challenge.    For the PFS challenge I went with the theme of a Christmas/holiday card. Take a look at what I made:


A few months ago Pinkfresh Studio had a Christmas/holiday release and they introduced the beautiful Folk Snowflake stamp, stencil and die set of products.  I love a good snowflake and had to get this one.  I had been waiting for the right situation to come along to make something with this set and the color combo from CTD is what set everything in motion.  I just love the beautiful jewel tone colors in the combo and it worked out perfectly that there were three colors (plus gold) and three layers to the snowflake.  I just love the snowflake in those bold colors.  I stenciled the snowflake first using PFS inks in Royal Kiss, Olive and Sapphire, stamped it with the outline stamp and then die cut it.   I had previously die cut the gold rectangle using the PFS Folk Rectangle dies set.  I layered that on a white panel and then used the smaller scalloped rectangle die for the piece I layered the snowflake on.  To make the scalloped rectangle and the snowflake substantial I adhered several layers behind each before adhering them to the panel.  I finished with one gold glitter embellishment to the center of the snowflake and the greeting that I had hot foiled in black a long time ago! 


That's it for me.  Thanks for stopping by and have a wonderful day!


Thursday, April 20, 2023

two very different cards...

 Hello!  Today I have two very different cards to share.  One is light and bright and the other is rather dramatic.  Let's take a look at the first one.


First up is the rather dramatic looking card.  This one is for the current Sunday Stamps challenge as well as the April Pinkfresh Studio challenge.  The Sunday Stamps challenge is a color challenge and I just fell in love with the bold, dramatic color combo.   Pinkfresh is asking for floral themed cards and I did use at least one color from their color palette:  olive.  I started by foiling the Daisy Wreath with black foil.  Once that was done I stenciled image using the majority of the Sunday Stamps colors.  My greens aren't as dark, but I think that is okay.  All inks used are from Pinkfresh Studio.   The wreath was then die cut with the matching die.  I cut an additional wreath from scrap white cardstock and adhered it to the back of the stenciled one to give it more stability.  The sentiment is a collaboration between Pinkfresh Studio and Scrapbook.com.  I don't know if it is available now.  I have had it for a long time, but I think this is the first time I have used it.  I foiled it using blue foil and die cut it with the matching die.  Additional cuts were made and adhered to the foiled sentiment.  I decided to continue the dramatic look by die cutting dark blue cardstock with the Sparkling Diamond cover plate die.  I then die cut it down further so I would have the white border.  I adhered the wreath and the sentiment and then added some Pinkfresh Studio jewels in Stargazer and Pink to finish the card.  Here is a close up of the foiled sentiment.


Now for my light and bright card!


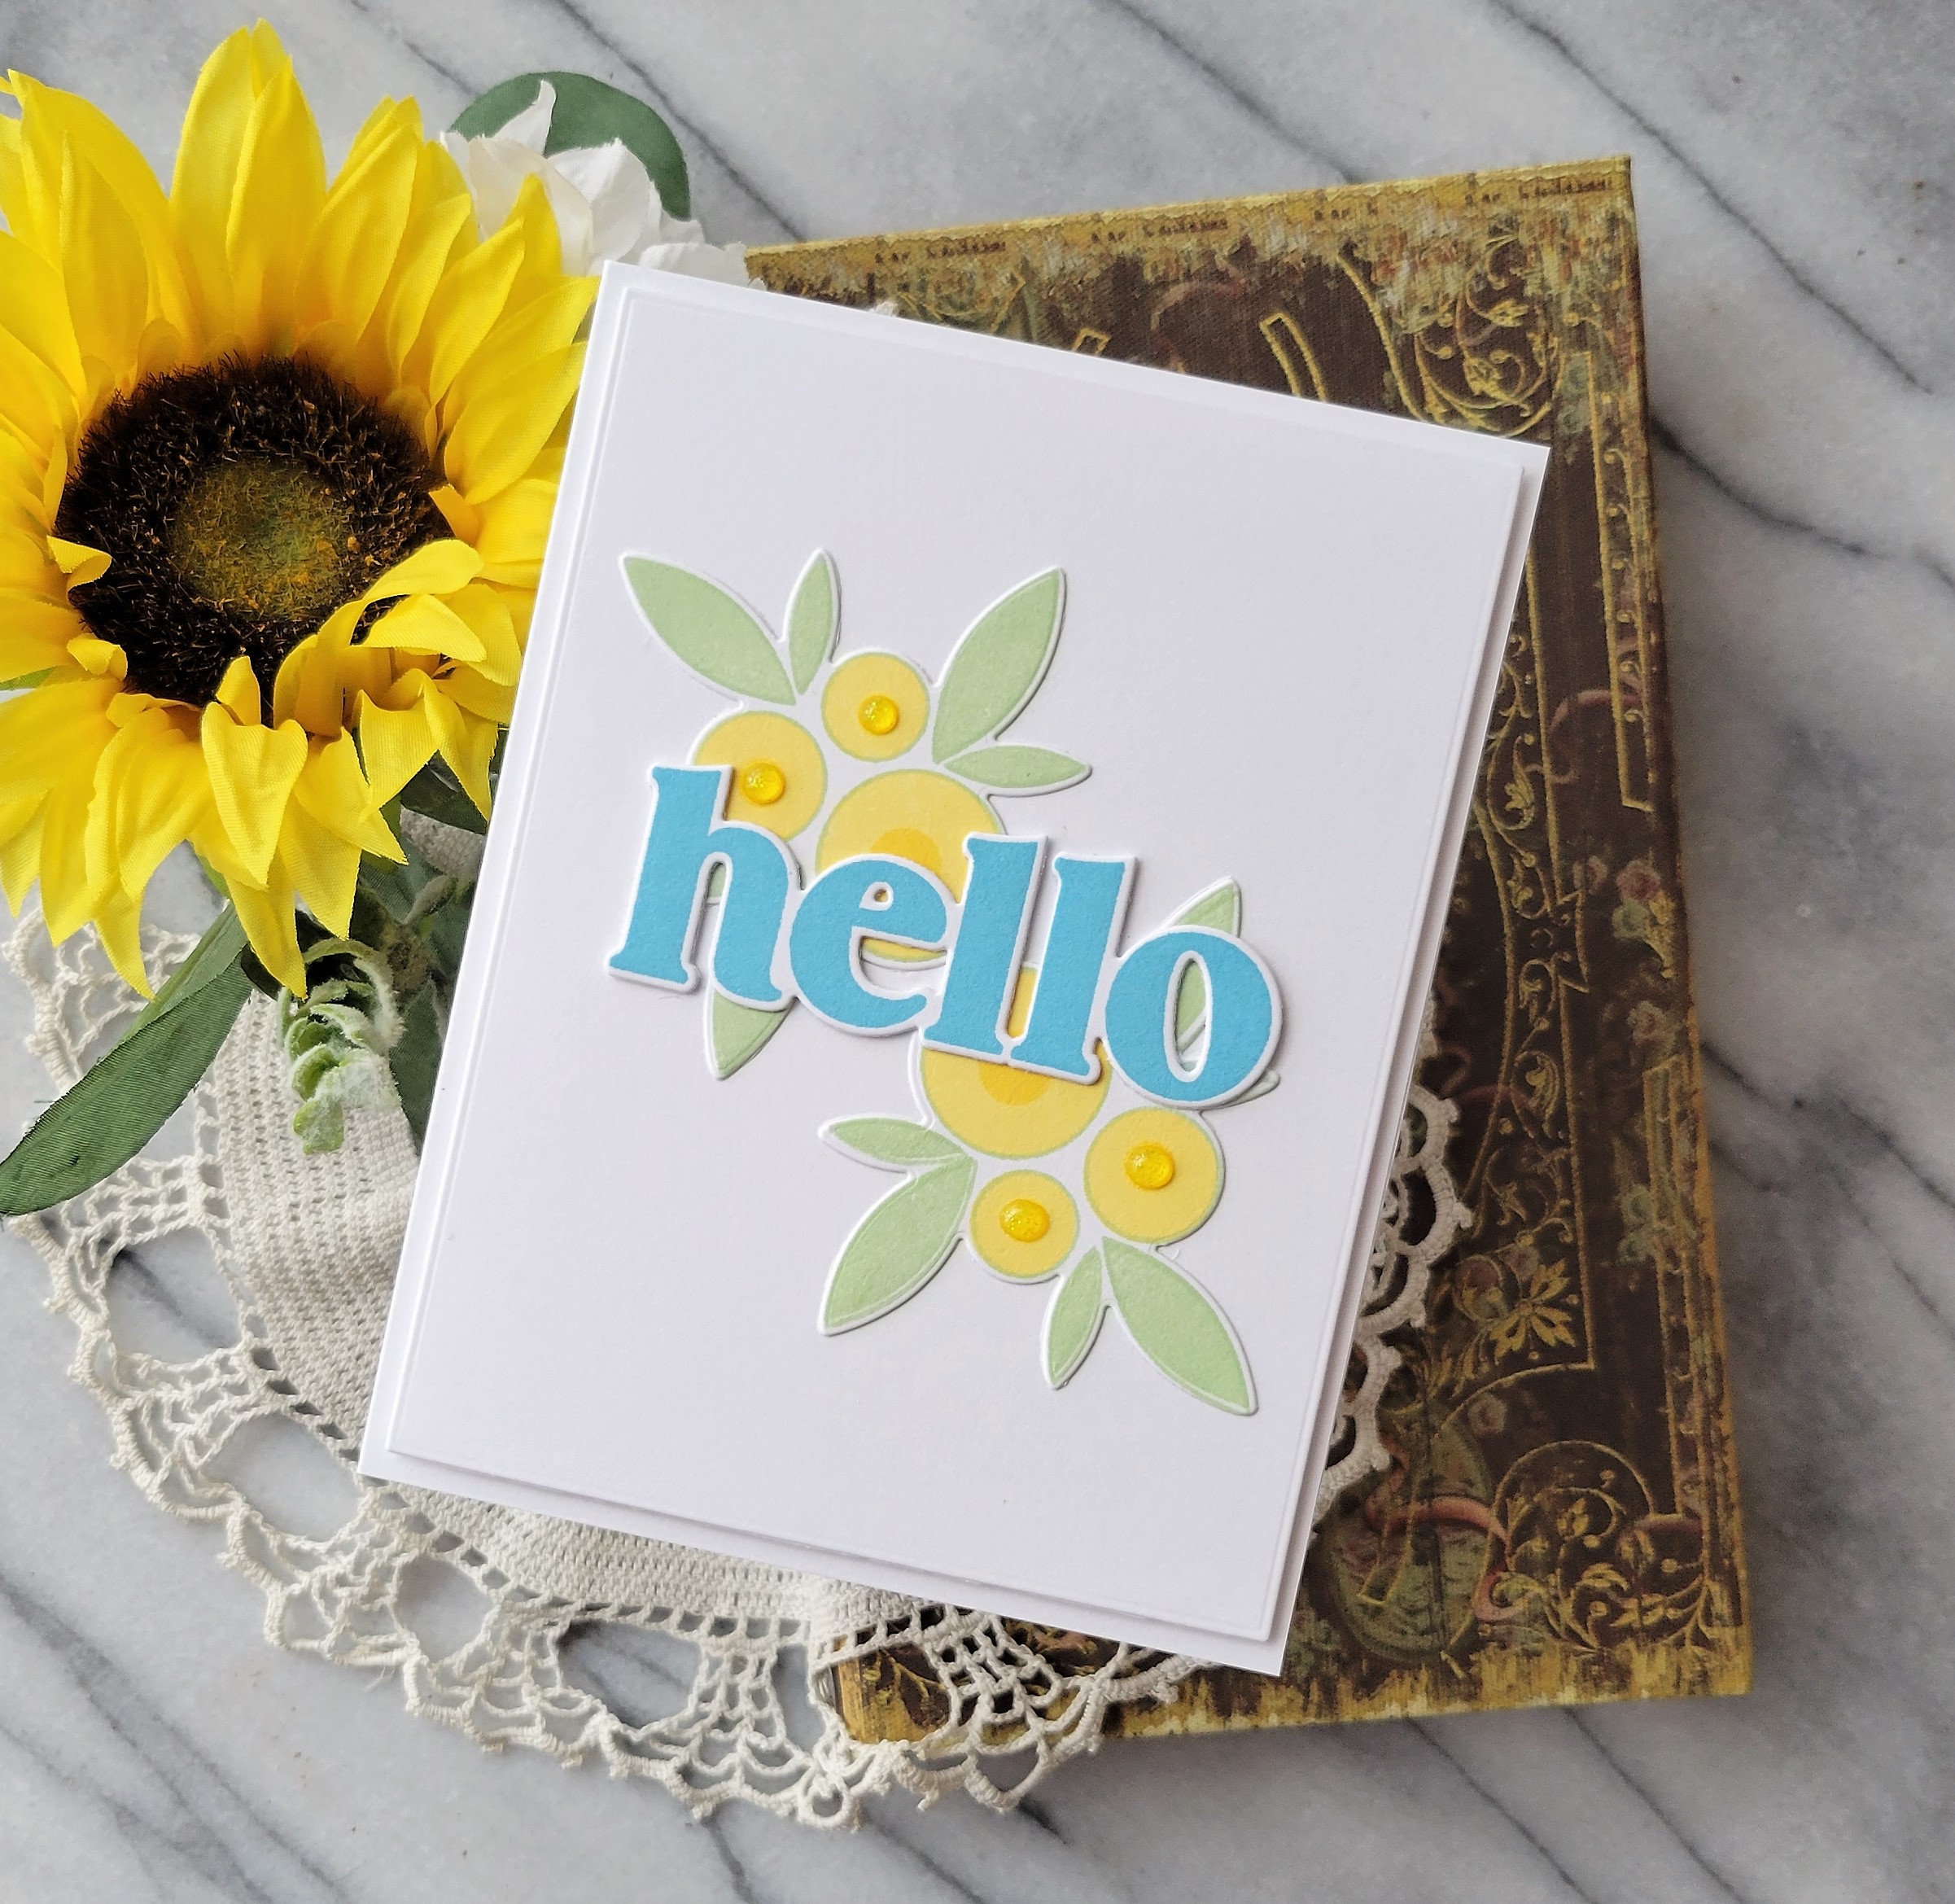
Even though it doesn't feel like spring in my part of the world the Color Throwdown combo helps remind we that it is in fact spring!  I pulled out my Reverse Confetti Poppies stamp and die set to do some simple stamping.  I'm still sad that Reverse Confetti is no more, but I'm determined to use my stash of RC products.  The hello is from the RC Hello Daisy stamp and die set.   After stamping and die cutting all the elements I arranged them on a simple white cardstock panel and then added some yellow Nuvo drops to the centers of the smaller flowers.   Clean, simple and very different from the first card!


Thanks for stopping by and have a lovely day!


Thursday, March 30, 2023

A Spring Post at Birch Press Design

 Hello!  Hope all is well in your part of the world.  I have a post up on the Birch Press Design blog today.  Here is a little peek:


I hope you will head over to the blog to check it out.  Thanks for stopping by and have a lovely day!

Friday, March 24, 2023

two cards...

 Hello!  Popping in with two cards today.  One card is for the Altenew monthly challenge and the other is for the Pinkfresh Studio monthly challenge.  First up is the card for Altenew, take a look. 


The color combo this month for the Altenew challenge was definitely a challenge for me.  But I wanted to take up that challenge because isn't that what challenges are for, lol?   The colors are green and two shades of brown, but there is also a lovely old brick castle featured in the photo so I decided to take some inspiration from that and create a "brick" background for my green leaves.  I created my own stencil using a die that I have that creates a brick background.  I applied light brown ink first through my stencil and then blended on some light gray ink.  The inks I used are Pinkfresh Doe and Altenew Linestone.  I went back and forth between the two colors to get the look I was going for.  I stamped the leaves from the Leaf Canopy stamp set on watercolor cardstock using VersaFine Clair Acorn ink and then watercolored them with two shades of green from my Kuretake Gansai Tambi watercolor set.  Once everything was dry I die cut them with the matching dies.  I die cut down my background panel, stamped it with the sentiment from Mega Succulent stamp set with the Acorn ink.  The panel was adhered to the kraft card base with foam strips and then I added the leaf branches.  Now I have a nice masculine birthday card and I'm really happy with how it turned out. 


Now let's have a look at my card for the Pinkfresh Studio monthly challenge.


The last time I ordered from Scrapbook.com they had a free gift opportunity that I couldn't pass up.  I pretty 6x6 pad of paper from Dress My Craft called Hydrangea Lawns.   I decided to use that along with many different Pinkfresh Studio dies for my card.  The Pinkfresh challenge is layers and boy do I have layeres, lol!  I started by die cutting the Modern Mosaic coverplate die from some of the patterned paper.  Using a rectangle die that I have that is the exact same sizes as the cover plate die I die cut a piece of patterned paper with a script design on it and adhered it behind the mosaic panel.  I then die cut another piece of patterned paper with the Fancy Oval frame.  I die cut a second frame and adhered it to the main oval.  I die cut a scalloped rectangle using the Essentials Scalloped rectangle die, adhered that and then added the oval frame.  I added foam squares to the back of the fall out oval and set it back inside the frame.   I had previously foiled some of the Pinkfresh butterflies on acetate and then adhered them to some patterned paper I used two of those on the card along with a sentiment that I foiled in gold on acetate, as well.  Nice to be able to use up some of those bits and pieces we all seem to have!


Thanks for stopping by and have a lovely day!


Friday, March 3, 2023

a wreath and flowers...

Hello!  I'm popping in with two cards for a few challenges.   And as you can tell from my blog title, one card features a wreath and the other features flowers.  First up is the card featuring a wreath.


The current color combo at Color Hues is gold and green and I thought they would be perfect to pair up with the Freshly Made Sketches layout.  I used the wreath image from the Birch Press Design Classic Sentimental Wreath stamp and die set for the circular image in the FMS layout.  I stamped the solid wreath using Pinkfresh Studio Grassy Knoll and then the detail image using VersaMark watermark ink.  Gold embossing powder was applied, heat set and then I die cut the wreath.   In order to get a green that matched the stamping I used the Grassy Knoll ink pad to apply ink directly to white cardstock and then trimmed off a strip.  I adhered the strip behind the strip of embossed white cardstock and then added that to the card front.  The sentiment is a new foil plate and die set from Birch Press Design called Thank You Noted Script.  That was foiled in gold and then die cut.  I adhered the wreath with foam squares and then added the sentiment.  I wanted something else on the card and so I decided to use some tiny gold stars.  


My next card is for Color Throwdown.  It is a rather fun combo of coral, yellow, navy and blue.   I had just received the Simon Says Stamp March card kit and I decided the fun folk art like flowers in the stamp set were perfect for this combo.  Take a look.


I started by deciding which colors I wanted to put together.  I decided to use the navy blue with coral and the bright blue with the yellow.   I used Pinkfresh Studio inks of Coral Reef, Lemon Whip, Sapphire and Summer Shower.   To ground the flowers I used the long wavy stamp from the stamp set (I actually cut it down to a small size to fit better) and stamped it in Simon Says Stamp Fog Gray ink.  The sentiment is also from the stamp set and was stamped in VersaFine CLAIR Nocturne and then die cut with a banner die.  I die cut down the stamped panel and then matted it with a panel of black cardstock slightly larger than the main panel.  I added everything to a Fog Gray cardstock base.

Thanks for stopping by and have a great day!

Wednesday, January 25, 2023

Waffle Flower Sneak Peek Club Inspiration Hop & Giveway!💕

*****GIVEAWAY CLOSED*****

***WINNER IS:  BUNNY! ***

Bunny please contact me with your full name, email address and mailing address.  Waffle Flower will send your kit out to you.

 Hello everyone!  Have you heard that Waffle Flower now has a new subscription club?  It is an innovative concept in that unlike most clubs that send you a themed kit the Waffle Flower sneak peek club allows you the subscriber to get the chance to receive not yet released products.   How fun is that?!   Each kit cost $29.99 and consists of select products that will be available in an upcoming release.   You can find out all the details regarding the club here on the Waffle Flower website.   
Today I am sharing projects that I created with the sneak peek kits that Waffle Flower generously sent me.    This blog post is part of an inspiration hop and link party put together by Waffle Flower and I will be giving away a sneak peek club kit to one commentor! Commenting to win closes on January 30th.  I will announce the winner of the kit on this blog post on Tuesday, January 31st.  Please make sure to check this blog post on January 31st.  I do need to let you know that unfortunately this giveaway is only open to commentors here in the US.   Let's take look at what I created.
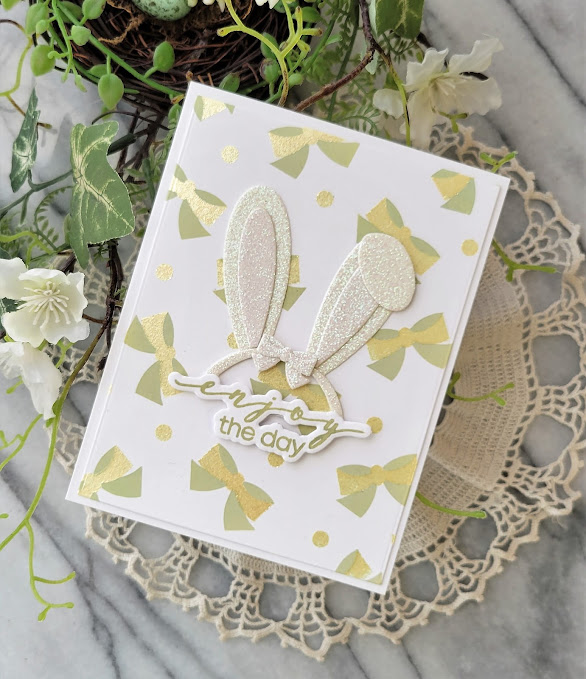

The sneak peek kit contained a super cute die set called Bunny Ears and a stencil set called Layered Bow stencil.  I used both products on the first card.   Both of these products will be available for purchase from Waffle Flower on February 5, 2023.  When Waffle Flower created the Layered Bow stencil set, they added an outline for an A2 sized card.  Adding the outline makes it so easy to line up the stencils.   For my background I started with the second layer of the stencil and inked up that layer with Shabby Shutters distress oxide ink.  I used some Nuvo Glacier paste in Pineapple Delight for the top layer.  Once the background was dry, I die cut it with a rectangle die.  All the pieces of the bunny ears dies were cut from Memory Box glitter cardstock in a very light shade of yellow and an off-white.   I layered everything up and then added them to my card front.  The sentiment is from the Waffle Flower Anemone stamp set and was stamped with the Shabby Shutters distress oxide ink and die cut with the matching die.
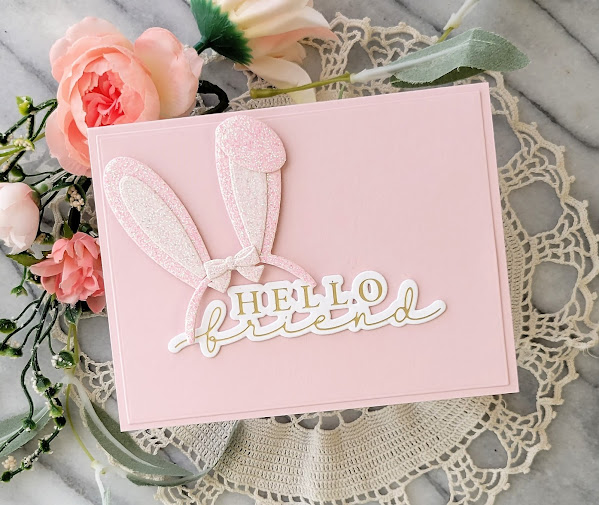

I had so much fun creating the first set of bunny ears that I decided to do a pink set.  I used two shades of pale pink glitter cardstock from Memory Box.  The sentiment is from the Waffle Flower  Hey There hot foil plate and die set.  I foiled the sentiment using matte gold foil.  Even though it says hello friend I think this would make a super cute Easter card.  

I hope you enjoyed my projects and don't forget to comment for a chance to win the same sneak peek club kit that I shared in today's post.   One additional note:  Waffle Flower will hold the kit for the winner until February 15th.