"We do not remember days, we remember moments." Cesare Pavese

Showing posts with label Pink Fresh Studio. Show all posts

Sunday, June 15, 2025

wishing you...

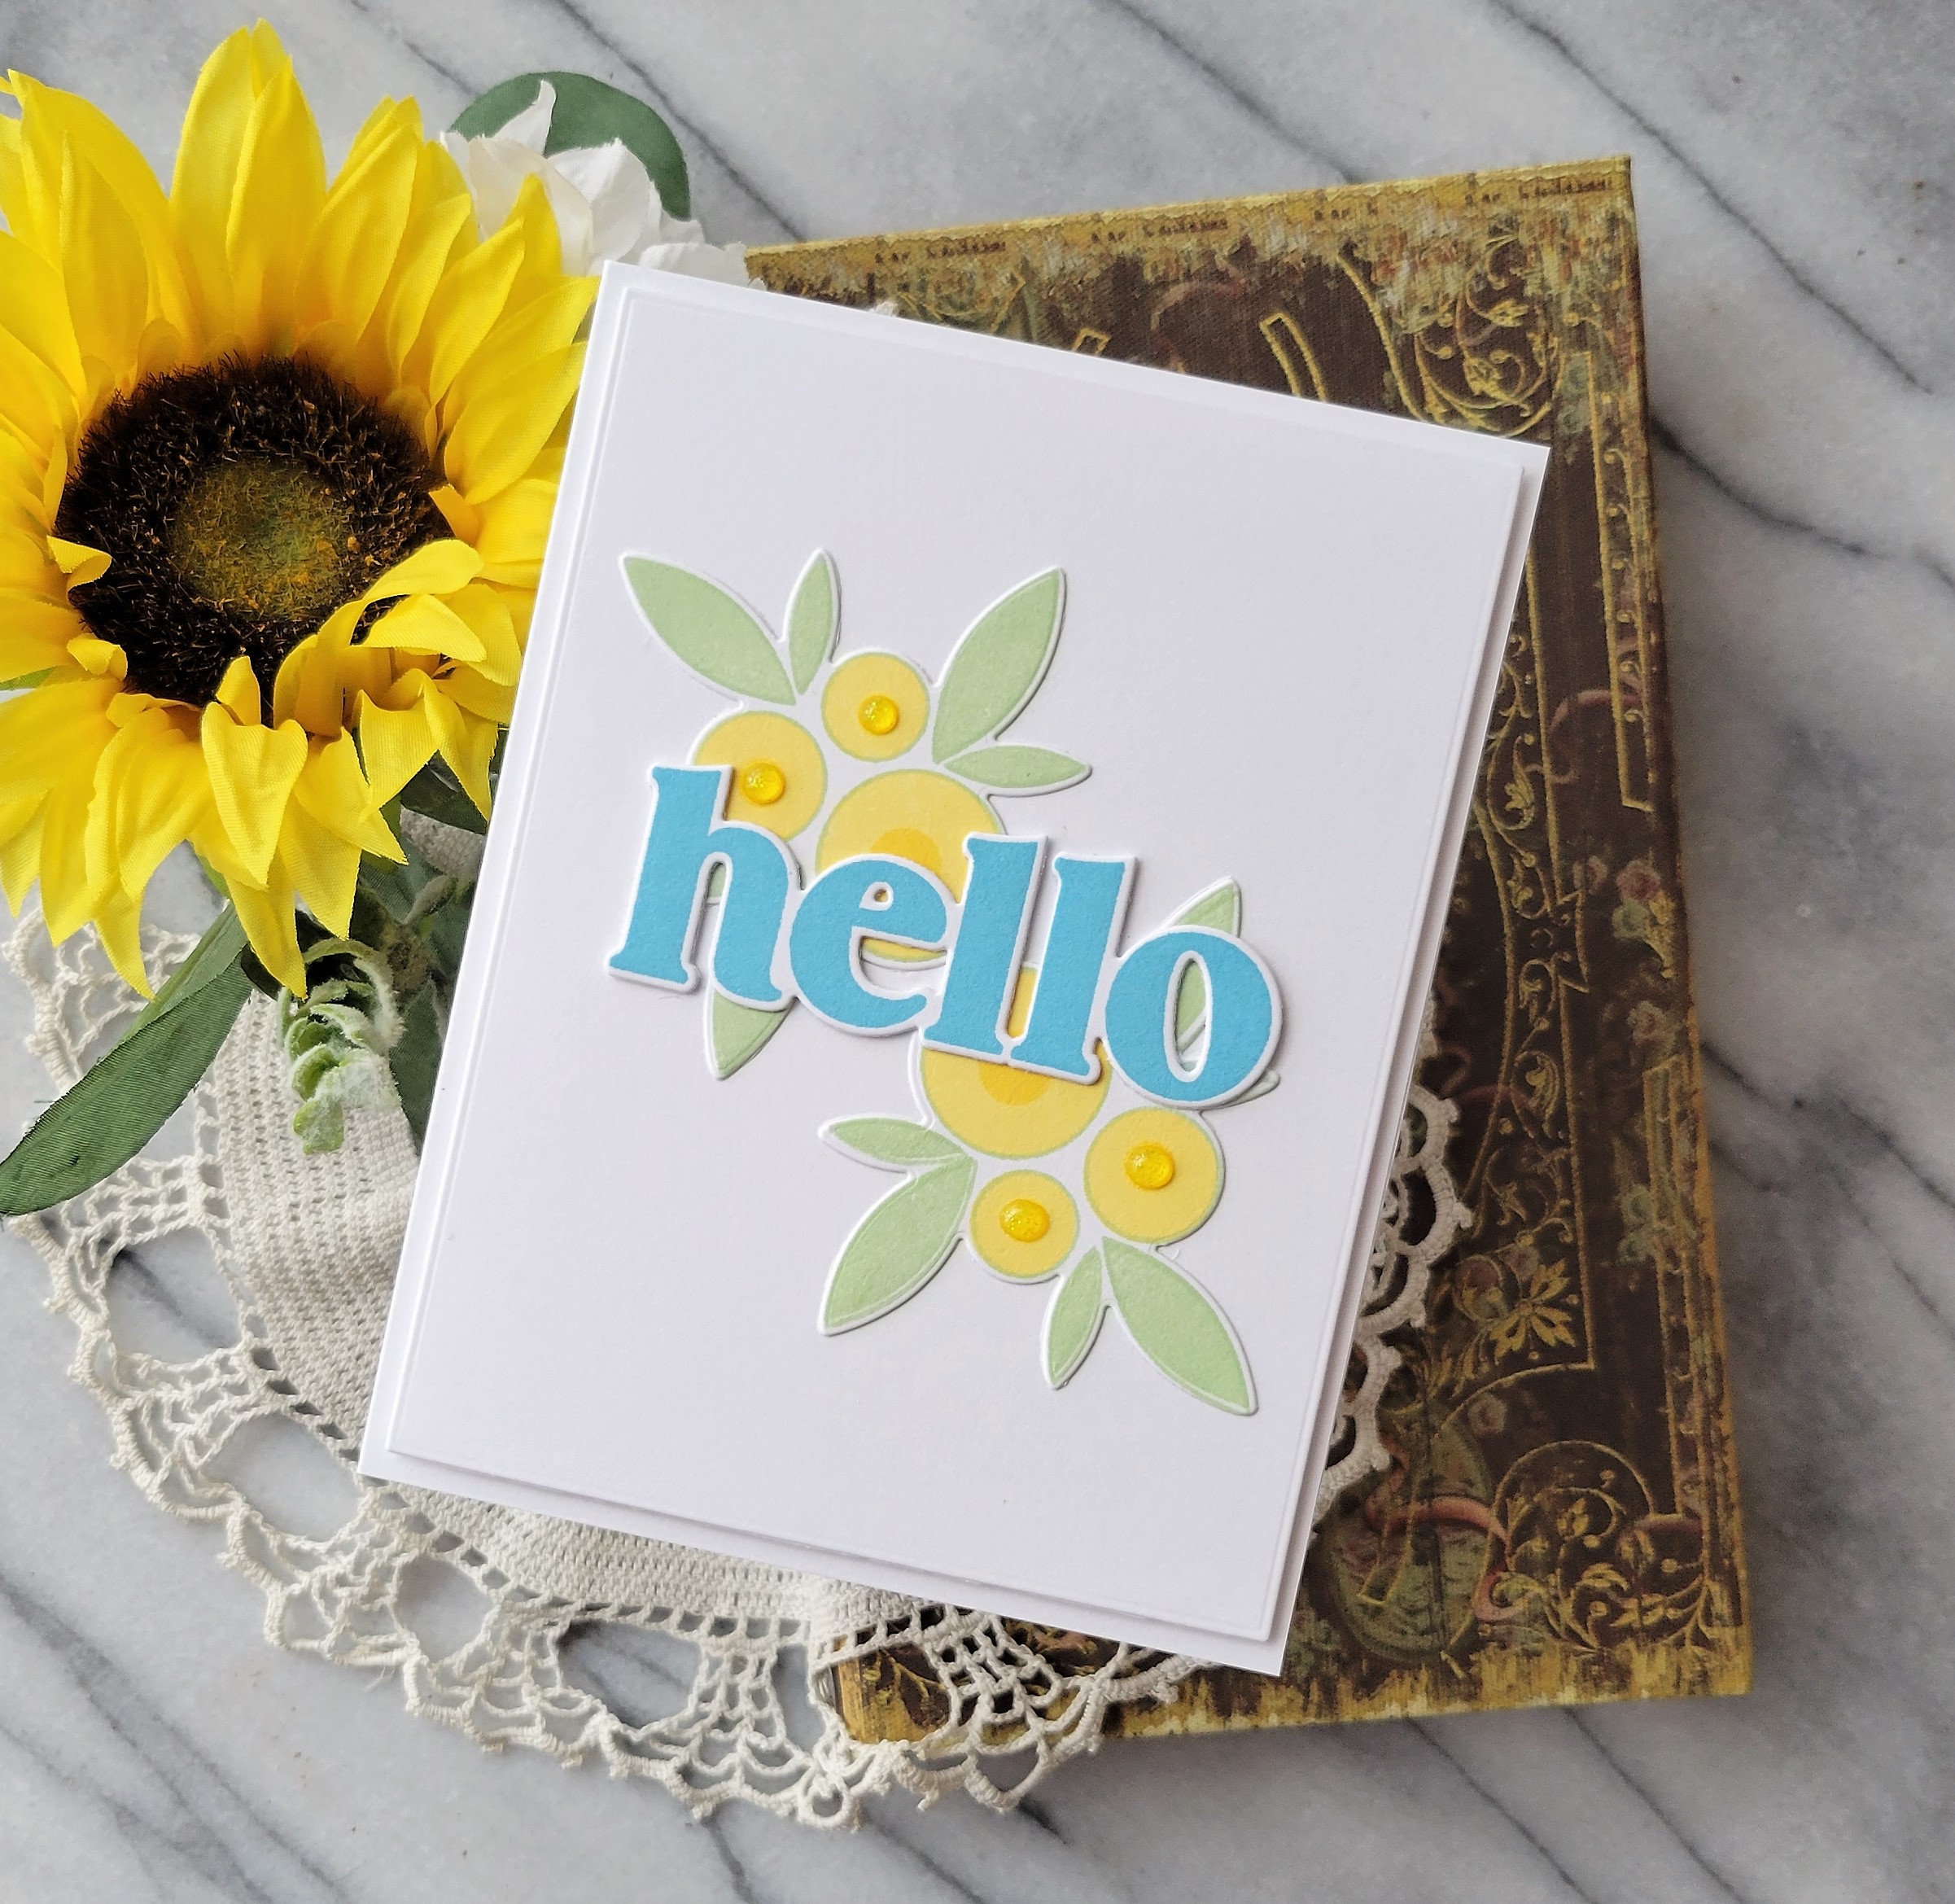
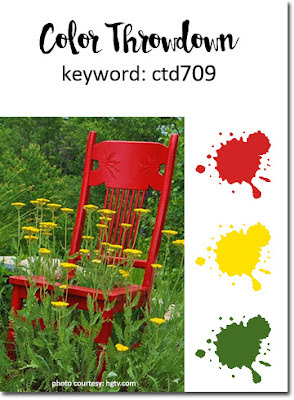
 Hello!  Popping in with a quick post to share a card for a few challenges.   Those challenges are Color Throwdown, Sunday Stamps and Pinkfresh Studio.  Let's have a look at what I made.


The sketch at Sunday Stamps is a fun one so I couldn't miss playing along. Even though there is a theme for the Pinkfresh Studio June challenge the challenges are actually now anything goes so I went with that and used PFS products.   For the three elements in the sketch, I used the Pinkfresh Studio Beautiful group of products.   The stamp set has two large stamps that contain three floral stems each.  I only wanted to use the floral stem you see on my card, so I cut three strips of white cardstock and then stamped each image that way.  It was simple and very quick.  Then I used the stencils to color my flowers orange and the leaves green.   Once that was done, I die cut each image.  To bring in the turquoise I first die cut a PFS postage edge die and then ink blended the edges with Peacock Feather distress oxide ink.  The flowers were arranged so I could determine placement of my sentiment.   That is from a different PFS stamp set.  Once the sentiment was stamped, I glued on my stems and then added Nuvo drops in Morning Dew to some of the little flowers.   


Well, that's it for me.  Thanks for stopping by and have a wonderful day!

Sunday, January 5, 2025

monochromatic cards...

Hello and happy new year!  Popping in with a couple of cards.  One card is for Freshly Made Sketches and Simon Says Stamp Wednesday challenge of something new.  The second card is for Color Throwdown and Just Us Girls (new challenge to use dies).  Let's have a look.


 The Simon Says Stamp IG challenge is to make a white on white project so I decided to use the FMS layout and a new SSS die called Forest Ring for my card.  I die cut the Forest Ring four times and layered them together.  Then I applied glossy accents and lots of Rock Candy glitter.   The snowflakes are from an older SSS die set called Merry & Bright.  I also covered those with gloss accents and Rock Candy Glitter.  I used my current favorite PFS post edge rectangle die to die cut the vellum and glued it to a white cardstock base.  Then I added the forest ring die cut, the snowflakes and the sentiment from an older SSS stamp set.   It is gloomy here in Western Washington so this one did photograph very well, but it is pretty in real life.

For the second card I finally used all the Herbarium layering dies from Birch Press Design along with the FMS colors and created a thinking of you card.  I threw in some black glitter cardstock for a little bit of sparkle.  The sentiment is from a new Birch Press Design stamp set called Vintage Everyday Greetings.  I can see myself using this new stamp set alot this year!  


Well, that's it for me!  Thanks for stopping by and have a wonderful day!

Wednesday, December 25, 2024

Christmas Makes...

 Merry Christmas to everyone!  I hope everyone had a wonderful day spent with family and/or friends!  As my blog post indicates, I have some Christmas makes to share so lets get started!


First up is a Christmas decor piece that I created using lots and lots of fun Tim Holtz Idea-ology Christmas products.  I was 100% inspired by the amazing Emma Williams.   If you have never seen her blog, check it out now.  She creates incredible works of mixed media art!   I had a lot of fun making this even though the mica flakes I used are alittle messy, lol!


This next piece is something I have wanted to make ever since I got Chilly and Freezy two years ago as a freebie from Simon Says Stamp.   I finally got the time last week after my son had his wisdom teeth out last week.  Again, I had a lot of fun creating this little scene with the snowmen watching Santa fly across the sky with his reindeer!  I cheated a little and used some patterned paper from Simple Stories that already had the snowy scene on it.  I just darkened up the top with some distress oxide ink in Uncharted Mariner and Black Soot.  Adding this to the Simon Says Stamp Monday challenge and Wednesday challenge. 


The Simon Says Stamp December card kit included a decoupage kit from Craft Consortium.  I put these cards together using that kit and Prima patterned paper that also came in the kit.   I gave the cards to my great nephew and great nieces with some "Christmas Cash".    I jazzed them up a bit by adding glossy accents and Rock Candy glitter to some of the snowy areas on the images.  I still have 5 more left and have plans to create some Christmas decor pieces with them. 


These cards were made with patterned paper, laser cuts and ephemera bits from the 49 and Market Evergreen Season collection.  I made these for my mom to give to the big grandkids.  I went with a postal theme and used the Pinkfresh Studio Post Edge dies to die cut the papers.   The sentiments are Memory Box Christmas labels.  So glad I had these products on hand to put together some cards quickly!


And finally a card made with a very old, but one of my most favorite stamp sets from Simon Says Stamp.  I gold embossed the sentiment and the floral sways on Spellbinders Mahagony cardstock.  I fussy cut the swags and die cut the sentiment with a Pinkfresh Studio elegant die.  The gold cardstock was also die cut with PFS die.  Everything was layered on a Mahagony cardstock base and then I finished with tiny gold pearls.

Thanks for making it to end!  Thanks for stopping by and have a wonderful day!

Saturday, May 25, 2024

two simple cards...

 Hello and happy Memorial Day weekend to everyone here in the US.  I hope you have a wonderful weekend and Memorial Day.  Our weather isn't so great this weekend (unfortunately typical for the Pacific Northwest!), but we will still have a good time!   I'm popping in to share two pretty simple cards that I made for a couple of challenges.   Let's have a look at card #1.


This card is for Color Hues (use coral and teal) and the Pinkfresh Studio May challenge of flowers.  I don't often make two cards for challenges hosted by papercrafting companies, but I had just gotten the pretty Pinkfresh Studio Amazing Things stamp, die and stencil set.  I'm on a mission to use products at least once right after I get them and so here we are, lol!  I stamped the image and then stenciled the flowers with Pinkfresh Studio inks in Coral Reef and Passionfruit and distress ink ink Abandoned Coral.  The leaves were stenciled with Pinkfresh Aquamarine and Teal Cave inks.  I used a PFS scalloped rectangle die to cut light gray cardstock and then adhered the stem to the frame before adhering it to the white cardstock base.  I finished with a sentiment from the Amazing Things stamp set that I die cut with the matching die and popped up.


This next card for the current Color Throwdown challenge is super simple.  I don't think I have made a card this simple in a very long time, lol!


  The colors for this week's CTD challenge are olive, grey and white.  Perfect for a masculine card.  I make birthday cards for my mom to give to her grand and great-grand children so this one will be going to her to give to my son who is turning 18 in just a couple of weeks.   I can't believe he will be 18!  Seems like it wasn't that long ago he was heading off to kindergarten!  Time sure does fly.  Anyway, I did direct to paper inking with Crushed Olive and Weathered Wood distress inks to get my colors.  I have been going thru my craft supplies, again, to determine what I need to purge and came across this little circular die with the trees in it from Simon Says Stamp.  Don't know the name of it, but it sure is cute.  I die cut the trees from the Crushed Olive panel and then die cut that with a square die.   I used the same square die to cut the Weathered Wood panel and then adhered the two together using thin foam squares.   I added it to a white die cut panel and then added the Memory Box birthday sentiment tab.  Like I said, super simple!

That's it for me!  Thanks for stopping by and have a great weekend!


Saturday, May 18, 2024

two cards...

 Hello!  Popping in to share two cards that I made for several challenges.  First up is a card I made for Color Throwdown and the May Pinkfresh Studio challenge of flowers.  Take a look.


I have had the Pinkfresh Studio Charming Floral Border set of products for along time and I think have only used it once.  Shame on me because how sweet is it?  I stamped the image twice and then used the stencils to color the flowers using Pinkfresh Studio inks.  When I initially did the stenciling of the purples the second shade was too close in color to the first one use so I had to re-stencil the image using a darker purple.   Didn't have to do that with the oranges and the aquas.  Once the stenciling was done I die cut the borders with the matching die.  I die cut additional borders from scrap cardstock to adhere behind the stenciled ones to give them more substance.  There were adhered to my favorite PFS Sparkling Diamonds cover plate die.  I decided that I didn't want to cover up any of the pretty stenciling I did so I used a sentiment from the Charming Borders set that I embossed in black on vellum and then trimmed down with a sentiment strip die.  I finished with these little clear droplets that I have.  I don't know where they came from, but I sure do like them!


This next card is for Freshly Made Sketches and the Simon Says Stamp Wednesday challenge.  Take a look.


I found the FMS sketch to be a bit of a challenge for me.  I wanted to use patterned paper for the card and used some green and blue plaid paper from a Memory Box 6x6 pad.  I die cut the center rectangle and then flipped the paper over to cut the strips from the other side.  I think I got my strips too close to the center rectangle, but no going back now, lol!  The center rectangle was popped up with foam squares and the strips around the rectangle with thin foam squares.  I had previously inked up some white cardstock with brown and blue distress oxide inks (vintage photos, gathered twigs and blueprint sketch) so I used those to die cut my little Birch Press Design Budding Twigs from those.  Some of the pieces have alot of inking and some only a little.  I liked the variation it provided.  I adhered the twigs together and then attached them to the center rectangle.  I finished with the twine bow and an Open Studio "happy birthday" sentiment tab.  


That's it for me.  Thanks for stopping by and have a wonderful day!


Saturday, March 23, 2024

He is Risen!

 Hello!  Posting agin, lol!  This time I'm sharing a card for the Pinkfresh Studio March challenge to frame it up.  I will also be posting this to the Color Throwdown gallery and the Simon Says Stamp Wednesday challenge.   Let's take a look at what I made.


I recently purchased the new Pinkfresh Studio Cherry Blossom stencil and die set.  The concept of having a stencil to work with a die is pretty neat.  I used Pinkfresh Studio inks for the cherry blossoms, leaves and stem.  The die cut super close so you don't have any white outlines left behind after diecutting.  I really like that!  You can also just die cut all the pieces from colored cardstock to layer.  For the frame it up part of the challenge I used the PFS Fancy Oval frame and the Stitched Scallop Rectangle die set.  I die cut the Fancy Oval frame from yellow cardstock several times and adhered them together for more stability.  I die cut the Stitched Scallop rectangle from a very light pink glitter cardstock and adhered that directly to my card front.  I then adhered the oval frame with thin foam strips.  The drop out ovals from the Fancy Oval frame set were also adhered together with a white one on top and then inserted back inside the frame.  I then added the cherry blossom stem to the frame using a combination of glue and foam squares.  I finished with the sentiment from a very old Simon Says Stamp Easter stamp set.  


That's it for me!  Thanks for stopping by and have a wonderful day!


Sunday, February 11, 2024

thanks...

 Hello!  Popping to share a card for a couple of challenges:  Freshly Made Sketches and Altenew February challenge.   Love the fun, bright colors in the Altenew challenge so I had to get something made before the month was over.   Take a look.


I used the pretty Altenew Sketched Florals stamp and die set along with their fun Dotted Waves debossing cover die.  I stamped the flowers using Pinkfresh Studio inks and then die cut with the matching dies.   I used the Memory Box curved capped dotted layering dies to die cut the panel from glossy cardstock.  I then debossed it with the Dotted Waves debossing cover die.  The sentiments are also from the Sketched Florals set.  I stamped both on vellum, applied black embossing powder and heat set.  The word 'thanks' has a matching die so I used that to cut the word and a thin labels die for the subsentiment.   Adhered everything to the black panel and then added it to a white die cut panel and card base. 


Friday, June 2, 2023

a little drama...

 Hey there!  Popping in with a card for yes, Color Throwdown and Freshly Made Sketches!  I have actually combined those two challenges in awhile and almost didn't this time but decided to make it happen.  Also adding this to the Simon Says Stamp Wednesday challenge.   It is a little dramatic, but I like how it turned out.  


I decided to go through my small collection of Pinkfresh Studio products and came across the Modern Layered Florals stamp and die set.  I used Pinkfresh Studio inks in Lemon Whip, Sweet Mustard, Fresh Pear and Grassy Knoll for the flowers and stems.   I was quite pleased with myself because I got everything lined up perfectly the first time.  That almost never happens!   Once I had the image stamped I die cut it with the matching die.   Prior to starting my card I had decided to clean things up a bit and put away items from a couple of Simon Says Stamp cardkits that I had purchased months ago.  In that process I found the patterned paper that I used for the card front.  I think it is from Simply Stories, but I don't know the name.  Anyway, I die cut the paper with the Pinkfresh Sparkling Diamond cover die and then trimmed it down on the diagonal.   At first I was just going to place it on the front of my card and leave it at that, but I wasn't in love with that look.  So I decided to die cut black cardstock using the same Sparkling Diamond die and adhered it to the card base.  I then lined up the patterned paper piece and absolutely loved it.  The bouquet of flowers was adhered with liquid glue and thin foam squares.  The sentiment is from the Simon Says Stamp Garden Fresh stamp set.  I stamped birthday greetings in black ink on white cardstock and then die cut the birthday with the matching die and used a label die to cut out greetings.   I adhered those with liquid glue and then added some Trinity Stamp sequins to finish the card. 


Thanks for stopping by and have a lovely day!


Thursday, April 20, 2023

two very different cards...

 Hello!  Today I have two very different cards to share.  One is light and bright and the other is rather dramatic.  Let's take a look at the first one.


First up is the rather dramatic looking card.  This one is for the current Sunday Stamps challenge as well as the April Pinkfresh Studio challenge.  The Sunday Stamps challenge is a color challenge and I just fell in love with the bold, dramatic color combo.   Pinkfresh is asking for floral themed cards and I did use at least one color from their color palette:  olive.  I started by foiling the Daisy Wreath with black foil.  Once that was done I stenciled image using the majority of the Sunday Stamps colors.  My greens aren't as dark, but I think that is okay.  All inks used are from Pinkfresh Studio.   The wreath was then die cut with the matching die.  I cut an additional wreath from scrap white cardstock and adhered it to the back of the stenciled one to give it more stability.  The sentiment is a collaboration between Pinkfresh Studio and Scrapbook.com.  I don't know if it is available now.  I have had it for a long time, but I think this is the first time I have used it.  I foiled it using blue foil and die cut it with the matching die.  Additional cuts were made and adhered to the foiled sentiment.  I decided to continue the dramatic look by die cutting dark blue cardstock with the Sparkling Diamond cover plate die.  I then die cut it down further so I would have the white border.  I adhered the wreath and the sentiment and then added some Pinkfresh Studio jewels in Stargazer and Pink to finish the card.  Here is a close up of the foiled sentiment.


Now for my light and bright card!


Even though it doesn't feel like spring in my part of the world the Color Throwdown combo helps remind we that it is in fact spring!  I pulled out my Reverse Confetti Poppies stamp and die set to do some simple stamping.  I'm still sad that Reverse Confetti is no more, but I'm determined to use my stash of RC products.  The hello is from the RC Hello Daisy stamp and die set.   After stamping and die cutting all the elements I arranged them on a simple white cardstock panel and then added some yellow Nuvo drops to the centers of the smaller flowers.   Clean, simple and very different from the first card!


Thanks for stopping by and have a lovely day!


Friday, March 24, 2023

two cards...

 Hello!  Popping in with two cards today.  One card is for the Altenew monthly challenge and the other is for the Pinkfresh Studio monthly challenge.  First up is the card for Altenew, take a look. 


The color combo this month for the Altenew challenge was definitely a challenge for me.  But I wanted to take up that challenge because isn't that what challenges are for, lol?   The colors are green and two shades of brown, but there is also a lovely old brick castle featured in the photo so I decided to take some inspiration from that and create a "brick" background for my green leaves.  I created my own stencil using a die that I have that creates a brick background.  I applied light brown ink first through my stencil and then blended on some light gray ink.  The inks I used are Pinkfresh Doe and Altenew Linestone.  I went back and forth between the two colors to get the look I was going for.  I stamped the leaves from the Leaf Canopy stamp set on watercolor cardstock using VersaFine Clair Acorn ink and then watercolored them with two shades of green from my Kuretake Gansai Tambi watercolor set.  Once everything was dry I die cut them with the matching dies.  I die cut down my background panel, stamped it with the sentiment from Mega Succulent stamp set with the Acorn ink.  The panel was adhered to the kraft card base with foam strips and then I added the leaf branches.  Now I have a nice masculine birthday card and I'm really happy with how it turned out. 


Now let's have a look at my card for the Pinkfresh Studio monthly challenge.


The last time I ordered from Scrapbook.com they had a free gift opportunity that I couldn't pass up.  I pretty 6x6 pad of paper from Dress My Craft called Hydrangea Lawns.   I decided to use that along with many different Pinkfresh Studio dies for my card.  The Pinkfresh challenge is layers and boy do I have layeres, lol!  I started by die cutting the Modern Mosaic coverplate die from some of the patterned paper.  Using a rectangle die that I have that is the exact same sizes as the cover plate die I die cut a piece of patterned paper with a script design on it and adhered it behind the mosaic panel.  I then die cut another piece of patterned paper with the Fancy Oval frame.  I die cut a second frame and adhered it to the main oval.  I die cut a scalloped rectangle using the Essentials Scalloped rectangle die, adhered that and then added the oval frame.  I added foam squares to the back of the fall out oval and set it back inside the frame.   I had previously foiled some of the Pinkfresh butterflies on acetate and then adhered them to some patterned paper I used two of those on the card along with a sentiment that I foiled in gold on acetate, as well.  Nice to be able to use up some of those bits and pieces we all seem to have!


Thanks for stopping by and have a lovely day!


Sunday, January 29, 2023

you deserve...

 Hello!  Another quick post sharing a card for a challenge that I haven't participated in for a very long time:  Pinkfresh Studio monthly challenge.   I'm going to try to participate more this year so I can use the lovely Pinkfresh Studio products that I have.  Take a look at my card:


The January challenge at Pinkfresh Studio is always a "year in review" challenge.  I decided to go with the May challenge of anything spring although it also works for the frame it up challenge.  Anyway, I used a stamp and stencil (there is also a die I just don't have it, yet) that I believe is only available at Scrapbook.com called Life is Good.  I stamped the image on white cardstock and then stenciled the image using Pinkfresh Studio inks:  Sparkling Rose, Candied Apple, Lemon Whip, Fresh Pear and Grassy Knoll.  Once I was done stenciling I placed the Sparkling Diamond cover die over the image and then ran it through my die cutter.   I then further die cut the image using the Folk Art Frames die set.    This gave me three pieces.  I glued the largest piece flat to my cardstock base.  I used foam strips to adhere the frame into its spot and then thin foam squares to adhere the remaining panel into place.  The sentiment is also a Pinkfresh Studio product that is exclusive to Scrapbook.com:  Foiled Sentiments.  I used a silver one and adhered it with foam strips.  I finished off the card with some Nuvo jewel drops in Limoncello for the flower center and Morning Dew.   I'm also going to add this to the Simon Says Stamp Wednesday challenge of anything goes

Thanks for stopping by and have a lovely day!

Sunday, October 9, 2022

beautiful friendship...

 Hello friends!  I'm popping in with a card that I created for the October Pinkfresh Studio monthly challenge, as well as their world cardmaking day challenge.  The October monthly challenge is all about leaves and the WCMD challenge is anything goes.   I pulled out my favorite fall paper pad from P13 called The Four Seasons:  Autumn to help me create my card.  Take a look:


 I used Pinkfresh Studio Essentials Stitched Scallop Rectangle to die cut the patterned paper.  I popped up the frame that is created using foam tape and then inset the interior piece flush on my cardstock base.  I had previously die cut some gold glitter leaves using the Curvy Leaves die set so I die cut additional pieces from patterned paper that coordinated with the main piece I cut.   All the pieces were layered as you see and then I added the little bows tied with kraft colored twine.  I finished with some sequins that also coordinated with the patterned paper.   The sentiment is from a pack of foiled sentiments that was a collaboration between Pinkfresh Studio and Scrapbook.com.  

For some reason I am not able to upload the graphic for either challenge.   Thanks for stopping by and have a lovely day.


Thursday, October 6, 2022

cozy hugs... simon says stamp october release

 Hello everyone!  Simon Says Stamp October release called Cozy Hugs is live on the blog and it is full of lots of pretty new products.  I'm popping to share a couple of cards that I made with the new Picnic Floral Sentiments stamp set from the release.  (An affiliate linked list of products is at the end of this post.  Using my links allows me to earn a small commission at no cost to you.  Thank you for your support.)  Let's take a look at what I made.  Both are very clean and simple.


For the first card I decided to go with shades of blue.   The flower and the sentiment look like they were stamped with the same ink color, but they weren't.  I used Pinkfresh Studio ink in Sapphire for the flower and Blue Jay for the sentiment.  I think stamping the sentiment on the light blue cardstock  was the reason it looks like I used only one ink for the stamping.  I used my  very old Spellbinders rectangle dies for the light blue square.  That was layered on the larger white panel.   The flower was stamped and then trimmed out.  I adhered that to the smaller rectangle, added Nuvo drops to the center of the flower and then added a few rainbow gems from Trinity stamps. 


For the second card I used the large flower and a smaller flower for the stamping.  The inks I used for the stamp are from Pinkfresh Studio.  After stamping the flowers I die cut the thanks using a Simon Says Stamp die.   I adhered the panel directly to a kraft cardstock base so that I could inlay additional die cuts into the opening finishing with the original die cut.  I finished off the card with two different types of sequins.  The larger are shaped like little flowers and the others are tiny silver and gold sequins. 

Affiliate linked supply list:


Thanks so much for stopping by today.  Don't forget to check out the new release!

Saturday, September 10, 2022

love you...

 Hello!  Popping in with a quick share for Color Throwdown, Freshly Made Sketches and the Simon Says Stamp Wednesday challenge.


This is another super simple card.  I did jazz it up a bit with the some embossing on the front panel.  I used a Simon Says Stamp 3D embossing folder.  I have to be honest and say that while I do like embossing folders I'm not a huge fan of the 3D embossing folders.  I find that I'm spending too much time trying to figure out the right "sandwich" to put together to get a nice embossed image.  I actually had two 3D embossing folders and I broke one trying to figure out how to get a nice embossed image with it!  Anywhoo... like I said this is a simple card.  I stamped the flower and stem image from the Simon Says Stamp Brushed Flowers stamp set using Pinkfresh Studio inks.  I die cut with the matching dies.  The white panel was embossed and then to break up all the white I die cut the seecond panel from light gray.  I stamped the sentiment in dark red ink and die cut it with the matching die.  I assembled the card and then finished with some yellow Nuvo drops in the center of the flower and the red, green and white Pretty Pink Posh gems. 


Thanks for stopping by and have a lovely day!